 Salted Caramel Cake
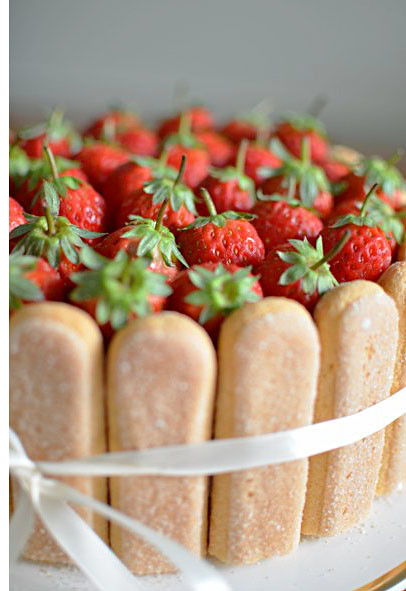
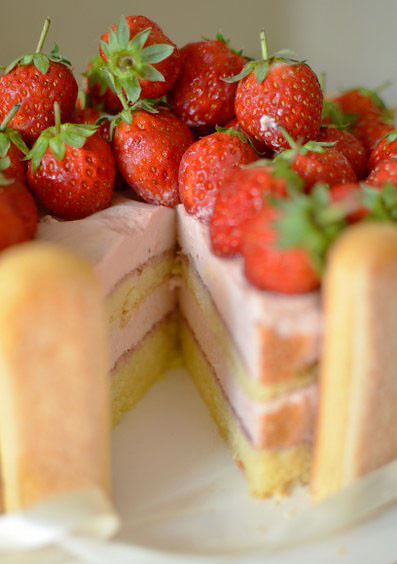
For my son Wey's 18th birthday last week, I spent 6 hours struggling to make a salted caramel cake. It had seemed easy enough, a semi-dense chocolate cake layered with salted caramel sauce, covered with ganache. The only problem was I wasn't one to follow instructions and advice. Pickyin had warned that because of our hot weather, the caramel sauce would be too soft and a better way would be to mix the caramel sauce with butter cream. As usual, I thought I could find a way to overcome that problem.
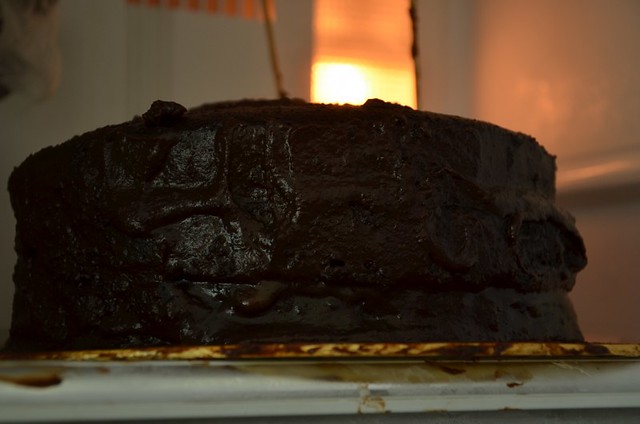
The cake would have had a better chance of success if I had baked the cake and made the caramel sauce the day before. As it was, I started on the cake at 10 am and had to finish decorating it by 4 pm because it is the rainy season and there wouldn't be enough daylight to take good photos of the cake after 4. Six hours is not enough to cool a cake and set the caramel sauce in tropical weather. As if it wasn't bad enough having to struggle to stop the caramel sauce from oozing out from the cake layers, the cake layers started to slide off each other because they were not level and the sauce acted like lubricant, making the cake layers slide like they were on ice. I was about to throw everything into the thrash when I thought of using dowels to anchor the layers, much like how piles work for buildings. It took about 6 wooden skewers to keep the 9" round cake layers together, with me all the while doubting my cake-making skills.
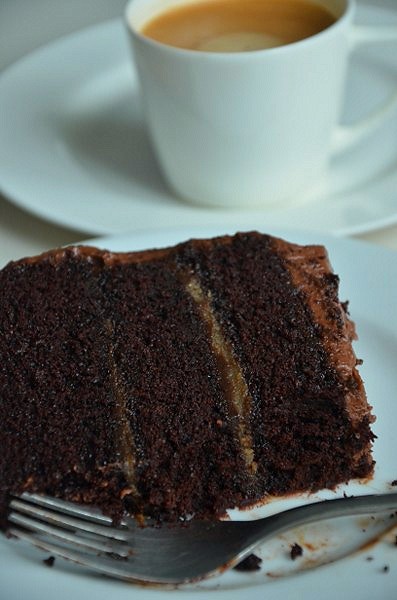
Making a cake for an occasion (we were a party of 11, celebrating at a new fine food restaurant) from a blog that I'm not familiar with is a big risk. When I got to the flour, there was a discrepancy of a whole cup of flour between Pickyin's recipe and the original recipe from which she had adapted her recipe and I was really torn between which recipe to use. In the end, I chose to believe in Pickyin and when the batter turned out watery, I was cussing myself but the cake baked into a semi-dense but soft and intensely chocolaty cake, so thumbs up for Pickyin!
Despite the disaster, I think that one day I will attempt this cake again, only this time I will make the cake and sauce the day before to give the sauce plenty of time to firm up and to give me time to frost, chill and frost the cake. Don't let my cake disaster daunt you from attempting this cake. In fact, you should find it easy to make if you heed my advice to make the sauce and cake the day before frosting it. Everyone said the cake was excellent (except my Hub and Wey who were not sure about the sweet and salty taste) and that made me so happy that I gave the rest of the cake to the other tables in the restaurant.
Do check Pickyin's recipe
here for a recipe that works for hot weather. I used the choc cake recipe and the salted caramel sauce Pickyin had adapted from
here because I had downloaded them on my iPad.
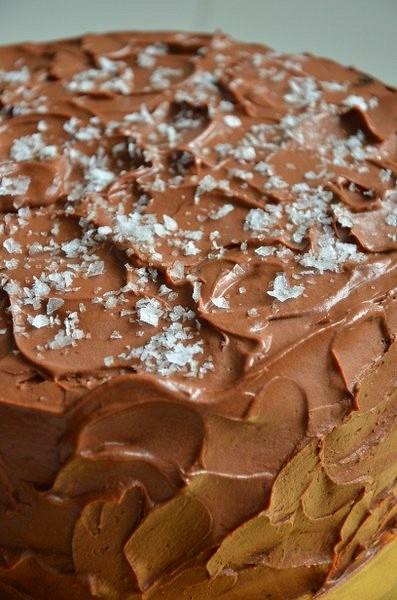
For the frosting on the cake, I just made a ganache with a milk chocolate although a dark chocolate would've made the cake more elegant.
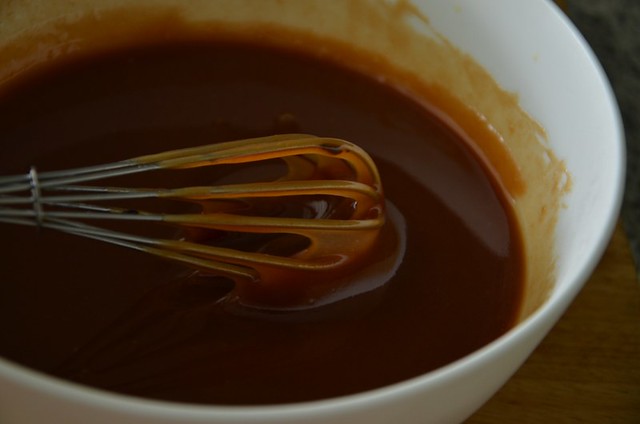
Beautiful silky rich caramel sauce.
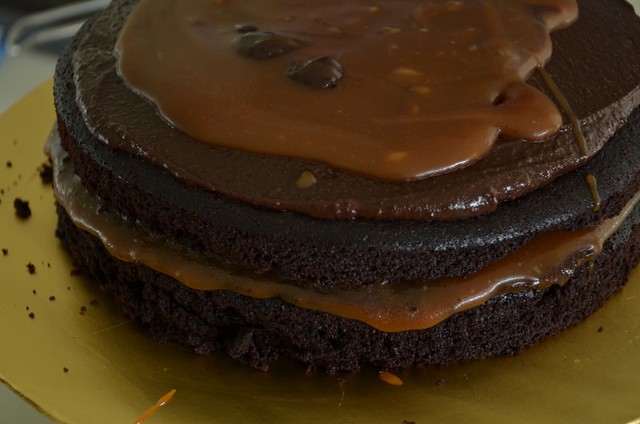
Disaster rearing its head. I had leftover choc frosting and used that too. More disaster.
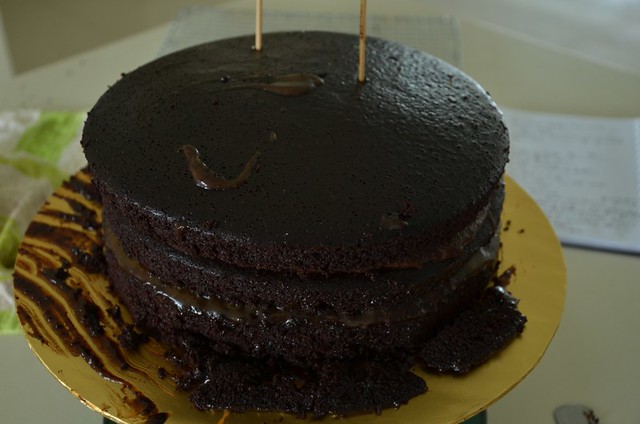
I had to stick about 6 wooden skewers to keep the cake layers from sliding off. It was really messy, and I had to claw away the choc and sauce that were pooling around the cake.
The caramel sauce oozed out, bringing the choc filling out too. I had the cake in the freezer while working on it, with the fridge door open. Could this cake be saved?

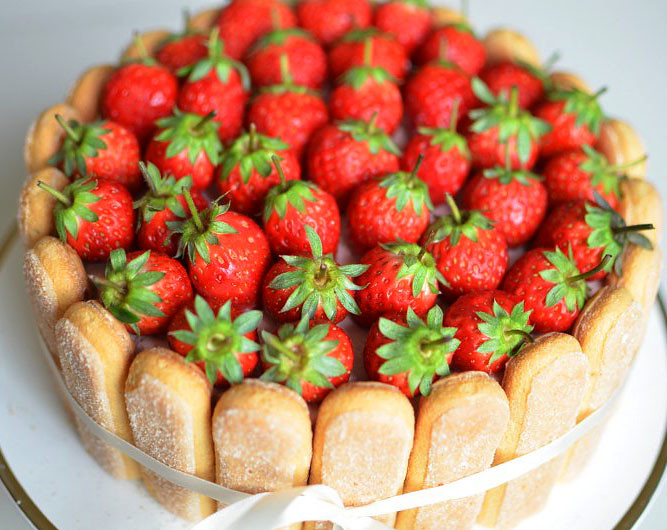
Not a pretty cake but in the dim light of the restaurant, all flaws were unnoticed.

Meet Chowder, our 5-week-old chow chow who does fine dining. He was so well-behaved that nobody knew we brought a dog in!
 Double Chocolate Cake
3 oz quality semi-sweet chocolate, finely chopped
1 1/2 cups hot brewed coffee
2 1/4 cups (original was 3) caster sugar
2 1/2 cups all-purpose flour (as adapted by Pickyin)
1 1/2 cups unsweetened cocoa powder (I used van Houten)
2 t baking soda
3/4 t baking powder
1/2 t salt (reduced from 1 1/4 t)
3 large eggs
3/4 cup veg oil (I used canola oil)
1 1/2 cups buttermilk (I used fresh milk + 1 1/2 T white rice vinegar)
3/4 t pure vanilla extract
1. Preheat oven to 160 C. Grease pans and line with parchment paper three 9" round pans for a regular height cake or 8" round pan for a tall cake (I think there's a typo mistake in Pickyin's recipe because her cake turned out very tall and although she had said to use 9" cake pans, at some point she mentioned 8" cakes).
2. Mix the boiling hot coffee with the chopped choc and mix well until smooth.
3. In a large bowl, sift in the sugar, flour, baking powder, baking soda, salt and cocoa. In an electric mixer bowl, beat eggs until thickened slightly (3 minutes on a stand mixer) and slowly add oil, buttermilk, vanilla and melted choc mixture. Add the sugar mixture and beat on medium speed until just combined, scarping down sides of bowl once or twice. The batter will be watery.
4. Divide batter among the pans and bake 1 hour, adding 10 more minutes if necessary.
5. Let cakes cool completely in pans on wire racks.
Salted Caramel Sauce
2 cups granulated sugar
1/8 cup (2 T) light corn syrup
1/8 cup (2 T) water
1 cup heavy cream
1 t sea salt
110 g unsalted butter
1. Put the sugar, corn syrup and water in a small heavy-based pot over high heat and cook without stirring (to prevent crystallization) until the syrup is dark golden amber in color.
2. Remove from heat and carefully pour in the cream (it will sputter violently!). Return to heat, and cook 2 minutes, stirring.
3. Remove from heat, add the salt and the butter a tablespoon at a time. Let cool completely and chill in the fridge overnight. Should the sauce have a layer of oil on top, use a small hand whisk and whisk briskly to combine.
To assemble, put a layer of cake on a cake board or plate, spread the top with a layer of caramel sauce, and repeat for remaining layers except do not spread the sauce on the top layer of cake. Completely frost the cake with ganache or use the fudge frosting below and set cake in fridge to chill at least 3 hours or more. You may have to put the cake into the fridge several times in between frosting if you are in hot weather.
Sprinkle salt sea salt flakes (I used Maldon's ) on top.
Choc Fudge Frosting (from
The Bitten Word)
1/4 cup + 2 T Dutch-processed cocoa powder
230 g unsalted butter, room temp
1/2 cup icing sugar
generous pinch of coarse salt
450 g semi-sweet choc, chopped, melted & cooled
Garnish: flaked sea salt (I used Maldon)
Whisk the cocoa powder and 1/4 cup plus 2 T warm water in a bowl until the cocoa powder is dissolved. In another bowl, beat butter, icing sugar and the salt on medium speed until pale and fluffy. Gradually beat in the melted choc and then the cocoa mixture until well-combined. Let stand for 30 minutes before using.