Wednesday, January 11, 2012

Onsen Tamago: Slow-cooked Eggs


The Japanese knew about sous vide long before the Brits or the French and onsen tamago is one example of slow cooking food in an enclosed container. Modern chefs who are into molecular gastronomy like to think that they can apply their high school chemistry and physics, and the sous vide cooking of meat in plastic bags at very low temperatures for 2 days or more to get a tender texture and 'original' flavor is gaining popularity in restaurants although I'd stay ten miles away. I just won't touch plastic-cooked food whether or not they are guaranteed to not leak into my food. That's the reason I only have one non-stick pan.

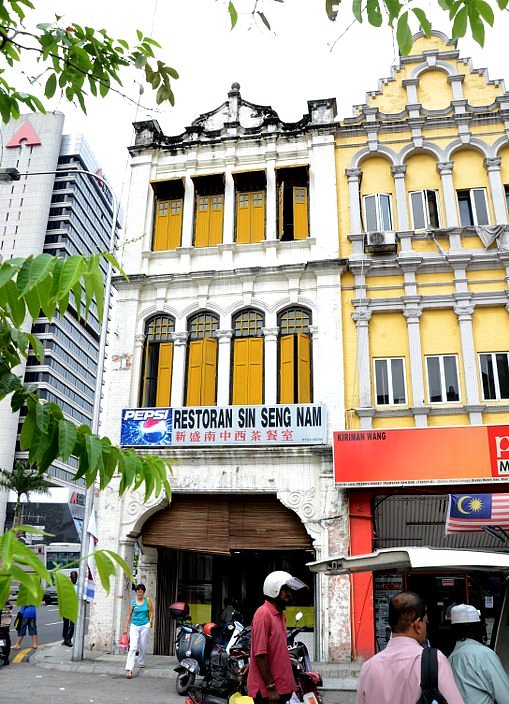
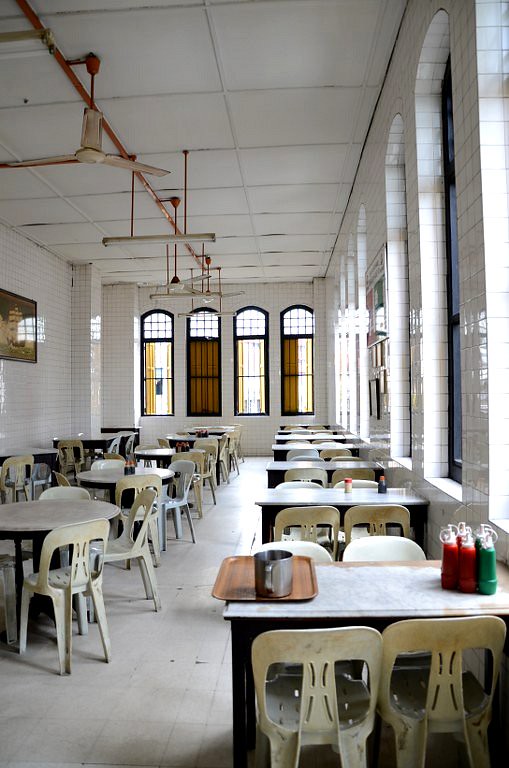
Onsen tamago are eggs cooked in hot springs, such as those on the foothills of Mr. Fuji. Japanese restaurants serve onsen tamago too but instead of hot spring water, trays of eggs are kept for a long time in warm water. That is all I could extort from a waitress at Nishiki Restaurant, the only place in KK where onsen tamago is served. Interestingly, I've eaten Mt Fuji eggs twice, and both times they were hard, maybe because the spring waters were too hot. They weren't any more delicious than regular boiled eggs and they stank of sulphur.

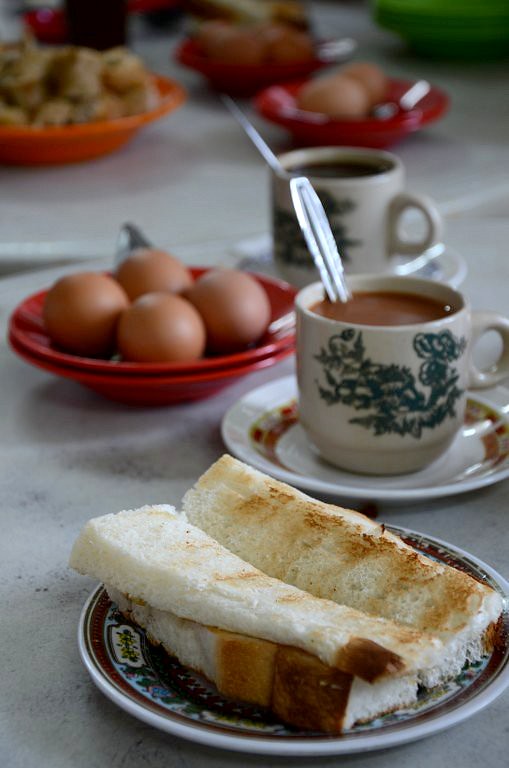
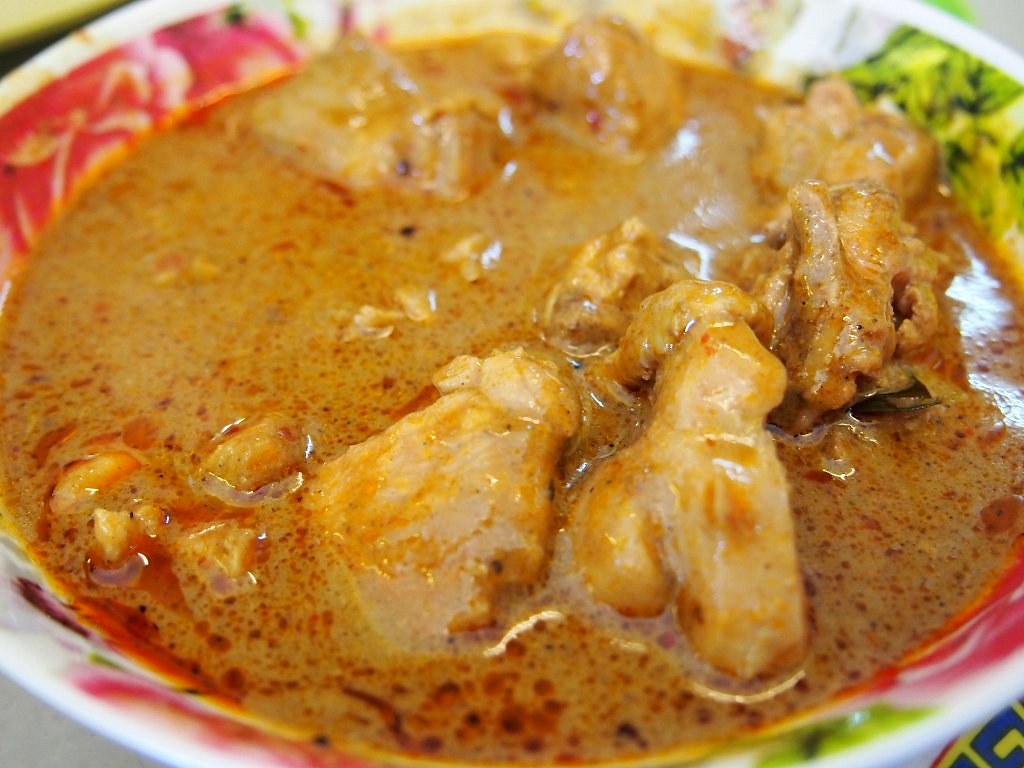
If you love half-boiled eggs but the thought of eating raw yolks makes you queasy, onsen eggs are the answer to your agony. Onsen eggs are in fact half-boiled eggs in reverse, eggs with cooked yolks and runny whites. I find it rather strange and sometimes wonder if the eggs are delicious just because they are reversed. But then I take a spoonful of the egg, a bit of cold, smooth, silky white and a bit of the firm yellow and I know that it's not the novelty of the unusual egg but the damn deliciousness of it. Of course the light dashi soy sauce adds to the taste but if you've eaten a good organic half-boiled egg, imagine it twice as delicious and you'll sort of know what I mean. The reason for the reversed state of boiled onsen eggs is egg whites are made of mostly protein (albumin) and coagulate at a higher temperature than yolks. That's why when you boil an egg, the whites set before the yolk. Of course the fact that the yolk is in the center means that it doesn't get as much heat. However, when you cook (not boil, technically) an egg at a temperature to just set the yolks, you'll get a firm yolk and a runny white.

The Nishiki waitress said that the onsen eggs were cooked for 45 minutes but couldn't--wouldn't--tell me the temperature of the water so I did a bit of googling (Google is the best thing ever!) and found that the recommended temperature is about 65 to 70 C. How long the eggs are to be cooked depends on the size of the eggs. I can measure the weight of my eggs but I can't measure the temperature because I don't have an cooking thermometer. The best method would then be to cook the eggs in the oven. Oven tempratures however are not accurate, with some ovens ranging + or - 15 degrees off the set temperature. For an near-scientific onsen tamago recipe, go here. It's a very interesting article and the site is just amazing; I love it. Based on the results posted in the article, the best onsen eggs were boiled at 64.4 to 66.7 C for 75 minutes.

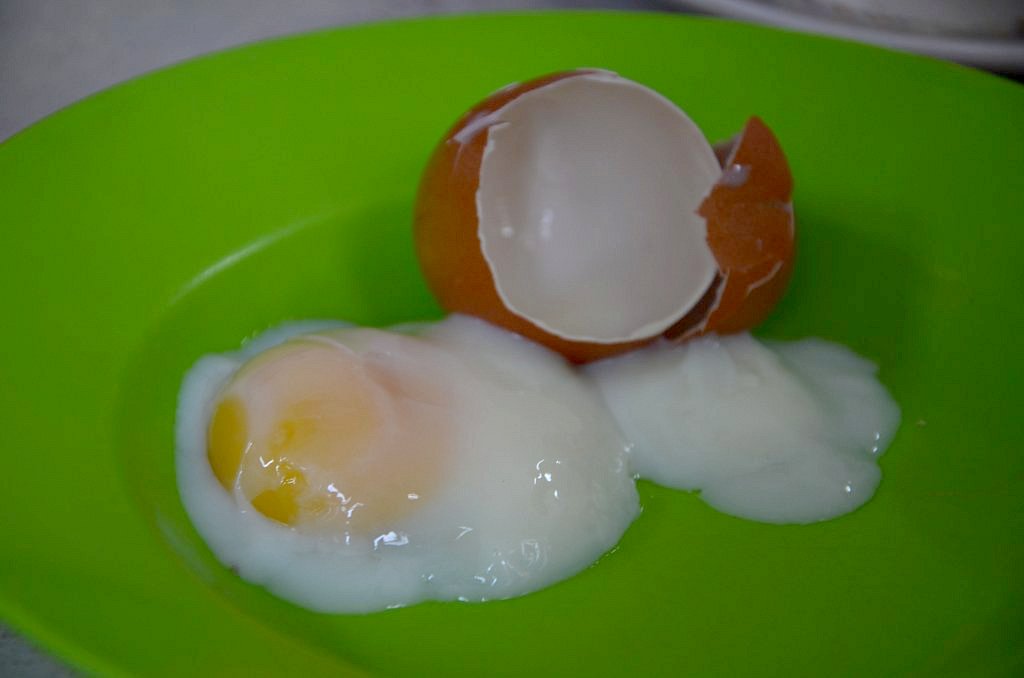
I know cooking onsen eggs is rocket science but since eggs are cheap, I thought I'd test a batch of 5 and adjust the time and temperature from there. Instead of 70 C, I set my oven at 85 C for 30 minutes because I have a cool oven, unfortunately. The pot felt so cool after 30 minutes so I increased the temperature to 95 C. I cracked one egg after 1 hour and got this:

DSC_8049_1024x678

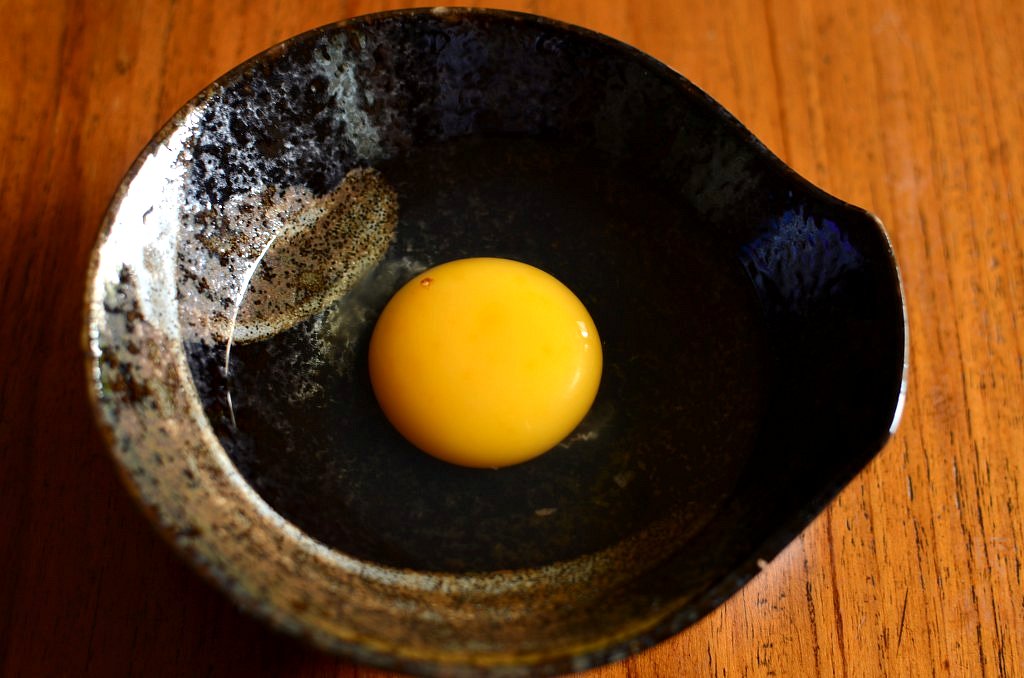
It's a raw egg! I wasn't surprised because I started with room temperature water, since I don't have a cooking thermometer. I put the pot back into the oven. I have to go out for lunch now. I'll be back maybe two hours later. Will my eggs be reversed?
                                                                  ~~~~~~~~~~
I didn't wait two hours because tiny bubbles began to form on the sides of my pot when I checked on the eggs an hour later (delayed my lunch appointment). I had set the oven temperature at 95 C, assuming that my oven is 15 degrees lower. After an hour, the egg turned out this way:

DSC_8055_1024x678

DSC_8067_1024x678

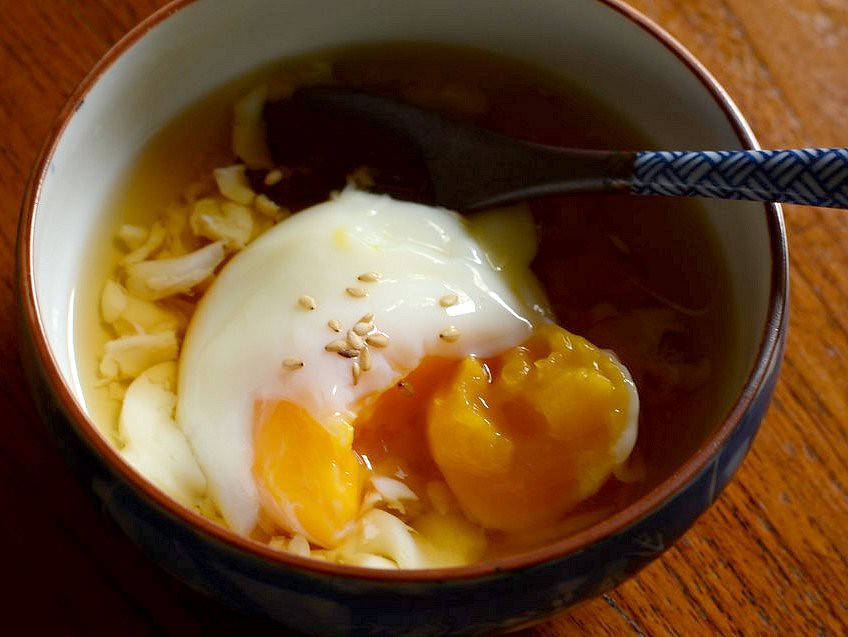
The white is still not fully set but the yolk is quite firm and cooked. If I had checked on the eggs at 45 minutes, I probably would've got the perfect onsen egg. I'm happy though because I've wondered about reversed boiled eggs for years. I think that if I have a cooking thermometer, I can make perfect onsen eggs in 45 minutes.

Onsen Eggs
large organic free range eggs (60 to 65 gm each), room temperature
dashi granules
light soy sauce
water

1. Preheat the oven to 70 C. Great if you have a reliable cooking thermometer.
2. Fill a small heavy-based pot with a tight-fitting lid with enough water to cover the eggs and heat it up to about 65 to 70 C. Put the eggs into the pot and cover with the lid.
3. Place the covered pot into the oven, middle position, and leave in the oven for 1 hour.
4. Meantime, mix a little bit of dashi granules with hot water and stir until granules are dissolved. Add some light soy sauce and dilute the sauce with water to taste. Chill in the fridge.
5. When eggs are done, put them in cold water to cool and then crack into a bowl and ladle some sauce over.

Monday, January 9, 2012

Old Chinese Coffee Shop: Sin Seng Nam

I'm going to have to speed up posting on the backlog of posts on my trip to Kuala Lumpur and Singapore last month. Gosh, was it just a month ago?

The folks at Royal Selangor did an excellent job of making sure that we enjoyed our trip. We were taken on a walking tour around KL, on a tour of RS' factory and showrooms, and meals were carefully planned at restaurants that reflect the different cultures and cuisines of Malaysia.

DSC_0086_509x768
Restoran Sin Seng Nam is one of the remaining old Chinese (Hainanese?) coffee shops in KL. Yut Kee is the more famous old-style Chinese coffee shop in KL but it closes Mondays. 

DSC_0059_509x768
We were directed upstairs because the ground floor was full. I love old, high-ceiling restaurants such as this. There's so much character and history in every corner, tile, table, window and even the ceiling fan. Reminds me of Journal Canteen in Melbourne.

DSC_0043_509x768
The standard brekkie in such types of restaurants consists of charcoal fire-toasted bread, sandwiched with kaya (a custard-jam made of coconut milk and eggs) and butter. Thick, strong local coffee in old mugs are another must, as are coddled eggs.

DSC_0055_1024x678
Coddled egg--not half as good as Yut Kee's.

DSC_0047_509x768
Fried noodles may seem too heavy for breakfast, but in Malaysia, it is eaten anytime of the day.

DSC_0057_1024x678
Cheong fun is flat rice noodles with a sweet sauce but here it's topped with stuffed okra, beancurd skin and fried fishballs. A bit too much variety for me, as I prefer plain cheong fun.

DSC_0058_1024x678
Plain cheong fun--yummeh!


It was a good breakfast. I'd go to Sin Seng Nam for the rustic interior and the architecture around the area but for the food, I'd stick with Yut Kee. Maybe I'm just biased because I love the coddled eggs at Yut Kee.

Friday, January 6, 2012

Duck Noodles and A Good Cow Poo Tart


One of the most famous culinary creation from Sandakan, a small town on the east of Sabah famous for its food, is the ngew si doi (cow poo heap) or ngew si tud (cow poo tart). Those names make some people uncomfortable, so euphemistically and outside of Sandakan, the tarts are known as UFOs. However, that polite and boring name belies the feisty spirit of Sandakanites (Sandakanians sound hick) who became known as people of strong principles in the 80s because they steadfastly supported the opposition party.

There aren't many places where you can get poo tarts and I used to get them from Kedai Kopi Mee Ngar in Iramanis but the last time I ate them months ago, they tasted of cheap margarine and were too sweet. Into my house yesterday walked Steph and her daughter, bearing with them two boxes of goodies from a restaurant operated by Sandakanites. One box contained rice wine-flavored chicken rolls and the other, ngew si doi.

I have the original recipe for ngew si doi from the coffee shop in Sandakan where the tarts were first made. It was given to me by a friend whose sister's maid worked in the kitchen of the coffee shop (a coffee shop here is literally that, a place where local coffee is served throughout the day, along with bread and pastries). Unfortunately, the shop guarded the recipe by keeping part of the recipe from the maids so what I've got is how to make the 'poo' (the rich yummy custard) but not the base of the tarts. I've tried many times to make the base, which has a neither soft or hard texture like madeleines, but failed to get a satisfactory clone. The 'poo' though is better than those in the shops because I don't scrimp on the ingredients. As far as I know, the ngew si doi recipe is not googleable--it just isn't available.

DSC_7997_1024x678
These ngew si tarts were better than any in KK. They weren't too sweet (in fact, they are a little too salty) and there was no strong margarine flavor either.

DSC_8014_1024x678
Rice wine-flavored chicken rolls were good but the filling was mostly onions. Also, that strong orange color is likely due to coloring, not egg yolk. Still, it was tasty and flavorful and I would drive there for this.

Kedai Kopi Sin Sin in Inanam (the new shoplots) is where you can get the tarts and rolls. I haven't been there yet but I will soon.

A friend recently directed me to Kedai Kopi Man Soon Hin (name to be confirmed) in the first row of the old shoplots just after the Inanam roundabout for bittergourd noodles. I love bittergourd (those heading to Hong Kong should try bittergourd sherbet, something I haven't eaten before but want to) and so I packed the whole family into the car one hot mid day last week.

PC290041_1024x768
Duck slices and rice noodles in bittergourd soup. 

Look at that presentation. I mean, really, which other shop goes to that extent? I love that they cared enough to make every bowl of noodles look good. However, the soup didn't impress us.

PC290049_1024x768
My bowl of mixed pig offal and noodles in bittergourd soup.

Why was this soup so ducky-flavored too when there's no duck in it?

PC290051_1024x768
Roasted pork and rice noodles in salted veg soup.

The crispy roasted pork is the crispiest I've eaten outside of Hong Kong but somehow the taste was just so so. Hub pointed out (he's beginning to have opinions about food...!) that the thin noodles from Thailand and Malaysia are best for frying while the thicker rice noodles from China are the right kind of noodles for soup. The thin noodles just didn't taste as good in soup, especially if the soup is not tasty enough. So proud of you, Hub

PC290044_1024x768
Fish head rice noodles in salted veg soup.

PC290046_1024x768
The curry chicken was okay, not extraordinary.

The noodles were RM6 per bowl and there were more toppings than most other places. However, unless you like your soup noodles ducky-flavored, it's better to stick to duck or roasted pork rice. I assume the rice isn't duck-flavored.

Tuesday, January 3, 2012

The Best Panettone Ever

DSC_7913_1024x678
DSC_7975_1024x678
    Soft, shreddy, rich, flavorful bread speckled with vanilla seeds, plump rum-soaked raisins and brandy-soaked cranberries.

Last year, I made panettone for the first time and thought it was pretty good for a first try. Then my friend Y came with a panettone from Marks and Spencer and it tasted better than mine because the orange peel flavor was stronger. It was still incomparable to the Milanese panettone I bought in Melbourne years ago. I think if you eat something for the first time, eat the best version so that you'll forever measure your future taste of the same thing against the best.

Panettone is a sweet bread that originated from Milan, Italy and it is eaten especially during Christmas. It is a rich bread with candied peel and rum-soaked raisins and has a distinctive look: it's always taller than it is wide. That is a problem for me because I can't get panettone parchment cases here. The other problem is that panettone, like chiffon cakes, is very soft and have to be hung so that it won't sit on its own weight. I didn't know that and the panettone I made for Christmas/New Year deflated as it cooled and sank in the middle. I also didn't know that panettone cooks as it cools. I had served my panettone straight out of the oven and it was a little bit sticky. I told my guests to eat the bread dipped into the vin santo that I had carried from Rome. The bread was so soft that upon dipping in the vin santo, it just soaked all the liquor and turned soggy. Laura has just confirmed that panettone is usually eaten with (not soaked) spumante, a champagne-like Italian wine. I have another question for Laura: do you tear the panettone or cut it? We tore it like monkey bread and it was fun to eat that way.

I once made 6 sponge cakes in one afternoon when I couldn't get the texture right, and threw each failed cake to the dog which turned its head the other way every time a cake landed near him. In that spirit of not giving up, I googled for another panettone recipe two days ago because the panettone I made for Christmas/New Year didn't have the right texture and taste. I wanted a panettone that was shreddy, not crumbly in texture. The latest recipe I found, named 'The Best Panettone Ever', made the best panettone I've ever eaten, better even than the first one I ate.

Unless you love panettone (and I do), don't attempt making it. A lot of time is needed to proof the dough. The dough has to be proofed first for 12 to 15 hours (less in hot weather) and then proofed again for 3 to 5 hours. However, the proofing time is dependent on the room temperature, as I found out last night. I made the dough at 4 pm yesterday, went to a dinner party, came home at midnight and did some reading. Suddenly, just as I was getting into bed, I remembered my dough and rushed to the oven. It was a Magic Porridge Pot scene:

DSC_7866_1024x678
This was 9 hours into proofing.

The other thing about making panettone is the hanging of the cooked bread. I used skewers as per the instructions but the bread pulled through the skewers and was mutilated. If you are not fussy about authentic-looking panettone, use a tube pan. I've read somewhere that large soup cans are good too but that still doesn't solve the hanging part.

I'v made several adjustments to the recipes, not in the amount but in the steps. Lahey's famous for his no-knead bread recipe and this too is a no knead recipe but I left the dough to proof in the mixer bowl and kneaded it after the first proofing because I wanted a shreddy bread. Btw, this recipe is great because everything is mixed at the beginning--you don't have to make a starter dough.

Right after we ate lunch, we pounced on the panettone. It was SO GOOD with coffee. The rain started soon after and I thought life just can't get any better. Really. I know Christmas is over but life is great and we should celebrate each day so make panettone even if it's not Christmas!

DSC_7867_1024x678
                            Out of focus but I want to show how wet the dough was.

DSC_7871_1024x678
    Windowpane stage is when the dough is so stretchy that it can be pulled into a thin, see-through membrane.

DSC_7874_1024x678
The dough was so wet and hard to handle that I used a heavy duty rubber spatula to scoop it and a pair of scissors to cut it.

DSC_7885_1024x678
The next day, after 8 hours of second proofing overnight in the fridge. I made twice the recipe and put one portion into a tube pan and another into a small cake tin.

DSC_7894_1024x678
Place a small spoonful of cold butter on the top before baking. The black specks are vanilla seeds. 

DSC_7910_1024x678
Hanging the poor bread.

DSC_7911_1024x678
The skewers tore through the bread because I used baking paper, not panettone parchment case.

DSC_7985_1024x678

The Best Panettone Ever (Adapted from Jim Lahey's recipe, published in Gourmet, Dec 2008)

1 cup raisins
2/3 cup candied orange peel
1/2 cup dried cranberries (my addition)
2 T light rum + 2 T hot water
1 T brandy (optional)
3 3/4 cup all-purpose flour
2/3 cup sugar
1/2 t salt
1/2 t instant dry yeast (I used 1 t)
1/4 t grated lemon zest (I used zest from 1 large orange)
seeds from 1/2 vanilla bean (or use vanilla extract)
3 large eggs, room temp
1 T honey (I used maple syrup)
2/3 cup tepid water
10 T or about 170 gm (original recipe was 10 1/2 T) unsalted softened butter/1 T melted/1/2 T chilled

equipment: panettone cases or large parchment case to fit a 7 or 8" round pan, at least 4" tall (no need to grease) or larger tube pan (no need to grease or line)

1. Soak the raisins in the rum and hot water overnight. Soak the cranberries in brandy overnight.
2. Next day (schedule your time), mix the flour, salt, sugar, yeast, lemon or orange zest and vanilla seeds in the bowl of a stand mixer.
3. In another bowl, whisk the eggs, honey/maple syrup and the tepid water.
4. With the mixer at low speed, slowly pour the egg mixture into the flour mixture. Increase speed to medium and mix until well-combined.
5. Add the 10 spoons of softened butter, 1 T at a time, until well-incorporated between additions.
6. Mix the raisins (I didn't have to drain the raisins as instructed because the raisins soaked up all the liquid; wasteful to drain the rum off anyway), the cranberries, the candied peel and the 1 T melted butter and stir that into the dough mixture with a long wooden spoon or heavy-duty spatula until well-mixed.
7. Cover the dough in the same bowl with cling wrap (or transfer to a greased bowl) and leave in a cold oven about 6 hours (in warm weather) or longer (in cold weather; recipe said 12 to 15 hours).
8. Knead the dough in the mixer for about 10 minutes until the dough at 'window pane stage' or as per the original recipe, turn the dough out onto a floured board, pull and fold the dough from outer edges into the middle.
9. Put the dough into a 20 cm/8" tube pan or panettone parchment mould, cover with a wet towel and let it proof 3 to 5 hours until doubled and very soft and puffed. Sprinkle some water on top pf the panettone if it looks dry. About 15 minutes before panettone is to be baked, heat the oven at 180 C.
10. Snip an X on the top of the panettone with scissors (careful not to deflate the dough) and place the knob of cold butter in it. If using  tubepan, place small knobs of butter around the top of the bread.
11. Bake on the bottom rack 1 1/2 hours or until a skewer comes out clean.
12. For panettone baked in tube pan, just turn over like you would a chiffon cake. For round pan, quickly pierce two long skewers parallel through the parchment paper and bread about 4-5 cm/2" from the base and hang the bread upside down in a pot to cool, about 1 hour.

Saturday, December 31, 2011

Rose Water Panna Cotta With Apple Compote

DSC_7740_1024x678

One more post before the end of 2011. Do you, like me, find that each year goes faster than the year before? Maybe time seems to fly the older you get because one day for an older person is one day over thousands of days compared to, say, a one-year old whose one day is one day over 365. I read that in some magazine years ago and I liked that explanation.

Panna cotta ("cooked cream") is super easy to make and super yummy too. Yes, believe it or not, there is such a dessert. Just set dairy cream with gelatine (overnight so you have plenty of time the next day) and serve it very cold with a caramel syrup and seasonal fruits. The Brits try to complicate everything the dessert by making a fruit compote but even so it's still much easier to make than say an apple crumble or a bread pudding.

I can't get rose water here so I used rose essence for the flavor and grenadine for the color. The rose flavor gave the dessert a subtle but wonderful flavor. I was lucky to have dried blueberries and cranberries. I didn't have dried cherries so I used fresh ones. The original recipe was from London: Authentic Recipes Celebrating The Foods Of The World but I made the panna cotta according to my long-trusted recipe. I also simplified the apple compote. That just means I made do without ingredients I don't have, such as Muscat de Beaumes de Venise, a sweet white dessert wine.

Happy New Year All!

DSC_7726_1024x678
Rose Water Panna Cotta With Apple Compote
The panna cotta:
1000 ml fresh dairy cream*
6 pieces gelatine sheets**
1 1/2 t rose essence or 2 t rose water
6 T castor sugar

* increase to about 1200 ml in cold weather or if you want a wobbly panna cotta
** from cake ingredients shops

1. Put the cream into a small pot, add the gelatine sheets which have been briefly soaked in cold water (15 sec or until just turning soft). Heat and stir the cream until the gelatine is thoroughly melted and pour into individual molds, preferably metal molds which are easier to ease out. For big parties, I make a huge mold for guests to help themselves with.

The Apple Compote
3 apples, peeled, cored and diced
3 T dried cranberries
3 T dried blueberries
2 T dried cherries
3 T lemon juice
finely grated zest from 1 large lemon
7 T caste sugar (to taste)
1 t rose water (or 1 t rose essence + 1/4 cup grenadine syrup)

2. Put the sugar, zest and 2/3 cup water into a sauce pot and cook, stirring, until the sugar is dissolved and the mixture is slightly syrupy. Add the remaining ingredients except for the lemon juice and let the mixture simmer for 5 to 10 minutes until the apples are tender and sauce is reduced and thickened. Add the lemon juice and remove from heat. Cool.

3. Run a blade around the sides of the panna cotta, hold a serving plate over the mould and invert. Cover the mould with a hot towel, leave for a few seconds and shake the mould to ease the panna cotta out. Spoon the compote on and around the panna cotta and chill thoroughly before serving.


Related Posts Plugin for WordPress, Blogger...