Sunday, October 30, 2011

Mt Jelliriffic!


                                                        "Celebrate life, love and humour"

DSC_8479.jpga

DSC_8644
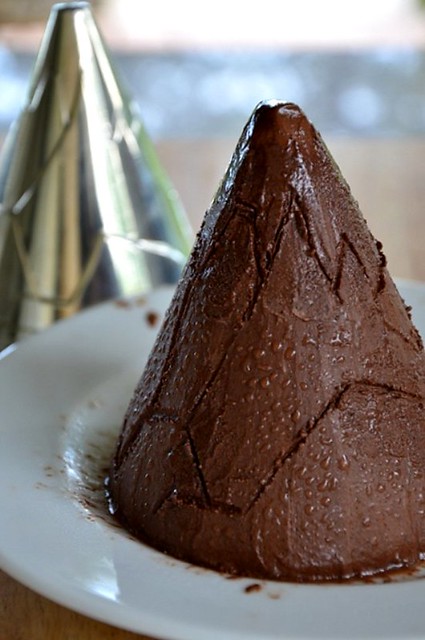
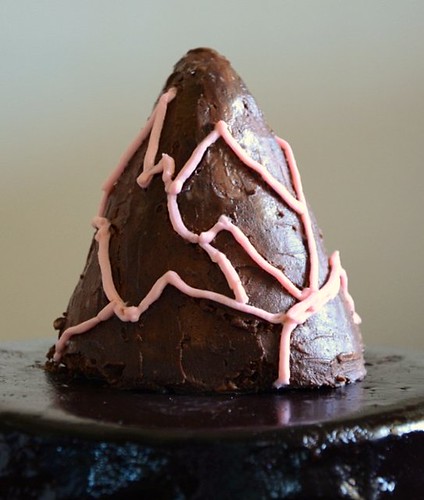
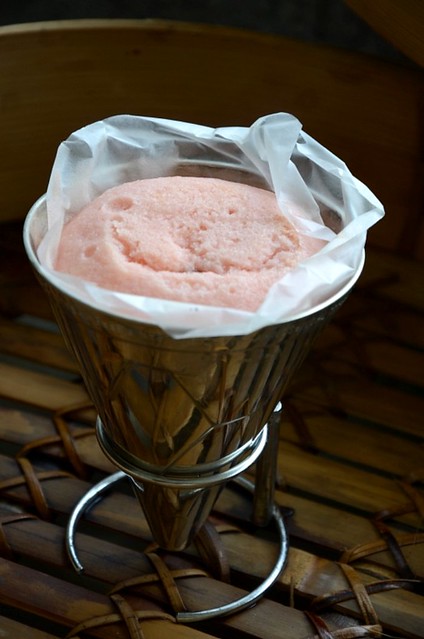
                             I think the cone done up this way would be great for a promotion cake, or a graduation cake to signify achievement because the mould was inspired by mountains that challenge us to overcome our fears. It's all about relishing life and living it with a purpose and passion. In Nick Munro's words, "Celebrate love, life and humour". 

What I really wanted to make for the finale post for the Jelliriffic! Challenge was a chocolate marquise using After Eight Mints that my friend Su had bought for me from KL (none in KK, can you believe it!), as per Gordon Ramsey's recipe in the Nov 2007 issue of Good Food. I wanted  a chocolate shell that fits over the choc marquise, with the lines of the mountains but that failed because the choc shell couldn't be pried off the mould without breaking.

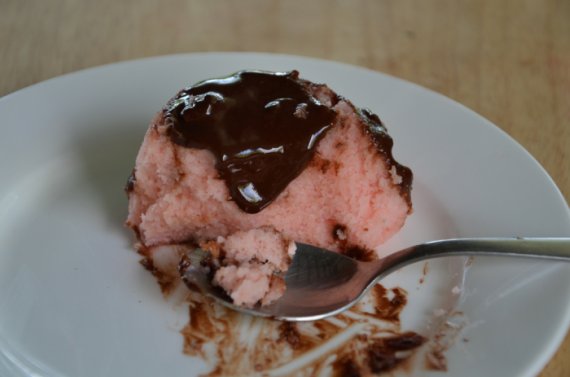
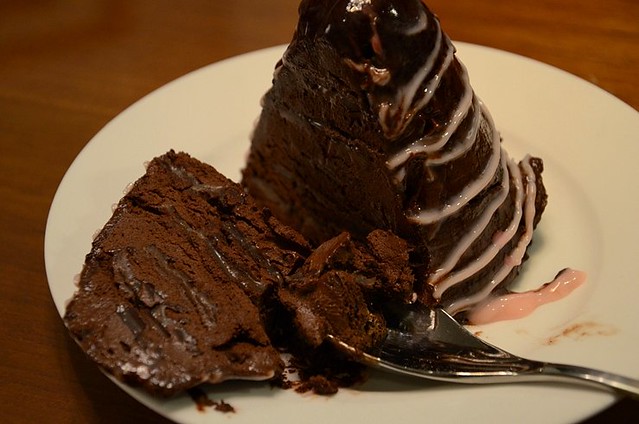
So what I did instead today was covered the choc marquise with melted dark choc with the intention of drawing the outline of the mould using a metal skewer but because the marquise was frozen (and it had to be or it'll melt fast in hot weather because it's so rich), the melted choc hardened quickly when smeared onto the choc marquise. It was impossible to draw the lines on hardened choc. With trembling hands, I peeled the hardened choc off. Parts of the marquise came off with the hardened choc too. What a mess! In the end I drew the lines of the mountain on the marquise. It wasn't what I wanted but I was thankful that at least it wasn't so bad looking.
                              
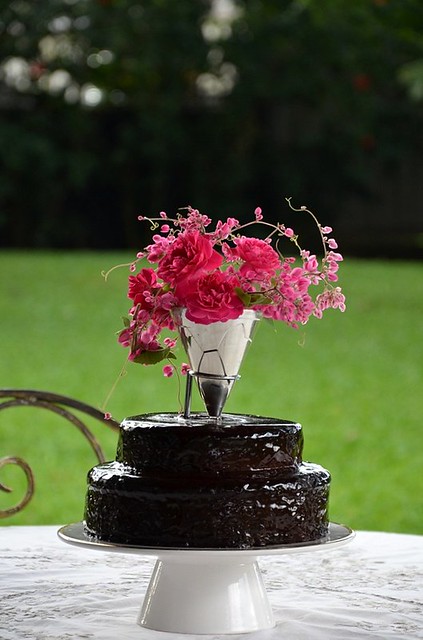
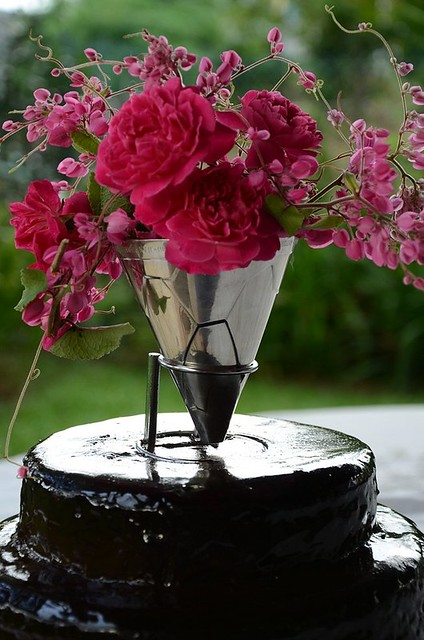
I like using the mould to hold flowers too. It's small and looks elegant on a wedding cake, don't you think?

DSC_8522.jpga

DSC_8543.jpga

So there you are, my last 2 ways to use the beautiful Jelliriffic! mould. It's been a stressful sleep-deprived fun month. I want to thank all of you for staying with me and supporting this Challenge. Goodnight!

DSC_8624.jpga
 Choc marquise is a very rich choc dessert (basically it's just whipped dark choc) which I usually can't eat more than two spoonfuls of but the addition of mint in this recipe makes the choc marquise very refreshing and SO yummy! Thumbs up Gordon!

Gordon Ramsey's Choc Marquise (1 cone + extra)
60 gm dark choc, melted over a bain marie
30 gm unsalted butter, softened
30 gm caster sugar*
1.2 tbsp cocoa powder (I used Valrhona), sifted
1 egg yolk (I omitted this; don't want raw eggs)
90 ml double cream
60 gm After Eights

* you may want to half this amount because the mints are very sweet or you can make the layers of choc deeper so that there's less mint.

1. Whip the butter with the sugar (if using the egg yolk, use half the sugar at this step) until light and creamy. Beat in the cocoa powder. If using egg yolk, whisk it with half the sugar until pale and creamy.

2. Mix in the melted dark choc, the egg yolk mixture and the double cream.

3. Put a spoonful of choc marquise into the grease proof paper-lined mould and place a small piece of mint on top. Repeat until mould is full. Cover with wrap and chill until hardened. In cold weather, take dessert out of fridge 10 minutes before serving so that it is easier to slice.

This is a good dessert to make days ahead so that you don't have to rush on the day of the dinner.

Jelliriffic!


Saturday, October 29, 2011

O Christmas Trees


                                                               "Love, Peace & Joy"

DSC_8404_509x768

DSC_8396_509x768

DSC_8451_1024x678
 
DSC_8368_1024x678
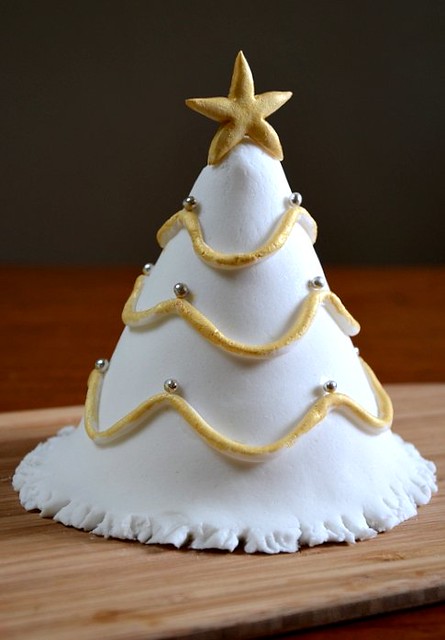
    Traditional Christmas puddings covered with sugarpaste double as edible Christmas decorations.

Less than two months to Christmas! I love the spirit of Christmas, the message of salvation through Jesus, the joy of families getting together in the last few days of the year, and of course, the food, the fun and the whole atmosphere of love, peace and joy.

Making the Christmas puddings brought Christmas to my house yesterday. I was singing Christmas carols and missing my daughter and oldest son. This will be the second year that my daughter won't be home for Christmas. I'm looking forward to having my son Ming around. He was Masterchef Monash two years ago and it's great when he and Wey are in the kitchen. Ming's the guy we trust with risottos while Wey not just cooks great pasta, he makes them. I love it when Ming and Yi have their friends over for rowdy nights of volleyball, cards (yes, but no gambling), Guitar Hero and new games that Ming brings home from Melbourne. 7 weeks to go.

The cone-shaped Jelliriffic! Nick Munro moulds are perfect for making little Christmas puddings which you can decorate into Christmas trees and give as presents to friends. I've used moulding sugarpaste/fondant to cover the puddings because they can last longer than buttercream. Sugarpaste is such a cinch to work with and I had so much fun this morning making these trees. If I had more time, I'd make a tree with the tiniest ornaments. Candy sticks, wrapped presents, bells, ooh.

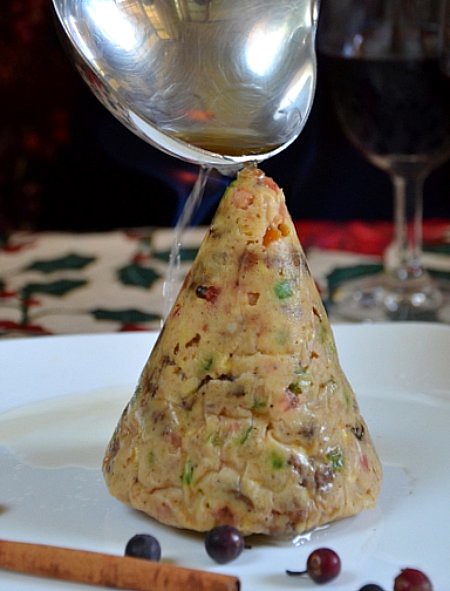
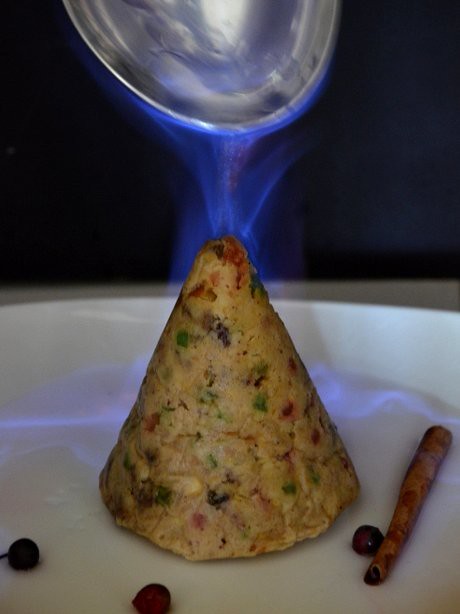
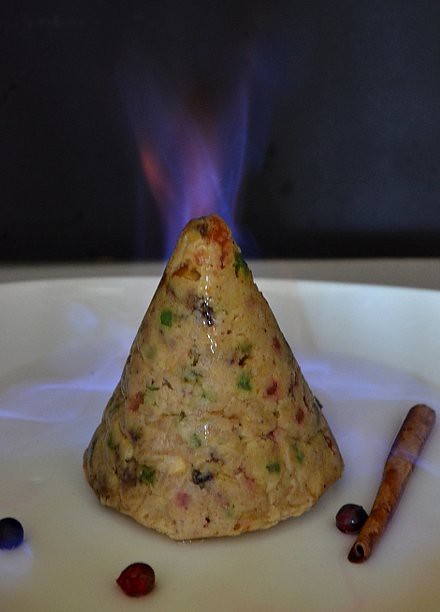
We got the pudding burning alright but the flames didn't show on the photos so we moved into the storeroom where it was dark. It was fun and gorgeous when the 'tree' lighted up, flames of blue, purple and red dancing on the tree and around the plate. I can imagine the drama of bringing a lighted Chistmas pudding to the dining table, with all the lights switched off. Yes, that's what I'll do this Christmas. Thank you, Olympus for the giveaway camera and Royal Selangor Pewter for the beautiful moulds. I hope the collection from the sales of the mould will be beyond expectations. I am sure the other 9 bloggers are also relieved to have completed (almost) the 30-day Challenge and happy that their efforts have helped to raise funds for the Breast Cancer Welfare Association Of Malaysia. If you haven't yet bought the mould, tomorrow is the last day to do so. In the spirit of Christmas, give generously to bless others!

DSC_8311_509x768
                          My Christmas pudding is white. That's what happens when you omit the treacle and forget the sugar! No worries, I have the moulds and I'll make more for Christmas. The flames didn't show up in this photo.

DSC_8343_509x768
                         Lucky that today is Saturday and Hub was around to help me light the pudding. The last time I flambeed anything was when I made crepes suzette (remember those?) to impress my ex-boyfriend. He's now my Hub.

DSC_8345_509x768
                           In our dark storeroom the flames were beautiful. Even the plate was lighted up.
                         
Christmas Pudding (1 cone)
15 gm plain flour
50 gm brown sugar
25 gm suet (I substituted with butter)
15 gm breadcrumbs
1/8 tsp each of ground cinnamon, nutmeg and mixed spice
100 gm mixed fruit and peel
25 gm raisins
10 gm nuts (almonds or hazelnuts etc)
1/4 apple
zest of 1/2 orange + the juice
1/4 tbsp rum
1 tsp treacle
1/2 egg
milk

1. Mix everything in a bowl, adding some milk or water to make dropping consistency. Cover with wrap and leave in fridge overnight.
2. Grease the Nick Munro mould and spoon the pudding batter in, packing firmly.
3. Cover the top with a piece of foil and secure with a piece of thread to prevent spill.
4. Steam 1 hour at medium heat.
5. Re-heat to serve. Pour whisky or brandy into a large ladle until 1/4 full and heat the ladle over a fire. The brandy will catch fire quickly so get everything ready and everybody seated. Pour the lighted brandy over the pudding.

Serve with a brandy butter: Whisk equal amounts (20 gm each) of brandy, sugar and butter.

For the Christmas trees, use store-bought fondant or make your own to cover the tree. I used a pair of scissors with sharp tips to snip the leaves of the green spruce. To attach ornaments to the tree, use a bit of the fondant paste mixed with water.

Pink Velvet Molten Choc Cake

                                                                "Velvet hand iron glove"
DSC_8197_509x768
             
DSC_8271_1024x678
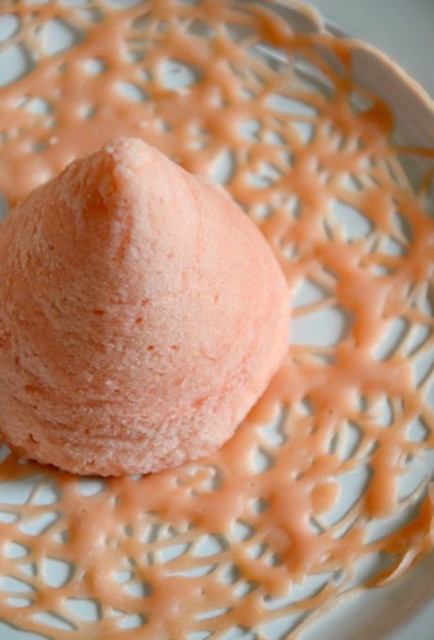
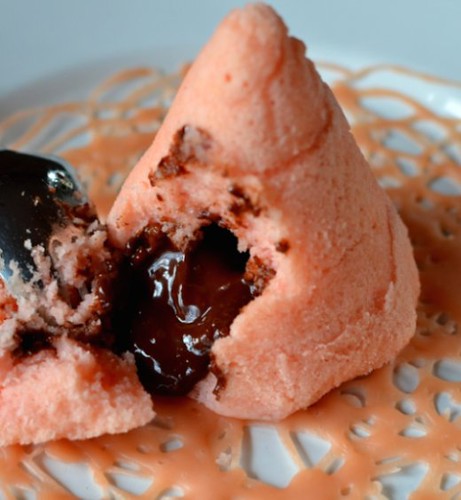
                        Rich, smooth chocolate ganache enclosed in a soft, superfine cake that was steamed, not baked, complemented by a pink coconut milk-flavored 'doily' (roti jala).

The Royal Selangor Pewter (RSP) Jelliriffic! Challenge is a stress test too because a recipe a day for 30 days is tough. There's the rush to make the jelly which may not turn out right, the rush to take photos before the sunlight goes, the rush to write before the midnight deadline and in my case, the extremely frustrating struggle with an unstable Internet service in the past 10 days. TM Net has been looking into the problem but so far cannot solve it.

My friend Veronica had suggested that I make a lava/volcano/molten chocolate cake with the moulds. I had thought of that very early on but RSP had confirmed that the moulds can be steamed but not baked. If I steam my cake, how will it turn out? Will the cake be too soft? Will the lava flow or set?

Against my resolve, I did leaf through Rose Levy Beranbaum's Heavenly Cakes two nights ago. One of the recipes in the book was the molten choc cake and even Rose had problems getting the 'lava' sometimes, something I've experienced too when I left the cakes in the oven for a split second too long. Rose's solution, the clever girl, was to make choc ganache balls, freeze them and place them into the cake batter. More hassle than the usual lava cake recipe but definitely something to try if it is guaranteed to give lots of lava.

As I started to weigh the ingredients, I suddenly thought of the infamous red velvet cake, a cake I feared eating because a standard 9" round cake has a bottle of red coloring in it. So there I was, very excited as I started to make not just a steamed choc molten cake, but a steamed red velvet molten choc cake with the Jelliriffic! mould. Wow, I thought, you're quite creative. As I took my food coloring out, I suddenly thought "Hey, why red? Pink is the color of the month!" And that's how the red velvet became pink velvet. I felt SO clever.

The first cake broke when it was turned out. The cake was too fine, too soft and there was so much lava that it had seeped through the cake and weakened the cake in the middle. The mould was narrow where the ganache ball was placed. It was about 2 pm but I didn't panic because cakes are easier than jellies. Jellies need time to set.

For a minute I thought about going ahead with the jelly Christmas tree that I had already made the night before. I took a spoonful of the failed cake and jumped. The cake was soft, fine, moist, delicious and there was plenty of rich smooth choc lava oozing out of the cake. I had to re-try the recipe again, tweak it for the mould, and share it with you all. But I had a problem. How do I prevent the lava from seeping through the cake, and how do I prevent the cake from breaking in the middle where the lava was?

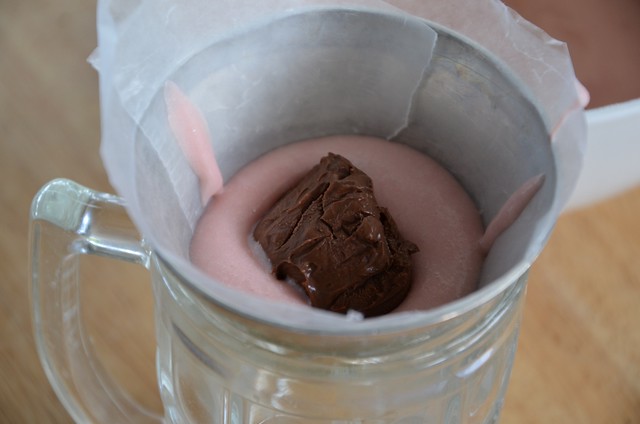
It was more work but what I did was steamed 2/3of the cake, then placed the frozen ganache ball on the steamed cake, top with more batter and steamed again. That this cake turned out so well is one of the best moments for me in the Challenge. I really am very proud of this cake but the real credit goes to Rose for her fool-proof lava and a recipe that makes the best velvet cake, pink or red. I've increased the amount of flour to make the cake firmer for the mould and replaced the buttermilk with milk because buttermilk is not available here. The only thing I'll change next time is the color because I wanted a baby pink but my cake turned out a salmon pink unfortunately.

But wait. Just a minute ago when I was waiting for my photos to load, I googled and found lots of people have beaten me to the pink velvet cake. It's just that I didn't know about it. No matter, I still feel pretty good that I thought of it too. And oh, don't you love that pink lacy crepe? It's a Malaysian crepe called roti jala ("net pancake") made with flour, eggs and coconut milk and is usually eaten with curries. I've blogged about it here and here. If you've never eaten it before, you must try it. It tastes and smells as good as it looks.

DSC_8118_509x768
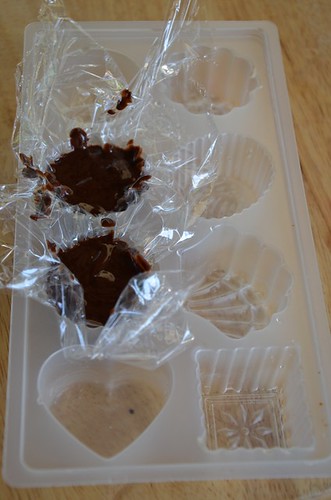
                                         Moulding the choc ganache balls.

DSC_8135_1024x678
                                This was the first cake.

DSC_8139_509x768
                                 An egg stand comes in handy in holding the mould upright. 

DSC_8164_1024x678
                                                                    Yum!


Pink Velvet Molten Choc Cake ( 2 cones)
The choc ganache balls:
30 gm dark choc, 60 to 62% cacao
40 gm heavy cream
--Heat the cream until just about to boil, add the choc and stir until choc is melted.  You can also melt the choc in the cream over a double boiler.
--Line 3 ice cubes cavity or small jelly moulds with cling wrap and spoon the ganache in. Fold the wrap over to cover or use another piece of wrap, and put into freezer for 2 hours or until frozen.


The Cake:
1 egg white + pinch cream of tartar
30 gm cake flour *+ 1/4 tsp baking powder
25 gm caster sugar
1/4 tsp pure vanilla extract
2 tbsp canola oil
1 tbsp unsalted butter, softened
1/4 cup milk
a drop of pink coloring

*If not steaming in the Jelliriffic mould, use 25 gm flour.

1. Prepare a bamboo steamer or a steaming pot.
2. Whisk egg white with the cream of tartar until just after soft peaks stage.
3. Sift the flour with the baking powder.
4. In a bowl, mix the butter and oil using a hand-held electric whisk and whisk 1 minute, then add the flour, milk, vanilla and color.
5. Add the egg white into the flour mixture in 2 parts, beating 30 seconds each time.
6. Place two Nick Munro moulds on  heat-proof stands and line  with grease-proof paper. Fill the moulds 2/3 up and steam 10 minutes. Keep the remainder of the batter in the fridge.
7. Carefully place a ganache ball onto the centre of the steamed cakes and fill up the moulds with the remaining batter almost to the top, leaving 1/2 cm for the cake to rise. Steam 15 minutes this time (the mould is thick). Remove and let cool (can still be warm) before turning out onto a plate carefully. If weather is cold, you can put the cake in the microwave for a few seconds to warm through. Serve with vanilla ice cream. For the lacy crepe, go here.

Friday, October 28, 2011

Cinque Terre Update

Update: The latest news is that Monterosso is damaged but not wiped out. I'm sure they'll rebuild and Cinque Terre will be even better and more beautiful than ever.

Manarola, Cinque Terre
Picture of Manarola, my fave of the five villages, taken from here. We ate at the restaurant in the yellow building with the red roof on the village square, which is really small, just a triangle of flat land overlooking a cliff. The whole of Cinque Terre is very hilly and is the perfect place for hiking.

Thursday, October 27, 2011

Drunken Cones


Chinese saying & song: The drink doesn't take a person; the person takes the drink"

DSC_8010_509x768
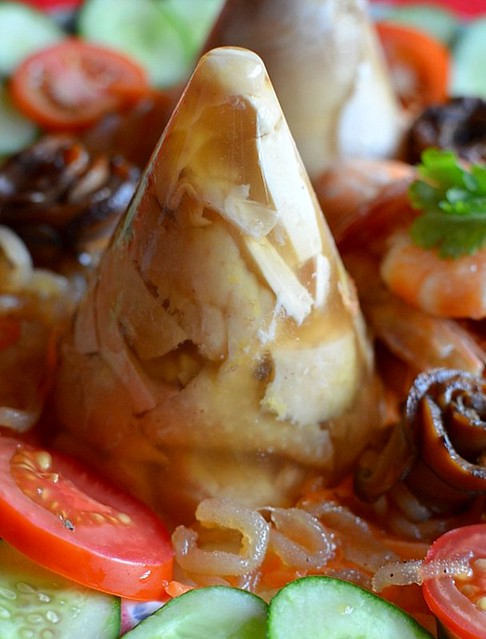
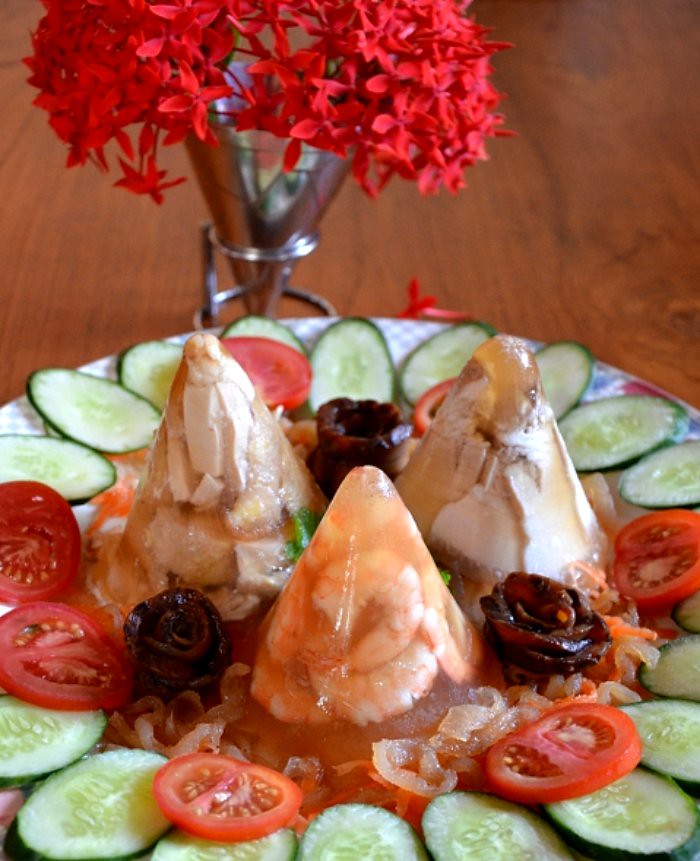
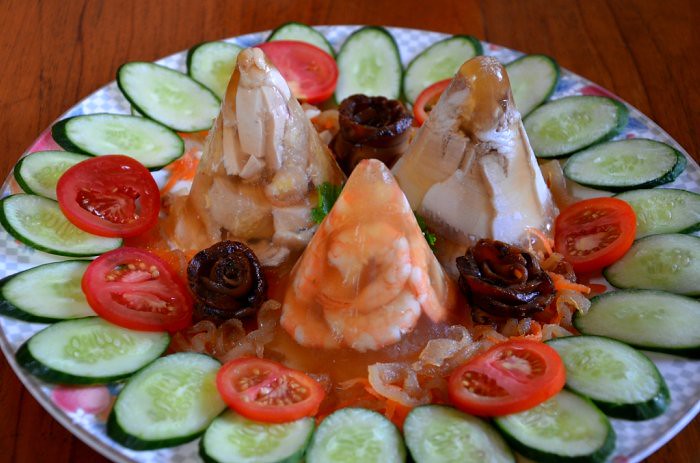
                     Aspic of chicken in Shao Xin Hua Tiao wine on a bed of jellyfish salad and oyster-sauce mushroom roses.

DSC_8009_509x768
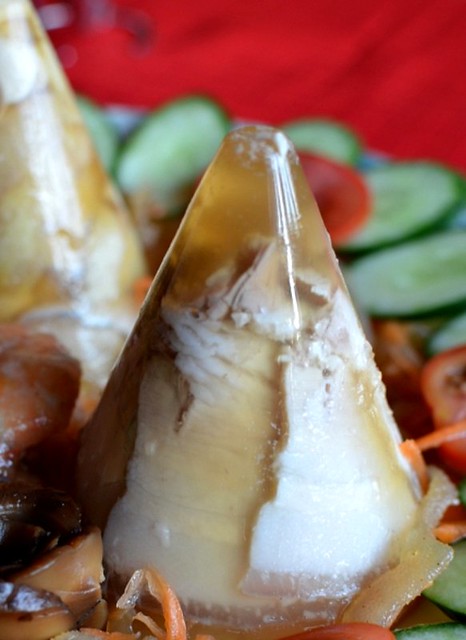
                      Aspic of pork belly in Shao Xin Hua Tiao wine.

Have you noticed that height is important in food presentation? Noodles are twisted mile-high, salads piled as high as they can hold and tall cakes always look better than short ones. On a buffet table, dishes are of varying heights, not level and low, and even I have been unconsciously taking a lot of vertical photos of the food for this blog. So yes, my point is, the Jellyriffic!Challenge moulds can give your food that the lift, like those new platforms you just bought. Only 3 more days to go for you to buy a mould and contribute to the Breast Cancer Welfare Association Of Malaysia. I forgot to mention in my previous post that besides contributing to the Association and getting a chance to vote for your fave blogger, you get a good chance of winning the new Olympus PEN Lite E-PL3 camera, which is what I'm coveting too. Also, it's time to drop me a comment (need more comments) to keep my spirit up and also to get that Olympus VG-100 camera!

While cold appetizers are very common in Shanghainese cusine, the Cantonese are not big on cold dishes except for the huge cold appetizer platter that is served at the start of a banquet dinner. The Cantonese appetizer platter is the most expensive item in a banquet meal because a lot of skills are put into preparing the varied items which must be pleasing in taste, color and texture and also because expensive ingredients, such as abalone, sharks' fins, prawns, dried oysters, corn-fed chicken and the best Jinhua ham are used.  I've not had a really good cold platter in a long time because restaurants are scrimping on ingredients and making appetizer platters of cold and hot items which downgrade the platters because the hot items, which used to be dainty hors d'oeuvres, are now stir-fried stuff, like top shells with dried chilies or deep-fried processed meat made into different shapes.

The first week of the Challenge, I made beef in aspic. Both kids said "Yuks!" at the jelly with slices of meat suspended within and refused to eat it. That recipe was not posted. Today I thought I'll try again, making the aspic Shanghainese with the addition of Shao Xin Hua Tiao wine. The aspics do look kind of weird, almost like preserved specimens in the lab. I must say I prefer not to serve drunken chicken this way.

 If I were making this platter for CNY, I'd include cold cuts of abalone, pork tongue and Shanghainese red-braised beef shin. A Sichuan peppercorn and chili dip goes best with the aspic meat. I can almost hear the 'dong dong chang' and smell the fire crackers.

DSC_8100_509x768

DSC_8103_1024x678
Chinese, like the Koreans, generally love gaudy bright colors and over-the-top decoration which they feel bring cheer, especially on festive and special ocassions such as birthdays and weddings. The most welcome color is red because they believe it's the color that brings happiness, prosperity and life. This cold platter would be considered very auspicious on CNY

Drunken Cones
Aspic Chicken:
1 whole chicken leg, skin on
one small slice of ginger
1 small stalk of spring onion, tied into a bundle
1 cup of water
1 tsp gelatine (3/4 tsp in cold weather)
1/4 tsp salt + 1/4 tsp salt (extra)
white pepper
1/2 tsp chicken stock
1/3 cup Shao xin hua tiao wine
--Simmer the chicken with everything for 10 minutes except the gelatine, extra salt, pepper and wine.
--Remove from fire, put 1/2 cup of the cooking liquid, the 1/4 tsp salt, white pepper and wine into a bowl and  soak the chicken leg in it until cool. Taste and season the liquid if necessary. Cover and put into the fridge to chill.
--When chicken is fully chilled and firm, debone it and cut into small slices.
--Put 80 ml of the soaking liquid and  the gelatine powder into a small pot, cooking over a low heat until gelatine is dissolved. Put in 2 ice cubes to cool.
--Rinse a Nick Munro mould, scoop in 1/2 tbsp of the gelatine liquid and arrange the chicken slices in the mould, spooning more gelatine liquid in as you go. Chill until set.

Aspic Pork Belly
200 gm* piece of pork belly, skin on
a thin slice of ginger
1/2 tsp salt
enough water or stock to cover the pork
1 tsp gelatine powder (3/4 tsp in cold weather)
salt & white pepper to taste
1/3 cup Shao xin hua tiao wine
* there will be leftover
--Simmer the pork with the ginger, salt and stock for 20 minutes. Check by putting a skewer or chopstick through. The chopstick should pass through easily but for a good, bite, don't cook the pork too soft. Remember though that the pork will firm up when chilled. Remove and cool, then chill in the fridge to set the pork to make slicing easier.
--Cut pork into very thin slices.
--Do the same as for the chicken, making a gelatine with 80 ml of the cooking stock.

Aspic Prawns
6 to 8 small prawns
enough water to cover the prawns
1/4 tsp salt
1/3 cup Shao xin hua tiao wine
1/2 tsp gelatine powder
--Trim the prawns & remove the dirt vein.
--Boil the prawns until just cooked. Drain, remove shells and put into a bowl with the wine (no cooking liquid). Cool and chill. Make gelatine as per the aspic chicken.

Mushroom roses
3 to 5 black Chinese mushrooms (remove stems), soaked in warm water until soft
2 tsp oyster sauce
1 tsp light soy sauce
1 tsp sugar
--Put the mushrooms in a small pot with the above ingredients with just enough cooking liquid from simmering the chicken or pork to just cover, simmering about 20 minutes. When cool, slice the mushrooms thinly, slanting your cut to get a larger slice. Arrange into roses, using black thread to hold the 'petals' together.

To serve, arrange the aspic meat on a large platter with other cold cuts if like and serve with:

Sichuan garlic dip:
1 tsp chili oil
 1/4 tsp toasted and grounded Sichuan peppercorns
3 pips garlic, minced
2 tsp grated ginger
2 to 3 tsp light soy sauce
1/3 tsp caster sugar (to taste)
a dash of msg (optional)
--Mix everything together. You can add a tsp of black vinegar too.

Cinque Terre Storm


Update: the latest news is that Monterosso is damaged but not wiped out:)

vernazza
Vernazza, as seen from a hill above the city, was partly destroyed yesterday.


Manarola, Cinque Terre
Picture from here of  Manarola


A buzz on my phone early this morning woke me up. A friend had messaged me about the storm that hit the Liguria region of Italy yesterday, killing 8 people and destroying villages. Two of the most badly hit villages were in Cinque Terre ("Five Lands"), and my hairs stood when I read the message. Monterosso, the first village and Vernazza, the beauty queen. I can remember these places so vividly, like I just came back from there. I remember the train rides from Genoa to the Five Lands and within the villages, accessible only by boats and trains.

I googled the news and what I read made me tear. I was in Cinque Terre just a year ago with my daughter and we talk about the place often. Yi says she'll honeymoon in Cinque Terre, not places like the boring Maldives, which is the top destination for China-Chinese honeymooners who walk around in matching shorts and count the hours to the next flight home. We had never heard of Cinque Terre until my friend CY sent me Rick Steves' Europe and Cinque Terre was described like a best kept secret. Of course when we got there, it was totally invaded by the Americans.

Cinque Terre is one of the prettiest places I've been to, apart from Banff, Canada (more majestic and beautiful than Switzerland!) but they are different. Of the five villages, Vernazza is the top favorite among tourists but my fave is Manarola, which is smaller than Vernazza but less touristy, if that can be used to described these places which were fishing viallges but now survive on tourism. I can't believe that Monterosso, the first village, has been completely wiped out. It's so sad. I hope they rebuild and recover quickly.

 I'll never forget Cinque Terre and the perfect day my daughter and I spent there. My big regret is that I didn't make any hotel bookings and refused to pay through my nose to stay the night. I should have done that.

monterosso
This is the Monterosso beach which is the first thing you see when you get off the train station. We didn't see the village of Monterosso because it was quite a walk away and it was too hot. As of yesterday, Monterosso village no longer exists.

Wednesday, October 26, 2011

Babao Fan

                                                              " Baobao yao chi babao fan ma?"

DSC_7975_509x768
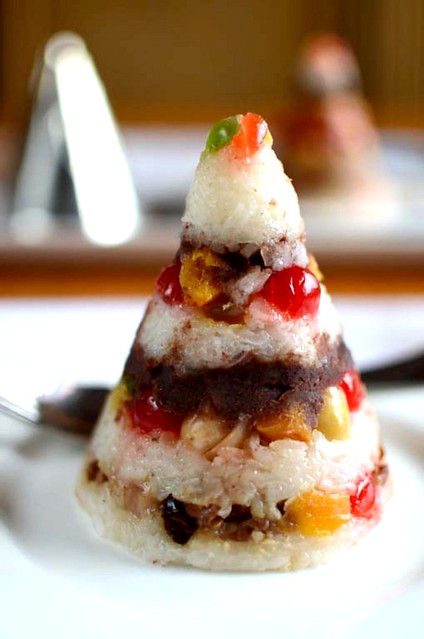
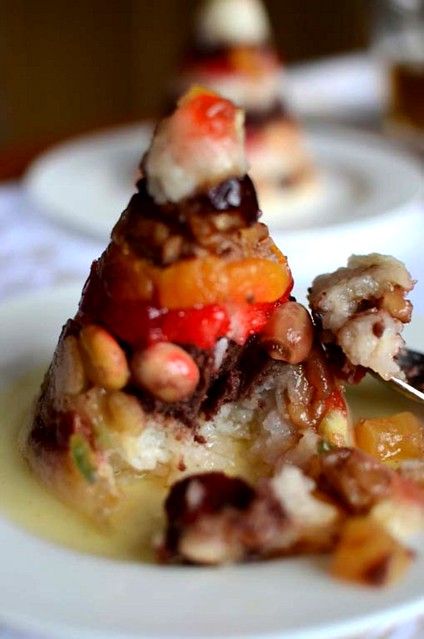
              Babao fan (eight jewels rice): glutinous rice with sweet red bean paste filling and a shell of  8 sweet 'jewels': candied cherries, dried longans, red dates, gingko seeds, lotus seeds, walnuts, dried apricots and raisins. So Chinese New Year.

I had the ultimate jelly for the last day of the Jelliriffic! Challenge and I just tested it today and it failed. I wanted to make a hard chocolate shell (like the Dairy Queen dipped cone) of the Nick Munro mould, with the lines of the mountain embossed on the chocolate, but the chocolate couldn't come off the mould in one piece. I have to come up with Plan B but I'm afraid to disappoint. Anyway, I've done my best and I really hope that many of you are convinced enough about the versatility of the Nick Munro moulds to buy at least one because the proceeds are going to the Breast Cancer Welfare Association Of Malaysia in aid of breast cancer awareness programs and women with breast cancer. Buying a mould or more is a terrific way to contribute towards helping those with the disease and those without the disease too because the stats are pretty scary: 1 in 3 cancers diagnosed in the US is breast cancer and in Malaysia, breast cancer is the No. 1 killer among women with cancer. Only RM290/USD100, and you help the Breast Cancer Welfare Association and women who are in need plus you get a mould which you can make jellies with, serve soup and ice cream in and even hold your favorite bouquet. And of course, you get a chance to cast your vote for the winner of the Jelliriffic! Challenge. Just four days to go so hurry!

Because of the Challenge, I finally got off my butt (and part of my butt got off me because I lost 2 kgs) and made many jellies and desserts which I would otherwise not have made. After making a dessert a day for the last 25 days, I've gained confidence, learnt to manage my time better (not, because I forgot to pick my son up yesterday!) and found that I really enjoy developing new recipes.

Today's babao fan (eight treasures/jewels rice) is one of those things I was too daunted to make. I didn't even particularly like this traditional Chinese dessert until two years ago. Every third day of Chinese New Year (CNY), we eat dinner at Uncle and Aunty Lu's (friends of my in-laws) and the highlight at the end of the meal would be Aunty Lu's eight treasures rice pudding. Eating the pudding is such a treat that I'd hear my in-laws say on the way home, "Mrs Lu's ba bao fan is the best ever this year," or "Mrs Lu's ba bao fan was a little too hard this year" or "I didn't even manage to grab a spoonful of Mrs Lu's babao fan". Uncle Lu is from Ning Bo in the Jiangsu-Zhejiang region, where cities such as Shanghai, Nanjing, Hangzhou, Suzhou, Wuxi and Yangzhou are located. I always felt that Mrs Lu could've made a bigger babao fan with more hongdousha (red bean paste) and more bao (treasures) because with a crowd of about 30 people, one serving was one scoop of rice pudding with one tablespoon of red bean paste and maybe a gingko nut if you are lucky. That wasn't enough for a once-a-year dish. MIL said that that's Lu Aunty's trick to make people crave her pudding even more.

Two years ago, Hub's cousin brought a babao fan from Shanghai when she visited for CNY. It was the best babao fan I've ever eaten and if I liked babao fun for the rarity of eating it once a year, that babao fan made me a fan of the fan (pronounced "fun"). Wey says my puns are terrible.

With all the reverence given to this traditional Chinese dessert, I never considered making it. The old folks talk of the patience needed to make the red bean paste and how the best bean paste must be made with lard. Then they tell me that a lot of skills and experience go into buying the perfect glutinous rice and making sure it is cooked to the right texture and sweetness. Wouldn't you be daunted too?!

The last time I bought red bean paste, I felt so bad serving the red bean baos to my family. The bean paste was cheap (RM3 per 1/2 kg), looked real dark red and after refrigeration, had a white layer of solidified oil. I threw away the remaining bean paste and swore that I'll never buy it again. You know what? I made red bean paste last night and it took less than one hour. I know what goes into the paste (the best red beans, less sugar and oil) and the best part was, the paste was delicious and bursting with red bean flavor. I felt like I've climbed a culinary mountain.

How was my babao fan? It's funny how things turn out, even food. I've told you how I wished that Lu Aunty's babao fan could be more loaded with treasures. My babao fan was so overloaded that every mouthful was full of treasures. I realized something then. Babao fan should be about the rice first, then the red bean paste and then the treasures. The treasures are necessary but in small portions to sweeten the rice, to give different flavors and bite and to pretty up the dessert. If I make babao fan again, I won't cover it with treasures. Like an overmade-up face, more is too much.
resized7_1024x768
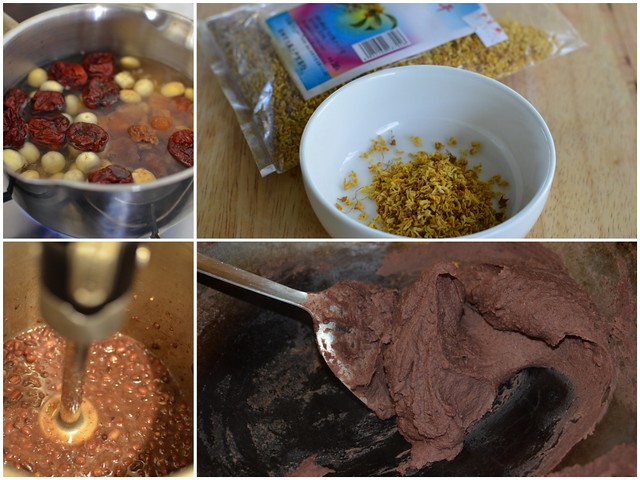
Boiling the treasures, guihua (osmanthus, the vanilla of China), blending the red beans and frying the beans. I didn't remove or sieve away the skins from the red beans.
DSC_7915_1024x678
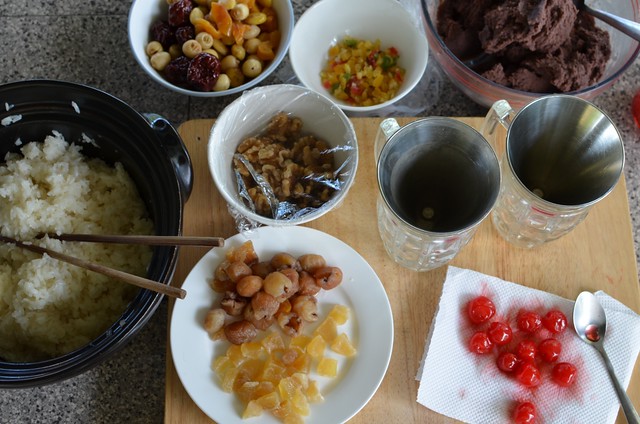
I found 9 types of treasures (substituted candied cherries with maraschino cherries) in my kitchen. The candied ginger and citrus peel were mistakes because the ginger gave a hot taste and the candied peel was too intense. Green or golden raisins would've been a better choice than the ginger and citrus peel.
DSC_7926_1024x678
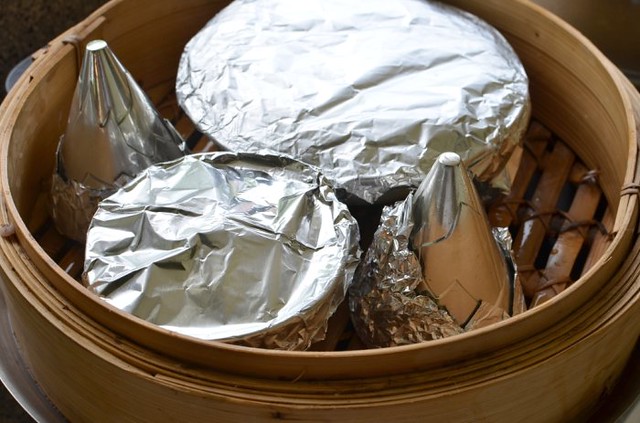
This was the first time I used the moulds for steaming. The moulds survived the heat.
DSC_7945_509x768a
The Nick Munro mould makes such a modern babao fan. Lately everything looks cone-shaped. Did you realize that the Martha Stewart Dreamy Coconut Cake is cone-shaped too?
DSC_7984_509x768a

8 Treasures Rice (for 2 moulds)
Choose 8 jewels:
6 lotus seeds, soaked, halved & green 'heart' removed
6 gingko seeds
5 Chinese dates, deseeded and halved
5 glace cherries, halved
10 dried longans
4 walnuts, quartered
almonds
2 pieces dried apricots
a spoonful of golden or green raisins
melon seeds

1 cup finest glutinous rice
1 tbsp sugar
3 tbsp veg oil
red bean paste

Syrup:
2 to 3 tbsp brown or 'slab' sugar
optional:1 tsp dried guihua (osmanthus)
liquid from boiling the lotus seeds
--Put the liquid (about 3/4 cup) from boiling the lotus seeds and red dates into a small pot with the guihua and sugar and boil until reduced to half. The syrup shouldn't be thick. Sieve the syrup and throw away the guihua.

Red Bean Paste (there'll be leftover paste):
1 cup red beans, washed
1/4 cup sugar
1/4 cup veg oil
--Boil the beans in a pressure cooker for 20 minutes with enough water to cover the beans. Leave in the pot to cool. There shouldn't be much liquid. If there is, drain it away leaving just enough for blending. If you want to remove the red bean skin, push the beans through a sieve. I think that's a waste of fiber and vitamins so I don't.
--Use an electric hand-blender to blend the beans until very fine.
--Heat a wok, add the oil, beans and sugar and fry under low heat for about 10 to 12 minutes, until the beans become thick and pasty and don't run when parted with the frying ladle.

1. Wash the rice and boil it with about 350 ml of water or enough water to cover with a level of about 1.75 cm above the rice. Turn the fire to low when the rice boils, add the oil and sugar and let it cook for 10 minutes. Check if rice is done. The rice should preferably be soft rather than hard.

2. Put the lotus seeds, red dates, longans and gingko nuts to boil with 1 tbsp of sugar and enough water to just cover. Boil 5 minutes only and drain, reserving the liquid for making the syrup.

3. Grease the moulds. Begin with a couple of jewels, then rice and then a layer of bean paste. Alternatively, you can have the bean paste as a filling in the middle.

4. Cover the mould with strong aluminium foil and steam for 45 minutes. Serve when still warm, with the syrup. The pudding can keep in the freezer for months.
Tuesday, October 25, 2011

Jackfruit Custard With Passionfruit Sauce


                                                               "Jack-in-the-cone"

DSC_7866_1024x678
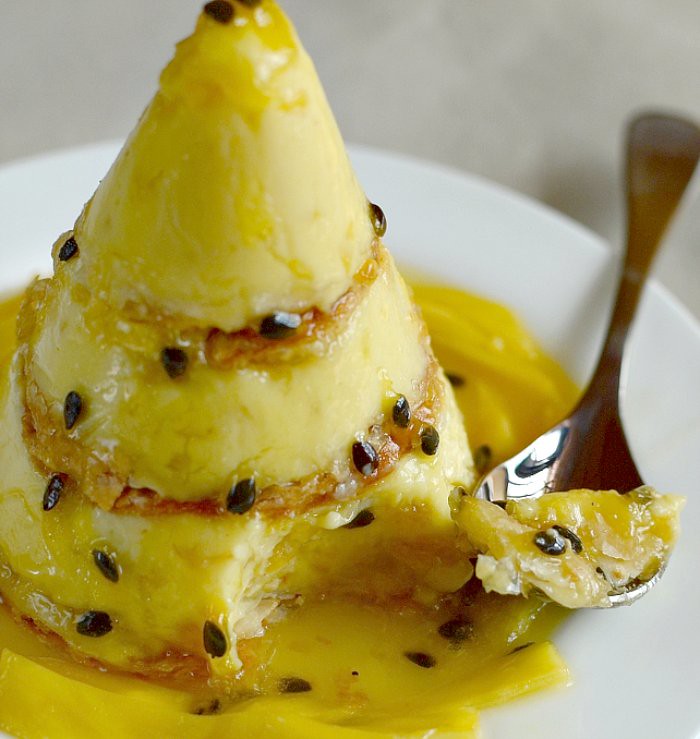
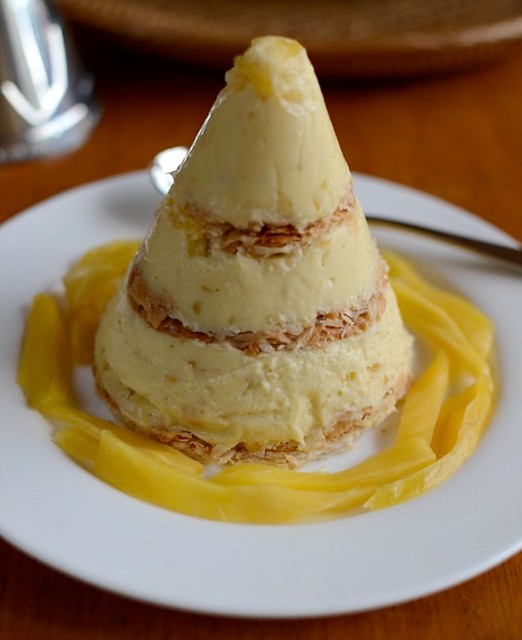
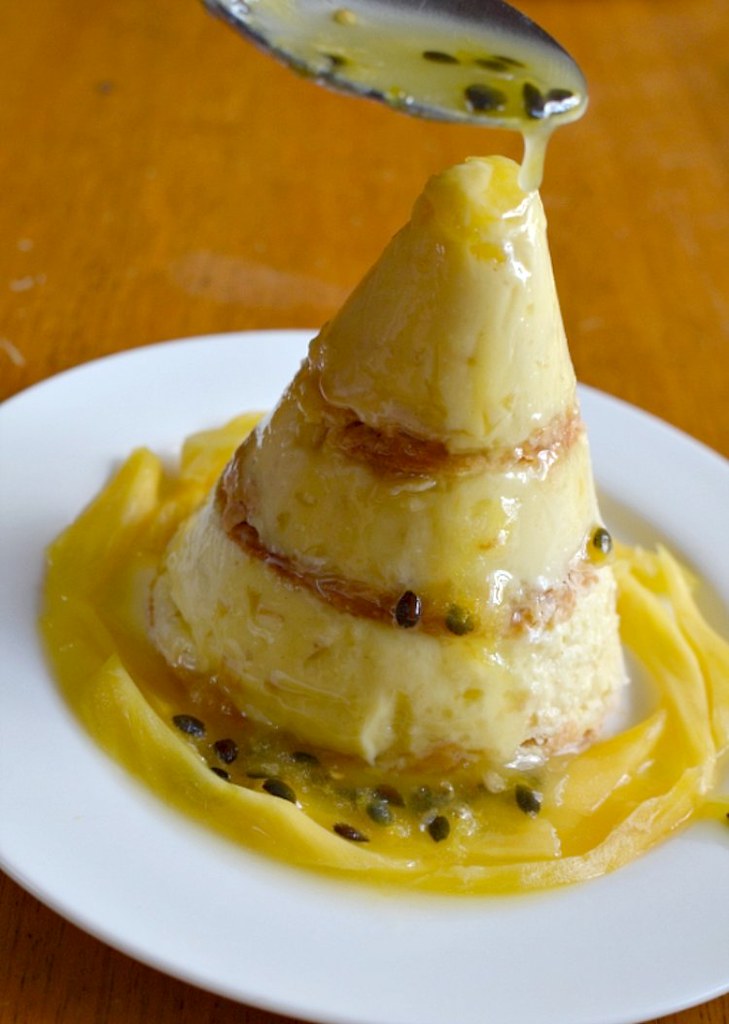
      Chilled custard with chopped jackfruit, layers of puff pastry and passionfruit sauce--what's not to like?

Yesterday's United Colors Of Jello was actually based on a reader's suggestion to make a jelly of the headgear worn by local Bajau horsemen but I was in such a hurry and couldn't wait and the jelly turned out as a big fat murky blob. Luckily, I had made an extra jelly using the leftover Jello and cream and that became the post for yesterday!

Some readers asked where the ideas for the Jelliriffic! Challenge are from. When I confirmed joining the Challenge, I made a list of the jellies I wanted to make based on the desserts I've always wanted to make and the desserts that I love. Many times, the jellies were inspired by the flora around me. I deliberately stopped reading food magazines and cookbooks so that my jellies will be original. Last week, my dear friend NC lugged back Rose Levy Beranbaum's Heavenly Cakes for me from New York and I haven't yet peeked at the book but am very tempted to. Delayed gratification is sweet. I'm so looking forward to curling up on my sofa next week with this book which I've wanted for a long time, and all those food magazines that I buy but never seem to have time to read. Next week I'll do that, and I hope it rains in the afternoons like it's been doing since the Challenge started. If so, I'll be sipping coffee and eating a piece of quiche or something. Not jelly.

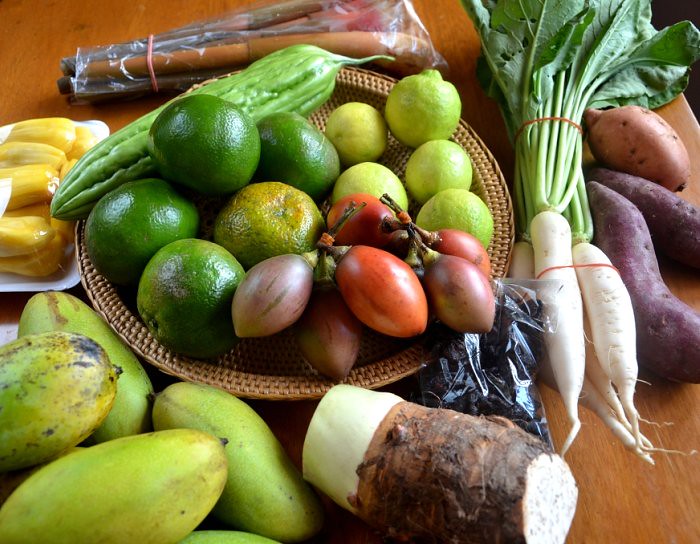
I was at the once-a-week tamu (meeting place/market) in Donggongon last Thursday and there were so many local produce, some from the jungles and some from the back yards of the villagers. I came home with these goodies:
DSC_7186_1024x678

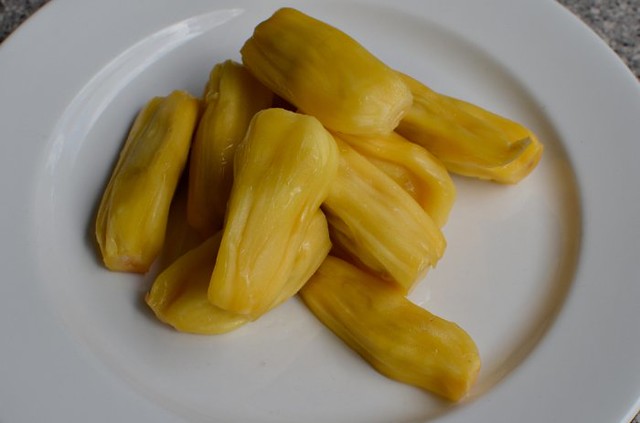
We've eaten most of what I bought except for the tamarillos and the jackfruit. While cleaning my fridge out this morning (what a lot of expired rubbish!), I found a small tub of frozen passionfruit pulp that my friend Yo had given me last year (or the year before?), organic home-grown stuff from her back yard. I usually just make a drink out of passionfruit but passionfruit reminded me of the vanilla slices I ate in small towns Australia. Why not make a Malaysian custard with the jackfruit and a passionfruit sauce to sweeten it?
Anyway, the custard turned out fabulous (do people still use this word) except for the passionfruit sauce which was too sweet and next time I make this, I'll use crushed biscuits instead of puff pastry because in our weather, the pastry becomes chewy instead of crisp. I am so relieved to eat a custard for a change because frankly, I've had too many jellies. I'm thinking hard about what to make for the remainder of the Challenge. I just hope I don't end up stuffing rice into the moulds (against my initial resolve against doing that, that's just what I'll be doing next!).

DSC_7802_1024x678

DSC_7811_1024x678
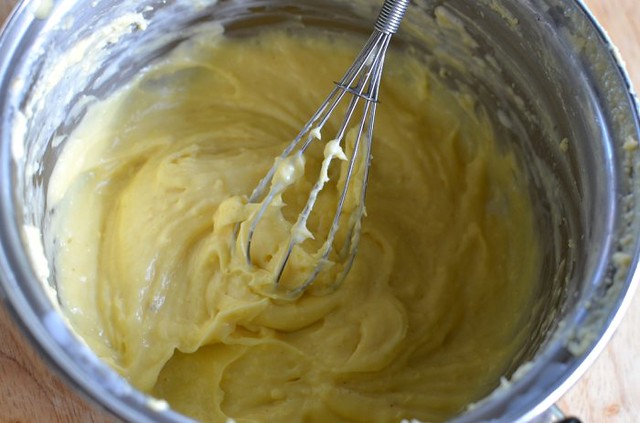
Mix egg yolks with custard powder and sugar.

DSC_7812_1024x678
Pour egg yolk mixture into the coconut milk and cream mixture.

DSC_7816_1024x678
   Cook, stirring, until smooth and thick (but this was too thick so I thinned it with extra milk).

DSC_7822_1024x678
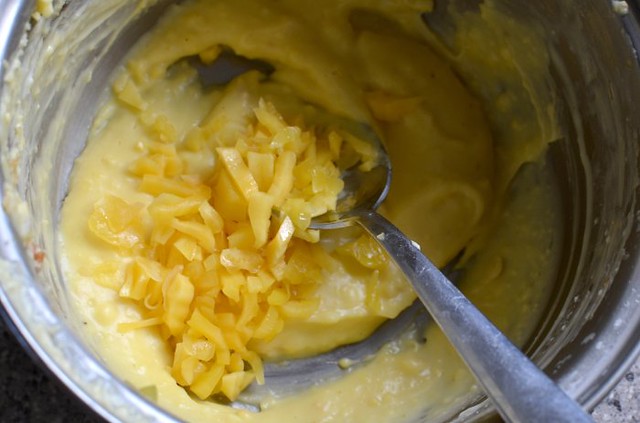
    Mix the jackfruit into the custard.

DSC_7818a
DSC_7819_1024x678

  DSC_7826_509x768
DSC_7836_509x768

Jackfruit Custard With Passionfruit Sauce (for 2 cones)
The custard:
1/2 cup fresh thick coconut milk + extra
1/2 cup cream
1/2 tsp vanilla extract
1 tbsp butter
3 heaped tbsp Bird's Custard powder
2 egg yolks, beaten lightly
2 tbsp caster sugar (or to taste but remember the sauce is very sweet)
The biscuit layer:
5 to 6 Marie biscuits or McVitie's Digestive biscuits or Graham crackers, crushed*
3 tbsp melted butter
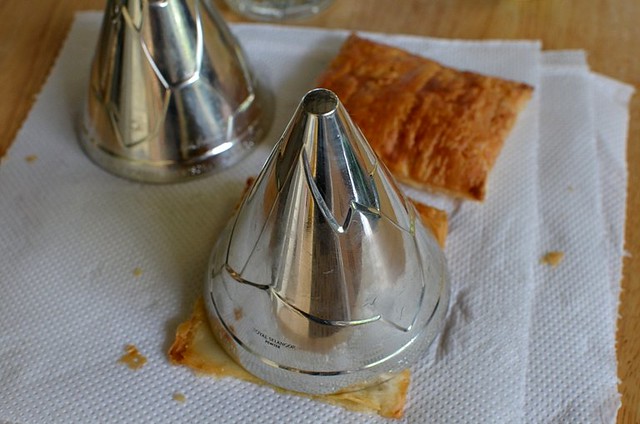
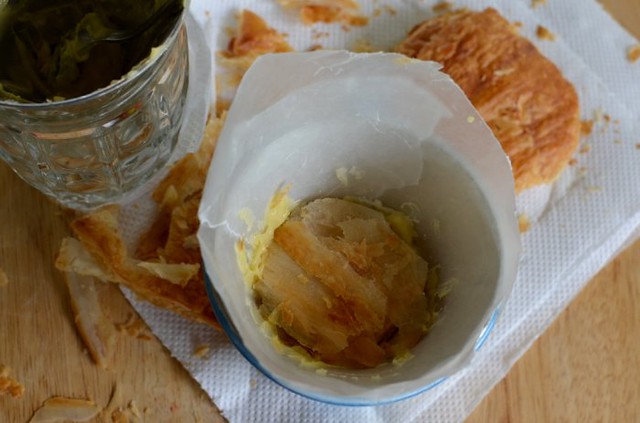
* or 3 small pieces of puff pastry baked at 200 C for 10 to 15 minutes until crisp
--mix well.
Passionfruit sauce:
1 tbsp passionfruit pulp
3 to 5 tbsp icing sugar
--just mix until you get the consistency you like.
Jackfruit:
4 pieces jackfruit, deseeded and chopped
extra jackfruit, sliced, to serve

1. Put the vanilla, cream and milk in a small pot. Remove from heat when just about to boil. Let it cool.
2. Mix the cornflour, sugar and about 2 tbsp milk in a small bowl and then mix in the beaten egg yolks.
3. Add the yolk mixture to the cream coconut milk mixture (can be warm) and boil over a very low fire, stirring all the time. When the custard begins to thicken, taste it to see if it has a floury taste. If so, it is undercooked so add more milk and continue to cook, stirring all the time. If the custard gets too thick, add more milk, stirring until you get a smooth, thick but not too thick custard.
4. Mix the chopped jackfruit with the custard.
5. Line two Nick Munro moulds with baking or greaseproof paper. Put a tbsp of the custard into the mould. Top that with the pastry (cut to size) or with a spoonful of crushed biscuits, pressing down firmly to level. Repeat until the mould is full, ending with a layer of pastry/buiscuit. Cover and chill at least 3 hours.
Serve with the passionfruit sauce and sliced jackfruit.

Monday, October 24, 2011

United Colors Of Jello

                                      "Dreams Really DO Come True"

DSC_7732_636x960
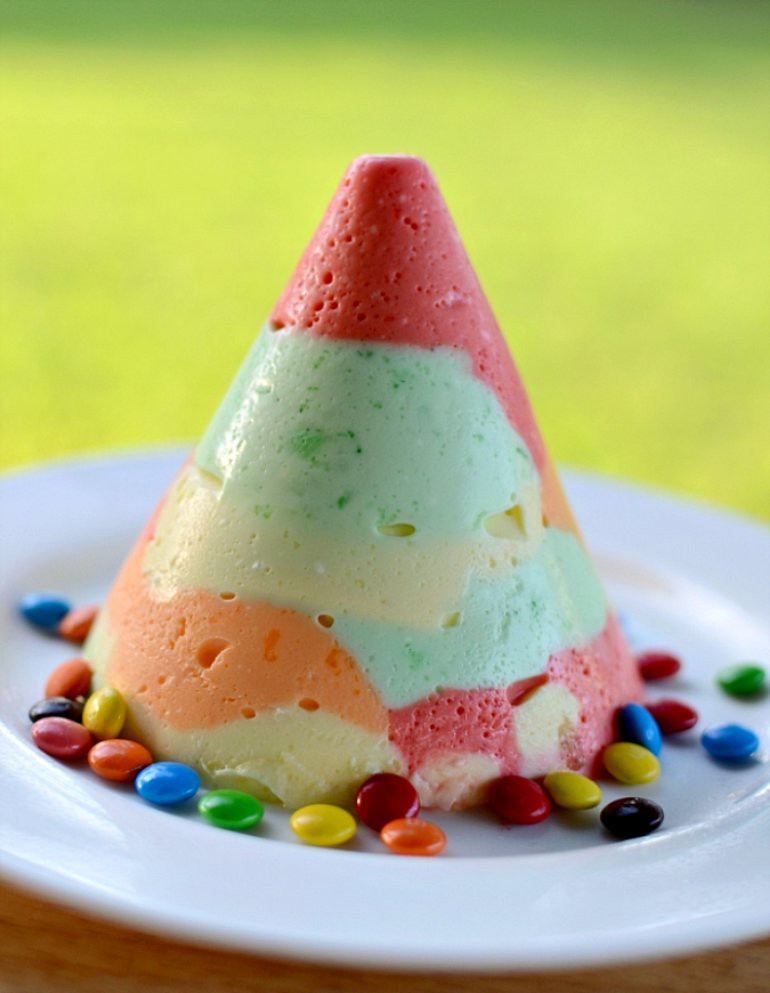
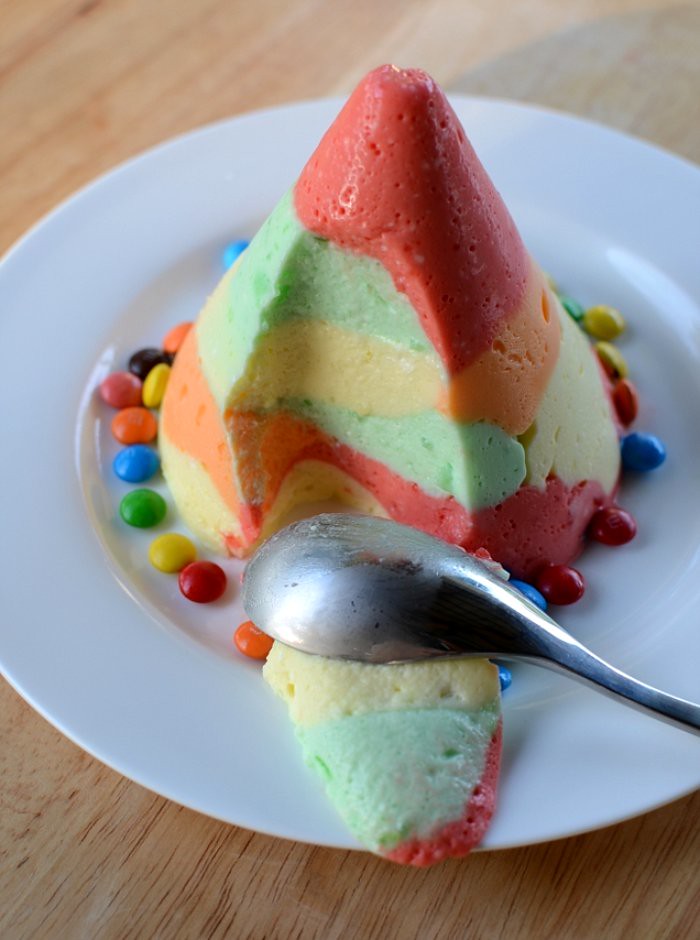
    United Colors Of Jello: Jello and cream of different flavors all in one cone and M&Ms to boot.

I was out all day and came home at 3 pm with no idea what jelly to make for the Jelliriffic! Challenge today. I had to pick my son up from school at 3:30 pm and was worried that there wouldn't be much time to take photos by the time I get back.

Whenever I travel, I love to check out supermarkets and bookstores because the supermarkets and bookstores here are absolutely pathetic. It's no wonder that I hate grocery shopping here.  Not one supermarket is well-stocked. Last week I had to go to 3 supermarkets just to get Jello. I think that the selection and variety of products are getting worse as the economy slides.

So what could I make quickly and be set by the time I get back? Jello of course. I had plenty leftover from making Broken Hearts.

I know this is similar to Broken Hearts but you know what, it tasted good and was easy to make so you might want it for your kid's birthday party. I usually avoid coloring but I'm partial to Jello. It's refreshing, fun to eat, looks pretty and is really quite delicious. The addition of cream makes Jello taste even better and with five different flavors, you've got the rainbow covered. Almost.

DSC_7712_1280x848

DSC_7719_1280x848

DSC_7766_636x960
United Colors Of Jello
1/4 packet each of 5 to7 different Jellos
150 ml dairy whipping cream
Garnish: mini M&Ms
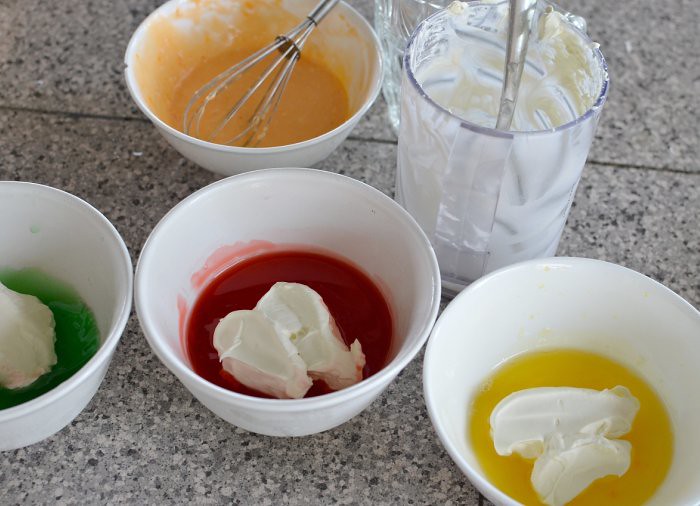
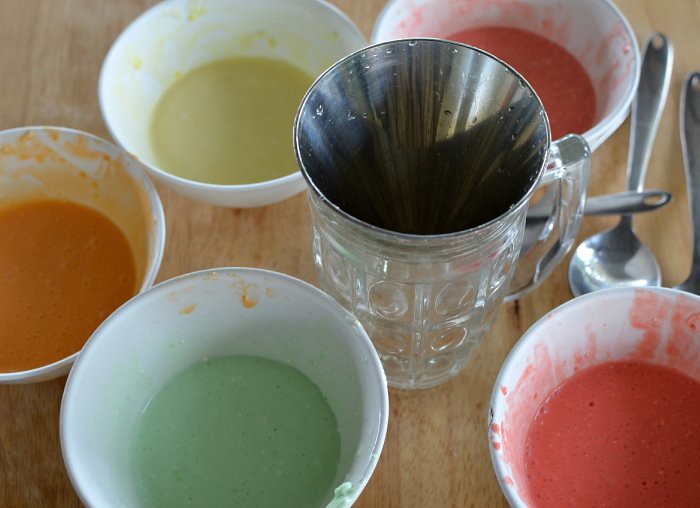
1. Make each 1/4 packet of Jello with 1/2 cup boiling water. To speed up the setting, you can use 1/4 cup of boiling water to dissolve the Jello and then add 1/4 cup of ice-chilled water. Make each Jello in a small bowl and put into the fridge to chill until thick and syrupy. Meanwhile, whisk the cream until stiff and leave in fridge.
2. When the Jellos are syrupy (not set or they won't mix well with the cream), mix 2 heaped tablespoon of cream into each Jello with a small whisk. If the Jello becomes too runny, put it into the fridge to set for a minute or less, depending on how set the Jello is.
2. Rinse a Nick Munro mould and scoop a tablespoon or two (vary the amount) of each color into the mould until the mould is filled. Press each scoop of jelly firmly so that you won't get pockets of air. I did not and you can see pock marks on my jelly. Leave in fridge to set. Garnish with the M&Ms. 

Readers' Vote


Sorry. Please vote again. The previous vote excluded the lemongrass coconut mousse.

Sunday, October 23, 2011

Lemongrass Coconut Mousse


"A Lifetime Of Love"

DSC_7671_636x960
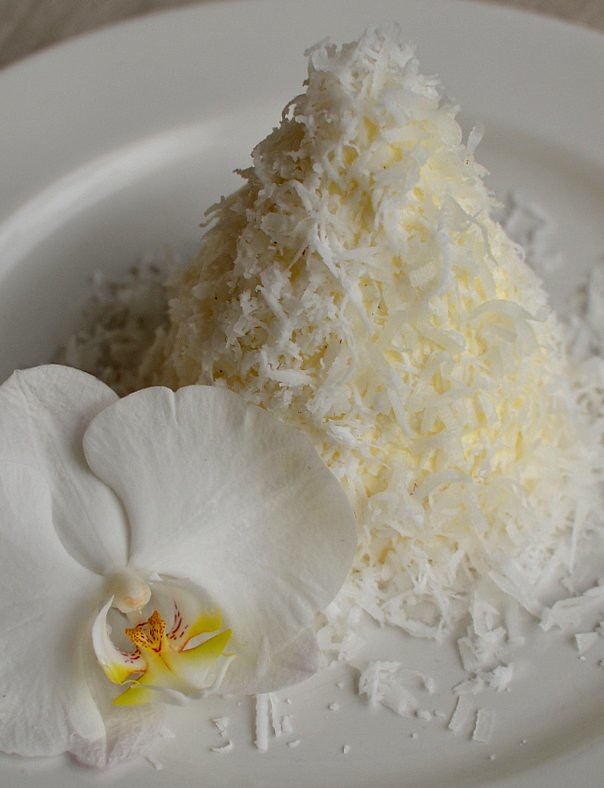
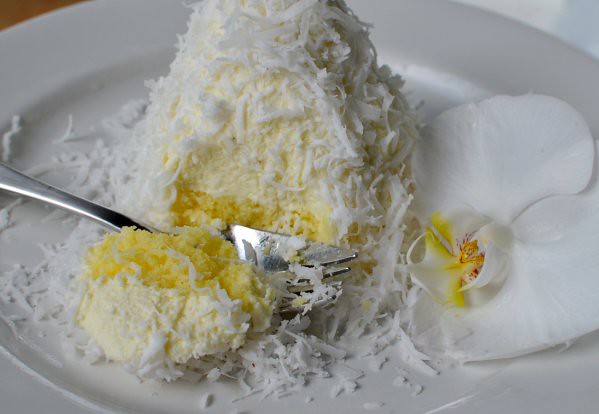
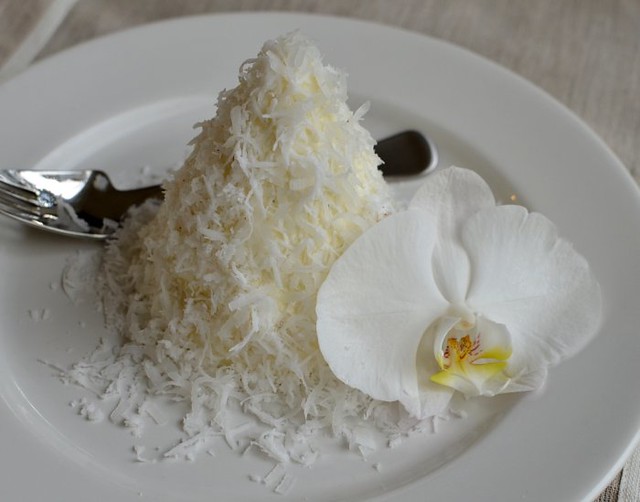
                 A dreamy-looking dessert of light lemon sponge cake layered with lemongrass-scented soft creamy mousse, fresh coconut milk and fresh and dessicated grated coconut.

DSC_7703_1280x848

                        Tastes as gorgeous as it looks and is one of my favorite jellies so far.

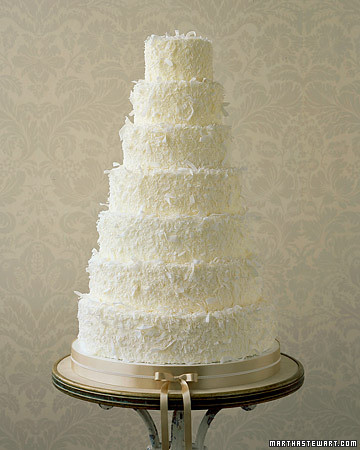
What I really wanted to do was the original recipe from here, a lemongrass coconut ice cream, but I don't have an ice cream maker and making it with a cake mixer will take hours to chill. I'm not fond of mousses generally although I do like tangy fruity mousses. I've also wanted to bake a Southern US coconut cake for years but never got around to doing it. Coconut cakes with all those coconut flakes look so dreamy and soft, perfect for a tropical wedding cake. Coconut cakes just need minimal decoration, such as big white gardenias or in Martha Stewart's coconut wedding cake, no decoration other than coconut. Simply gorgeous.

coconut cake
                                     Martha Stewart's Dreamy Coconut Wedding Cake.

I feel good after making this. Like I said, have always wanted to make a Southern coconut cake and although this isn't the same thing, I love the effect of those white delicate flakes of coconut on the cone. Besides looking gorgeous, this was a delicious piece of cone. The lemongrass as a flavoring for desserts is new to me. Lemongrass is usually used in cooking curries and other spicy savory dishes. Makes me think that there are so many other ingredients that are yet to be brought out of the box. The coconut milk goes well with the lemongrass, giving it the rich wonderful flavor only fresh coconut can give. What I'd do differently if I had more time is bake my own sponge cake. It's Sunday and I just don't have the time to slave in the kitchen. Betty Crocker's cake mix tasted just like regular cake mix. Ugh. It's been over 10 years, maybe more, since I've made a cake from the box and it looks like there's not been any improvement.

Another week to go before the whole Jelliriffic! Get Your Jelly On! 30-Day Challenge ends. I'v learnt a lot about jellies, made many mistakes and ate many jelllies but I'm looking forward to lunching with my friends again without worrying about the afternoon rain and how my photos will turn out or struggle with the slow erratic Internet service. Personally, the best thing about the whole Jelliriffic thing is I've lost 2 kgs in 3 weeks, something I couldn't do the whole year! Maybe jellies are the new Atkins diet.

I hope many of you have bought the Nick Munro mould, proceeds of which go to the Breast Cancer Welfare Association of Malaysia. That is the real reason for the whole Jelliriffic! Challenge, to raise funds for the Association which is a non-profit organisation set up by medical specialists to help women with breast cancer. There's still time to buy a mould. It's a beautiful, shiny piece of designer mould and its versatility has been proven by all the participants of the Challenge. Get it here.

DSC_7591_1280x848
                 
DSC_7603_1280x848

resized4_1280x960
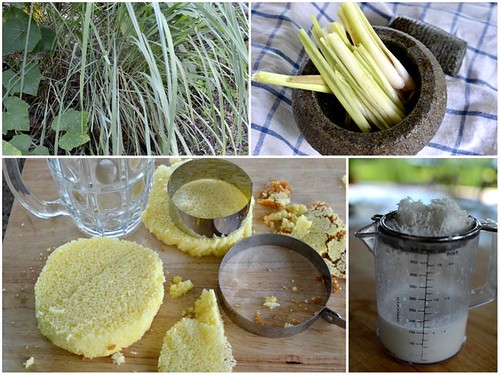
                    The lemongrass is an Asian herb, used mostly in savory dishes where it gives a lemony citrus flavor that's very refreshing. Most backyards inMalaysia, and even in public parks, have a bush or two of lemongrass growing wild.

DSC_7633_1280x848
    Can you imagine a multi-layered cake of many coconut cones decorated with cascading white Sabah orchids? Wow.
Lemongrass Coconut Mousse
1 1/2 cup freshly grated coconut
1 stalk lemongrass, smashed
1/2 cup water
2 tbsp sugar (or more to taste)
1/2 tsp gelatine powder
3 tbsp water
60 ml dairy cream
2 small pieces of sponge cake cut to fit the mould

1. Boil the lemongrass in the water for 10 minutes. Cover to infuse. Let cool. Strain.
2. Mix 1/2 the lemongrass water with the grated coconut, massage well  and squeeze out the milk through a sieve.
3. Dissolve the gelatine powder and sugar in the remaining water over heat. Cool, chill until slightly syrupy.
4. Whip the dairy cream until stiff, stir in the gelatine syrup with a whisk and pour into a rinsed Nick Munro mould stopping halfway to add a layer of sponge. Pour another layer of the mousse and lay a final layer of sponge over the mousse. Wrap and chill at least 3 hours until set.
5. Sprinkle with freshly grated coconut (no brown bits). Serve very chilled.

Related Posts Plugin for WordPress, Blogger...