Wednesday, October 5, 2011

Jelly Kinabalu


"Faith moves mountains"

DSC_5886_1024x678
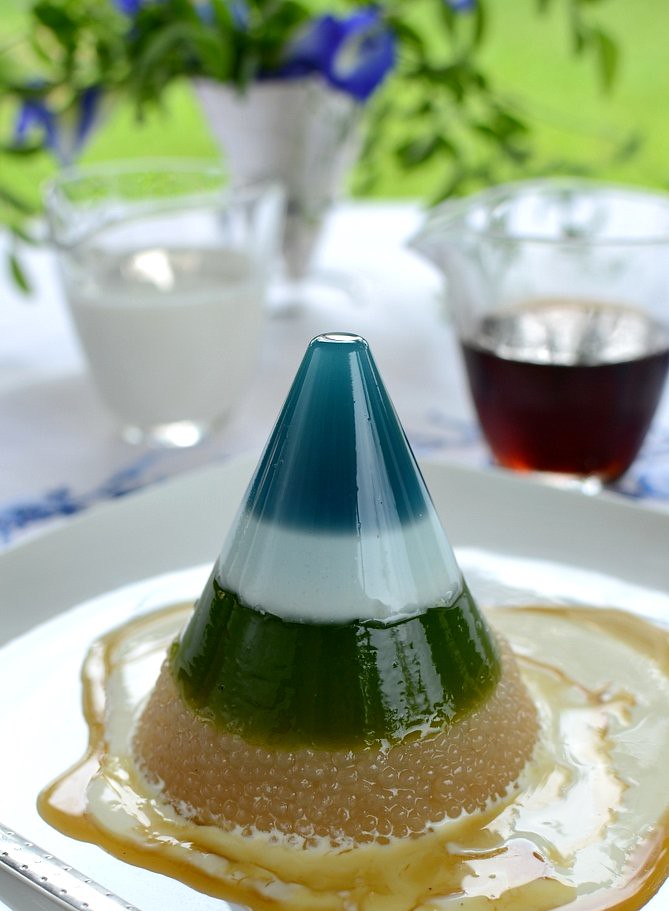
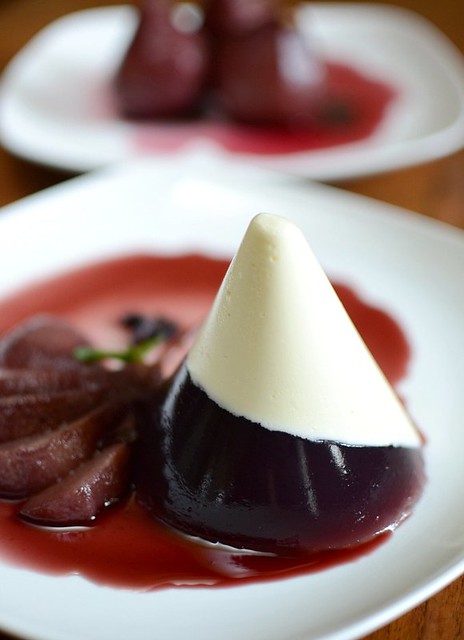
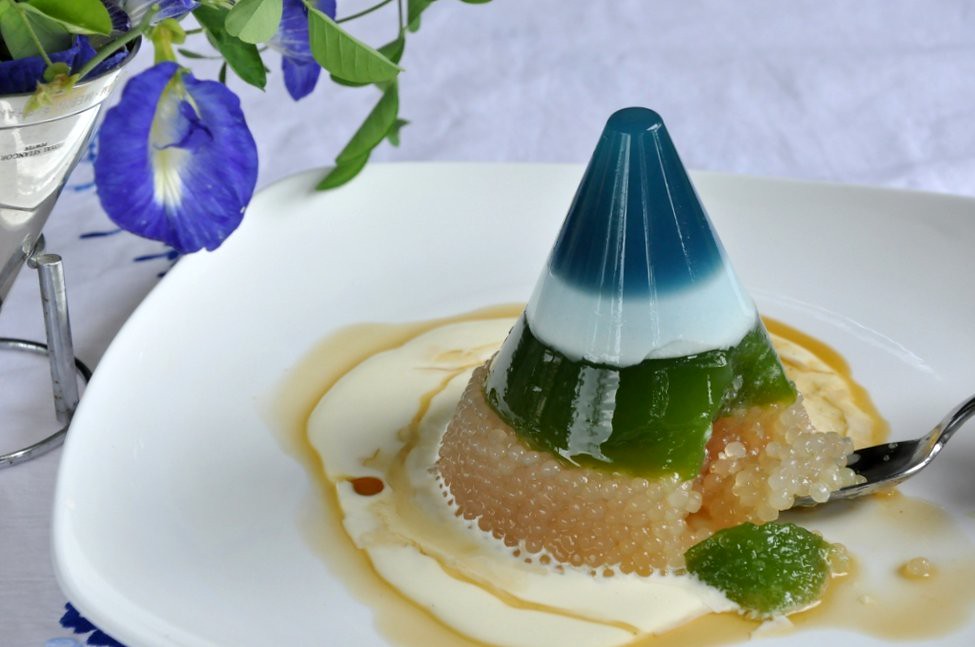
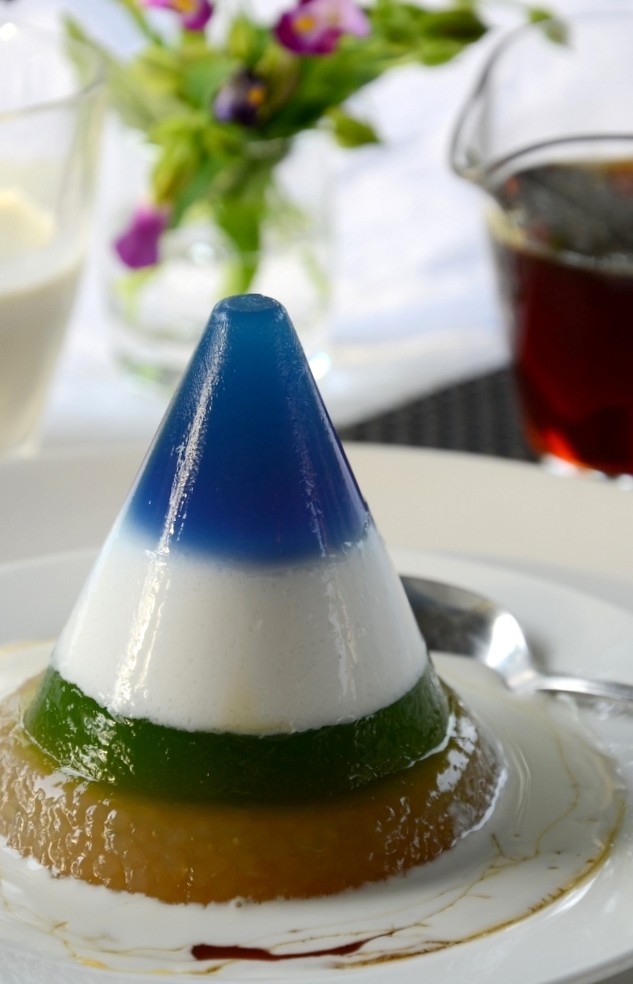
Jelly Kinabalu: Blue layer (the sky) of natural blue dye from bunga telang, white layer (the clouds) of coconut milk, green layer (the padi/rice fields) of pandan leaves and brown layer (the rich land) of sago pearls in gula melaka/palm sugar.


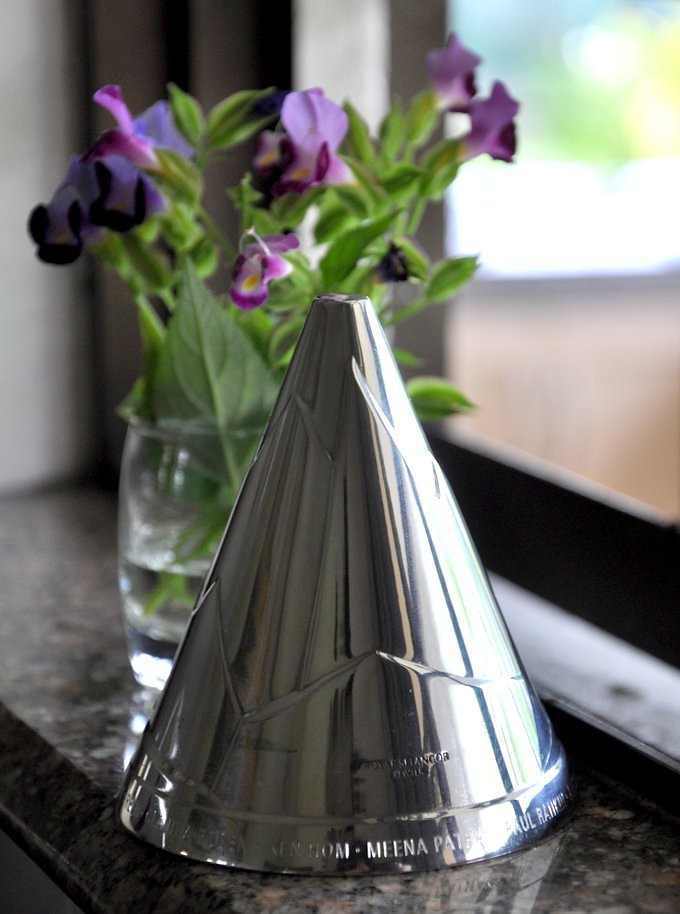
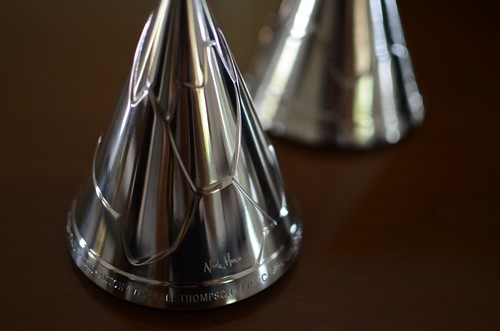
Nick Munro the British designer was inspired by mountains when he designed the jelly mould for Royal Selangor Pewter, organizer of the Jellyriffic! challenge to raise funds for the Breast Welfare Association Malaysia. The mould has inspired me to make Jelly Kinabalu, a tribute to the 5th highest mountain in South East Asia (SEA), Mount Kinabalu, in the most beautiful state in Malaysia, Sabah.


Picture 223-1
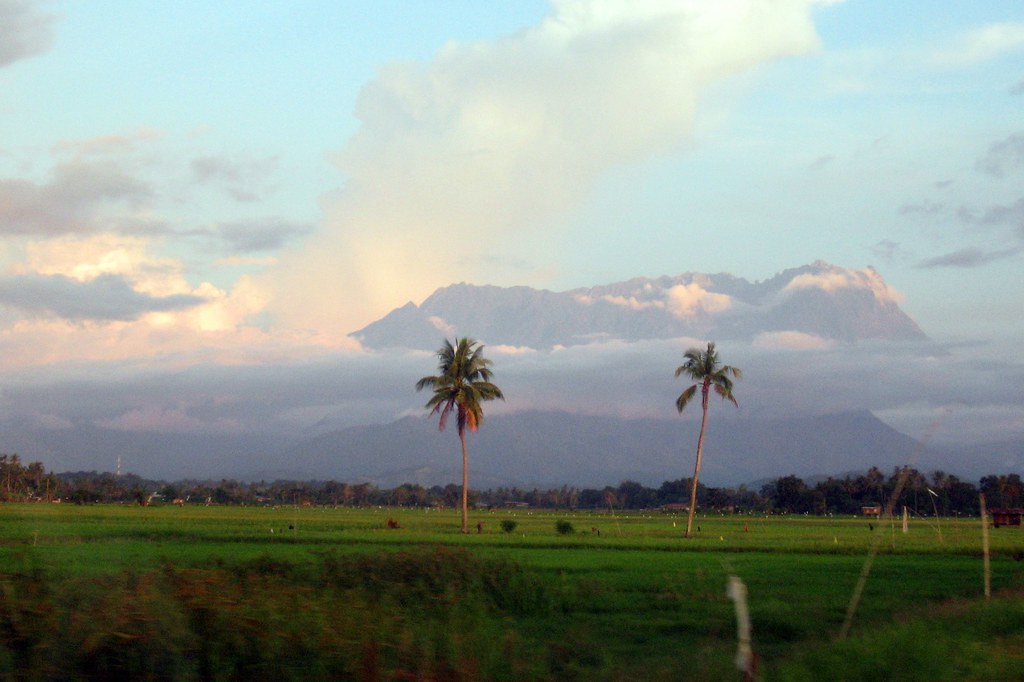
Photo grabbed from here.

Growing up, Mt Kinabalu was known as the highest mountain in SEA. Now we know that the highest is Hkakabo in Myanmar followed by 3 other mountains in Indonesia. I climbed Mt Kinabalu at 17 and never climbed it again although I wish I did. Climbing Mt Kinabalu at the end of high school is a ritual for the people of Sabah (known as Borneo when it was governed by the Brits); you aren't a true Sabahan until you have climbed the mountain. The climb up is arduous, taking two days to go up and down, but the view from the top and the feeling of having reached the peak are unforgettable although every person I know who climbed said that they'll never climb again and a few years later they forget the misery and up they go again. It's like childbirth.

In creating Jelly Kinabalu, I hoped to capture the colors and the feel of the mountain as seen along the drive to Kota Belud and Kudat, towns in the north of the state: blue for the mountain, white for the clouds that hang around the mountain, green for the padi (rice) fields and brown for the rich soil that supports the cultivation of padi by the native people. For the flavors, I've used the bunga telang (butterfly pea, botanically known as Clitoria ternatea for obvious reason) for the blue, fresh coconut milk for the clouds, pandan leaves for the padi fields and sago pearls mixed with gula melaka for the land. The combination was a success--we loved it. Truth is, anything with fresh coconut milk, pandan and gula melaka can't go wrong.

Bunga telang is used in Malaysian cooking for dyeing kuihs (desserts made of starch,sugar,coconut milk and more) and a blue rice dish called nasi kerabu. Pandan leaves are widely used in SEA for making cakes and desserts. I think that pandan flavor should be up there with vanilla, a flavoring made from the seed pods of tropical orchids. Gula melaka is the one of the most underrated ingredient in the world, in my opinion. Plain white sugar is nearly scentless but gula melaka, made from the sap of coconut palm, smells so good that I can't sniff it without squeezing my eyes.  Be careful though because some gula melaka are adulterated with plain sugar so the flavor is not as intense. Fresh coconut milk is another great ingredient. While cows' milk is subtly flavored, coconut milk is rich, creamy, aromatic and sweet. The richness and flavor of fresh coconut milk just can't be canned or packeted so I never use canned coconut milk or powder for making desserts.  Processed coconut milk is fine for savory dishes such as curries because it acts more like a thickener and not so much as a flavoring ingredient as the spices overpower the flavor of coconut milk. Sago pearls have a gentle bite and are fun to eat but are bland and so are perfect for taking on the flavor of other ingredients served with it.

DSC_5818_1024x678-1

resized2_1024x768

DSC_0789 (2)_1024x680
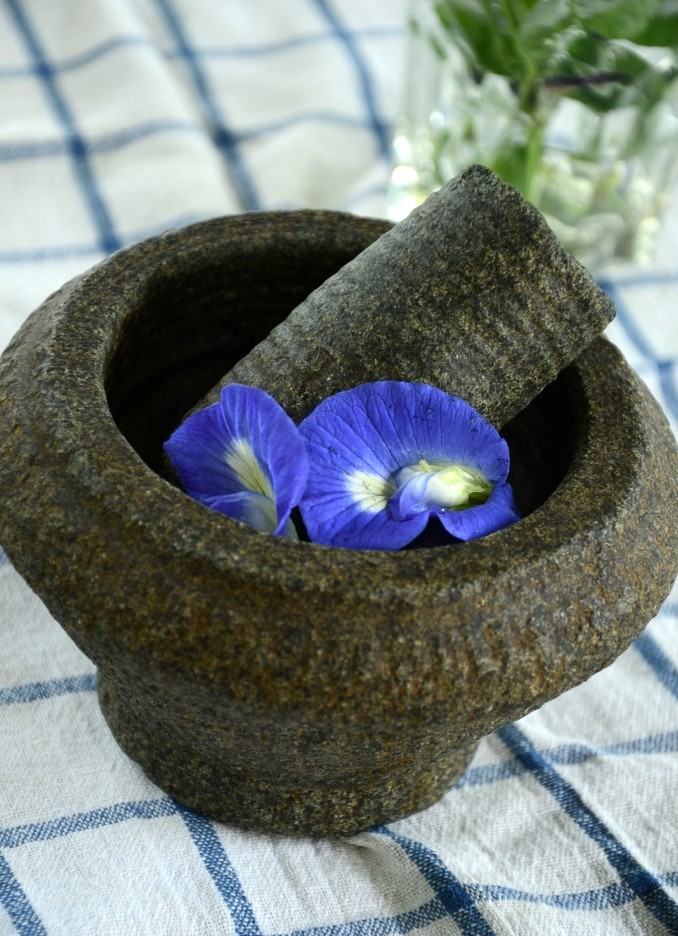
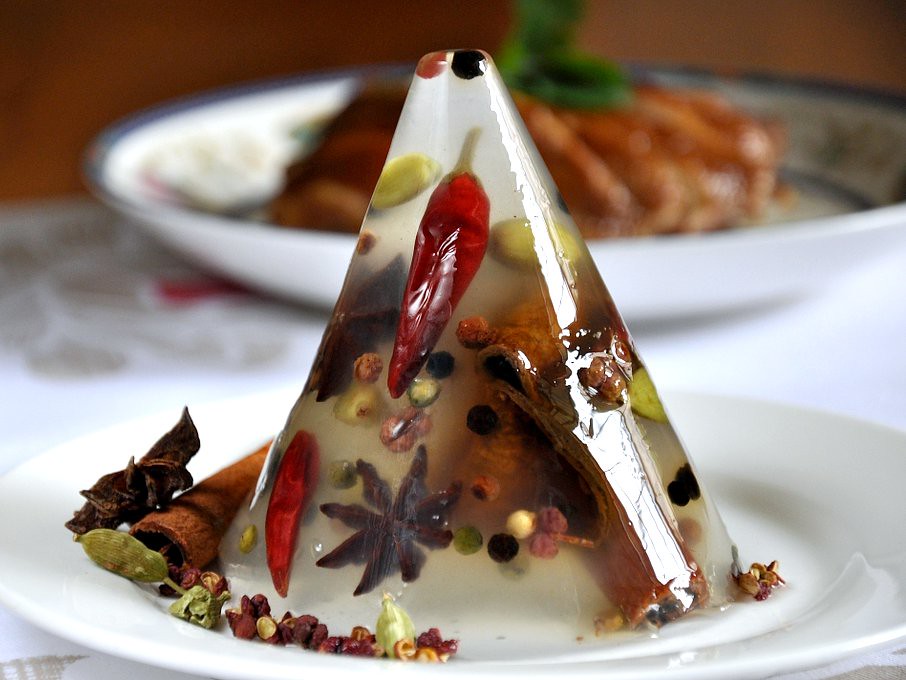
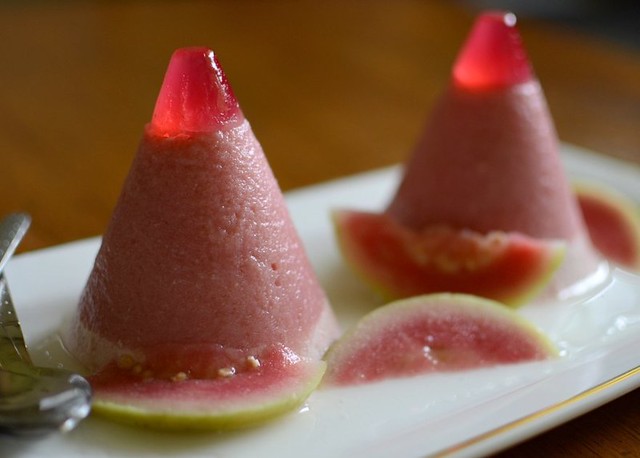
This jelly was made with 3 bunga telang in the top layer and two in the second layer. The blue here wasn't as bright as the first jelly I made (below) probably because less flowers were used and the mortar that I had pounded the flowers in was not washed thoroughly after pounding the pandan.

DSC_5800_1024x678-1
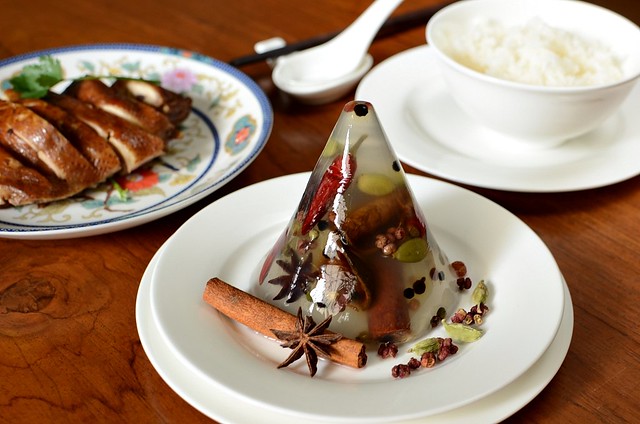
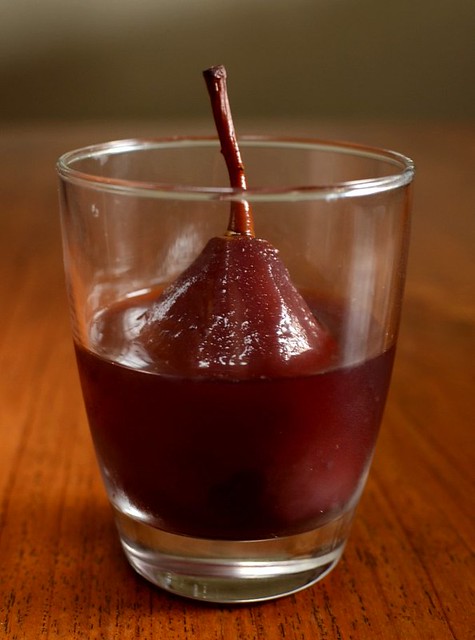
This jelly was made with 5 bunga telang flowers in the top layer and none in the second/white layer. The sago was cooked too soft and that layer spread out under the weight of the top layers. I prefer the white layer here though, instead of the bluish-white layer in the other jelly above.
Jelly Kinabalu
The Mountain:
50 ml water
1/4 tsp agar powder (reduce for a softer agar)
1 tsp (or more to taste) caster sugar
juice extracted from 3 to 4 bunga telang
1) Mix the sugar and agar powder and sprinkle over the water. Heat gently to dissolve. Add the bunga telang juice and stir well.
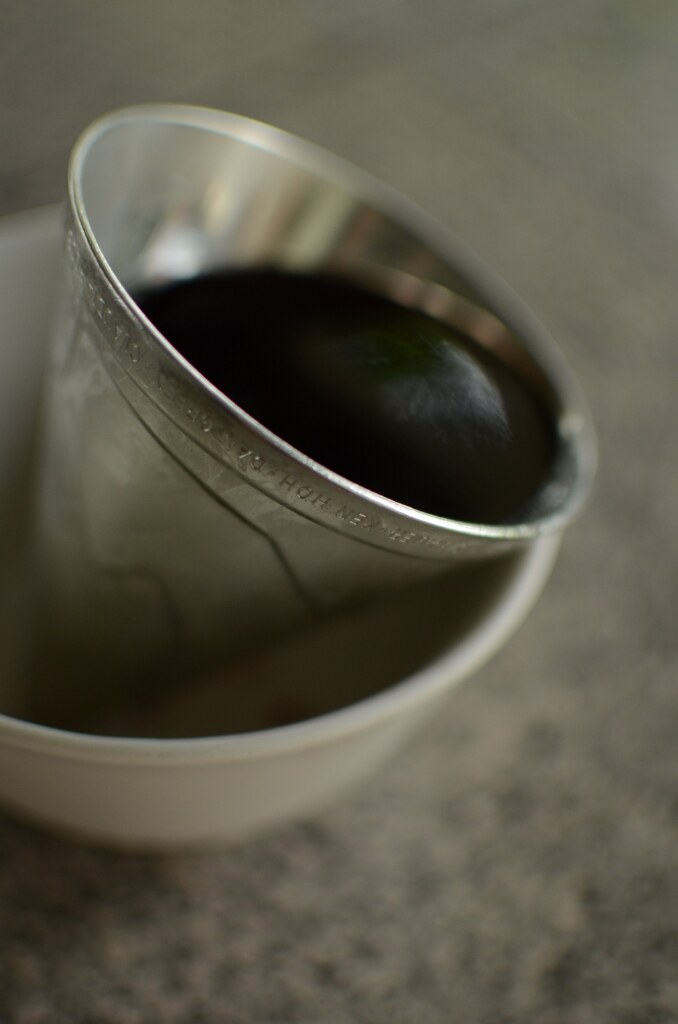
2) Rinse and stand a Nick Munro jelly mould in a mug and pour the liquid agar in through a sieve. You can work on the next layer straightaway because agar sets quickly.

The Blue-White Sky:
50 ml water
1/4 tsp agar powder (or reduce for a softer agar)
2 tbsp of thick fresh coconut milk
1 tsp (or more) caster sugar
2 bunga telang, juice extracted (add a tbsp of water)--optional
1) Mix the sugar and agar powder and sprinkle over the water. Heat gently to dissolve. Add the bunga telang juice if using and stir well. Add the coconut milk.
2) Rinse and stand a Nick Munro jelly mould and pour the liquid agar in through a sieve over the blue layer. You can work on the next layer straightaway because agar sets quickly.

The Grass:
1/2 t agar powder (or reduce for a softer agar)
100 ml water
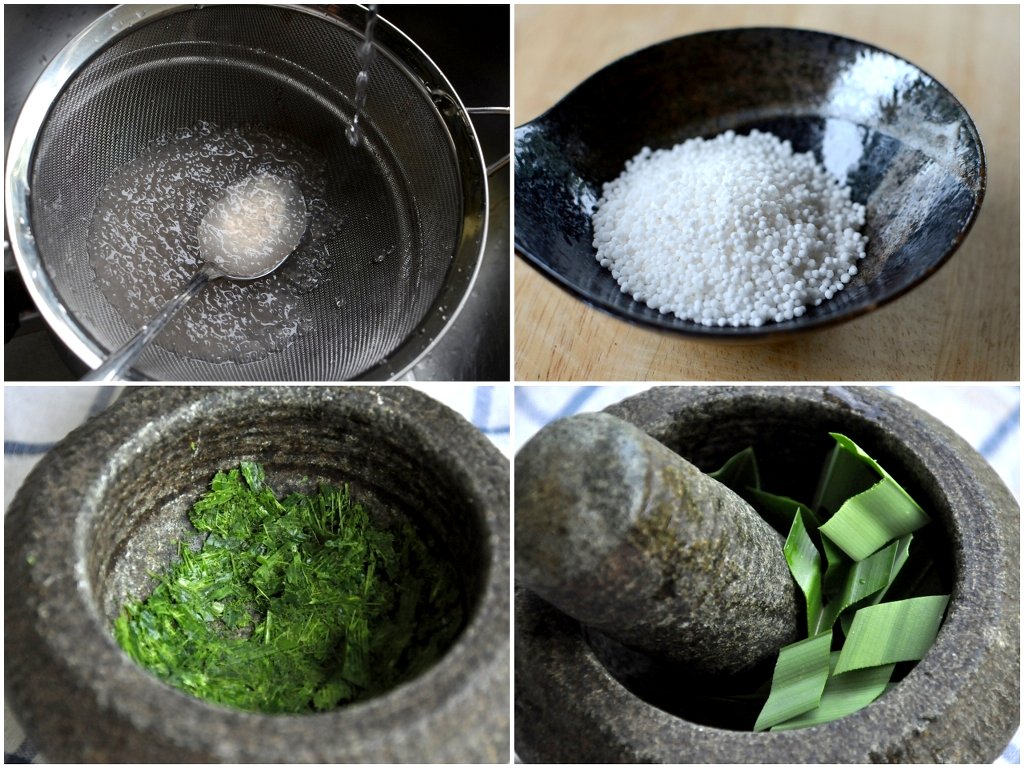
1 small pandan leaf, pounded and 'massaged' with 1/2 the water (50 ml)
2 tsp (or more) caster sugar
1) Mix the sugar and agar powder and sprinkle over 50 ml of water in a small pot. Heat gently to dissolve.  Remove from heat. Add the 50 ml pandan water. Stir well.
2) Sieve over the blue-white layer. Chill.

The Land:
3 tbsp white pearl sago
2 cups water
2 tbsp gula melaka syrup
1) Boil the water in a small pot and add the sago pearls. Stir well so that they don't stick to the bottom of the pot. Boil under a gentle flame until half transparent. Cover and turn heat off. After 10 minutes, if the center of the sago is still white, turn heat on again and repeat.
2) Pour the sago over a sieve under running tap water to remove the melted starch. Stir with a spoon until all the excess starch and water are gone. Do not remove too much melted starch or the sago will not stick together well when cooled.
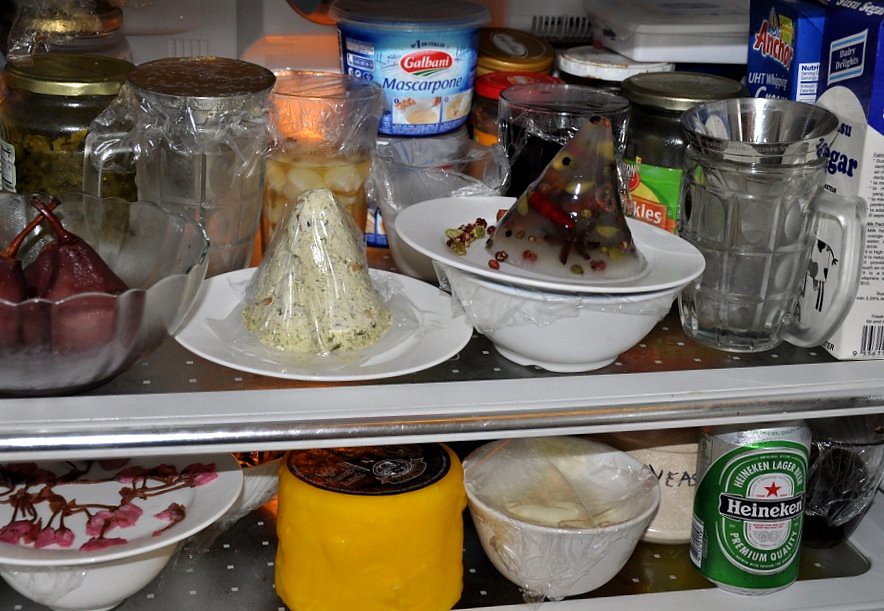
3) Mix the gula melaka in and scoop onto the green layer. Cover with wrap and chill for at least 8 hours.

Serve with extra thick fresh coconut milk and gula melaka.

Note: I found that the juice from pandan leaves will coagulate into minute little specks when heated so do not cook the juice. Agar jellies are preferably firm but if you don't like that, reduce the amount of agar.

Tuesday, October 4, 2011

Spice Pyramid


"The Nick Munro mould has more possibilities than 31 X 10!"

DSC_0802_1024x680
Konnyaku spice pyramid of cardamons, star anise, tangerine peel, several kinds of peppercorns, cinnamon bark and dried red chili. If using water or chicken stock without a gelling agent, the spice pyramid can go into the curry pot.

I think all the other 9 bloggers in the Royal Selangor Pewter Jellyriffic Challenge are just as caught up in squeezing their cerebrum for creativity and imagination as I am. While cooking soy sauce chicken a few days ago, I thought it would be fun to use the Nick Munro mould to freeze all the spices for one of my best recipes, soy sauce chicken. The liquid would be chicken stock and the whole frozen spice pyramid can be kept in the freezer and thrown into the pot when needed. But is HOT here so ice would just melt before I can take enough photos for my post.  But I liked the idea of a spice pyramid and if I can't cook with it, I thought, I can use it as a centre piece for a special dinner.

I have problems using gelatine powder because gelatine jellies go soft quickly in hot weather and are delicate and tricky to turn out from the mould. Agar is a much better choice for hot weather (now I know why agar is the preferred gelling agent in tropical South East Asia besides the fact that it is made from seaweed and not the bones and skins of animals, making it halal and kosher) because it gels at room temperature and doesn't melt even in very warm conditions. Agar, however, is slightly cloudy compared to gelatine. Konnyaku, a gelling agent made from a Japanese potato, like agar, doesn't melt in hot weather and is clear when set. Perfect for my pyramid. I'm telling you, I'm enjoying all these jelly experiments. It reminds me of chemistry and the best part is I don't have to write any chemical equations. The bad part for me is the photography--too stressful. The other drawback is I think my family (and our fridge) is reeling from jelly overload--they have to eat all the jellies, good or bad.

DSC_0816_1024x680
Groaning with jelly stuff.

DSC_0796_1024x680
The mould perks (that's right, perks) up my kitchen window.

DSC_5850_1024x678
Don't you think the spice pyramid looks pretty and fun as a center piece, perhaps for a curry party or in my case, a soy sauce chicken dinner? 

Spice Pyramid
2 teaspoons konnyaku powder (to make a hard jelly)
a pinch of citric acid
200 ml water
spices: cinnamon bark, cardamons, Sichuan peppercorns, star anise, dried orange peel etc

Method:
1. Put the water into a small, thin-based metal pot. Scatter (as wide and thinly as possible to prevent clumping) the konnyaku powder over the water and wait 2 minutes for it to soften. Heat gently, stirring all the time until agar is melted. You can use it straightaway as it will solidify quickly.
2. Rinse and place a Munro mould into a mug. Ladle 1/2 tablespoon of the molten jelly into the mould and leave in fridge to set.
3. Take mould out, place a mixture of spices and a bit of molten jelly just to cover. If you put too much, the spices'll float. Leave in fridge again to set. Repeat until mould is topped up.

Note: Make sure that the mould when full is level or jelly will lean when turned out. You may have to re-heat the jelly as it solidifies at room temperature. If you plan to freeze the pyramid for cooking later, I think using chicken stock is a good idea.


Monday, October 3, 2011

Green Butter


"Green and butter it"


Basil pesto reinvented: Pesto made with butter on toasted baguette. Sweet basil and cherry tomatoes from my garden.

In Europe last year, my hub embarrassed me frequently by requesting for butter everytime we had bread. For this Chinaman, dinner rolls and bread are to be eaten with butter, not oil and vinegar. When we finally got to London, he was thrilled to be served butter with bread without having to request for it and I was too, because good bread with good butter is one of the most delicious and comforting things to eat, especially when you are watching your diet.

Sweet basil grow so fast in our tropical sun that I often give them away to restaurants. This most distinctly Italian herb needs to be trimmed frequently or it goes to seed and die. I was getting a loaf of baguette last Sunday when it came to me: pesto with butter instead of olive oil and the Royal Selangor Pewter Nick Munro jelly moulds for the Jellyriffic Challenge would be perfect for that. And that's how today's green butter recipe came about. Spread on freshly toasted baguette and eaten with a  chicken stew, we think green butter is divine! If you are making a batch of pesto, try frying up some green eggs too. Yummy.

p.s. I used the pesto butter to fry eggs and bread for breakfast and they tasted wow. Pesto never fails and butter just makes it even better!


Green Butter
3 Tbsp of home-made pesto (recipe here)
100 gm softened but firm salted butter (use the best butter)
a small handful of toasted pinenuts

1. Whisk the butter with an electric hand mixer until light and fluffy.

2. Drop the pinenuts and 3 tablespoons of pesto into the whipped butter and fold to mix well.

3. Scoop into the RSP Nick Munro jelly moulds, packing the butter in firmly. Cover with wrap and chill until firm.

DSC_4922_1024x678
Nick Munro designer jelly moulds from Royal Selangor Pewter. Yes, that's me reflected on the mould.


Sunday, October 2, 2011

Poached Pears Wine & Mascarpone Jelly

                                                          "Whine and Dine"

I think there's some confusion here. The good folks at RSP confirmed that it's not necessary to blog a recipe daily for the Jelliriffic! Challenge; posts can be broken up and as long as there's a post daily, there's no contravention of the rules. But every other blogger has put up a recipe post daily so far so I guess I should just keep up. Here's my Poached Pear Wine and Mascarpone Jelly.

DSC_5211_1024x678

                        Creamy mascarpone jelly on top and refreshing jelly of pear-poaching wine at the                       bottom.

DSC_5858_1024x678

I didn't know what to do with the poaching liquid from poaching pears but they disappeared pretty quickly. Everyday, my son Wey would come home from school, plonk a poached pear into a glass and fill it up with the poaching liquid. He said that it was delicious without ice cream or fancy creme caramel. I ate the last one before he did and as usual, the boy was right. It was delicious.

I still prefer Wey's poached pears in their liquid to this jelly but I'll post the recipe anyway just in case you want to serve the liquid this way.

Poached Pears Wine & Mascarpone Jelly
The Wine Jelly:
1/2 tsp (a little bit less if in cold weather) gelatine powder
2 tbsp water
120 ml poaching liquid (room temp)
caster sugar if necessary
1. Sprinkle the gelatine over the water in a small metal pot and heat gently until all the gelatine is dissolved. Cool.
2. Add the poaching liquid to the gelatine, stir well and pour into a rinsed RSP Nick Munro mould. Carefully put the mould into a bowl wide enough to allow the mould to be tilted without spilling. Chill in the fridge.

The Mascarpone Jelly:
1/2 t gelatine
2 tbsp water
1 1/2 to 2 tbsp caster sugar (to taste)
2 tbsp mascarpone
50 ml whipping cream, whipped
1. Dissolve the gelatine powder and sugar in the 2 tbsp water. Cool.
2. Fold the mascarpone into the whipped cream and then whisk in (using a small hand whisk) the gelatine liquid. Pour mascarpone mixture over the wine jelly, cover with wrap and leave to set in fridge. Serve very chilled with poached pears.

DSC_5183_1024x678

Set the mould tilted in a bowl.

DSC_5194_1024x678

                Don't be confused by the cointreau. It overpowered the cheese so I don't recommend it.

Saturday, October 1, 2011

Pink Guava Sherbet Sorbet


DSC_5693_1024x678
Delicious, flavorful and refreshing sherbet and sorbet made with home-grown guava. Look at that beautiful color!

DSC_5389_1024x678
This one's made without gelatine and whisking.

I love tropical fruits for their interesting looks, flavor and texture. The pink guavas from a friend's tree were so intense with flavor, bite and color that I knew straightaway that I had to use them for Royal Selangor Pewter's jelly challenge.

The weather's hot here and icy treats such as sherbets and ice creams are perfect for cooling. A sorbet is a frozen dessert made of fruit, sugar and water while a sherbet has in addition, milk and sometimes cream. Other than tasting delicious and refreshing, sherbets and sorbets are easy to make even without an ice cream maker but, like mine, they will not be as light and smooth. I used 100% fresh fruits, no artificial flavoring or coloring (except for the 'tips') and very little sugar and the sherbet sorbet (I know, sounds like Robert Robertson. Mary Mei Li) was delicious and refreshing, perfect for 35 C weather. Speaking of weather, my biggest challenge is not developing new recipes or having to blog daily. It's taking photos of jellies in hot weather. I've had jellies that won't drop out but then melted when the moulds were immersed briefly in hot water. Today I've had people who are here on holiday drop in when I was taking photos and they stayed and stayed and left when the sun was at its height and the heat the greatest. I've had a day last week when the tail of a storm in the Philippines (north of here) knocked out the electricity for 8 hours and the jellies just sagged within 10  minutes of shooting. Hot weather is the real challenge for me.


DSC_4197_1024x678

Sweet and flavorful pink guavas from a friend's garden.

Guavas are tropical fruits that originated from South America. Here in Malaysia, guavas are found growing by the roadside and in many gardens because they are hardy plants usually brought in by the birds. When I was a tree-climbing tomboy, I used to spend my afternoons on a guava tree, eating the fruits before the birds can get them. Guava trees don't grow very tall or big but my perch was high enough for me to watch out for my father and scramble down the tree as he drove in. If you haven't read a book (in those days, a Mills & boon love story book where the guy confesses to the girl only in the last 3 pages that he loves her and not that hot but catty woman he's always with) on a tree on a balmy afternoon on a tropical island, you truly have missed out.

Anyway, guavas. The guavas I ate were the old-fashioned kind, small with lots of seeds but packed with flavor. Those guava trees have become rare but can still be found in the villages and countryside. The guavas we get now are hybrids from Thailand where agricultural research has turned the fruits into big (apple-sized), crunchy and fleshy fruits with less flavor but that's because most guavas, like other commercial fruits, are picked too early. Eat a guava fresh off a tree and you'll marvel at the sweetness and flavor.  I have a white-fleshed guava tree but don't get many good guavas from it because it is susceptible to bugs. Pink guavas are lovely and highly flavored but have too many seeds although that's how all guavas were before the scientists worked on them.

Guavas are one of those 'superfruits' which pack lots of vitamins, minerals and antioxidants. One guava has  nearly 5 times the amount of vitamin C in one orange: 228 mg per 100 gm guava versus 45 mg per 100 gm of orange. If you are counting calories, reach out for a guava (112 kJ) rather than an orange (192kJ).

P1470952_1024x768
Seedless guavas eaten with a salted plum powder dip.

Guavas are eaten like apples but the ones we get are so big that they have to be sliced up. Most people eat guavas with a salted plum powder dip but I think that's unnecessary salt and sugar.

I wish I have an ice cream machine because they make much better sherbet and sorbet than the ones I made, which were done with a hand blender. Try making some soon. You'll be surprised at how refreshing and delicious pink guava sherbets and sorbets are!

This is my first entry for the Pink Ribbon fund raiser for breast cancer awareness and support. Celebrate our boobies, ladies! (men too).

Pink Guava Sherbet Sorbet

The Tip:
1/4 t gelatine powder
1 T water
1/2 t caster sugar
pink coloring

1. Put the water into a small metal pot, sprinkle gelatine powder over and let it soften for 2 minutes. Add the sugar and cook over a gentle flame, stirring until the gelatine and sugar are dissolved. Using a toothpick, stir in a wee bit of pink coloring. Cool. Divide into two Rick Munro moulds and put into the fridge to set.

The Sorbet:
350 gm of pink guava (after peeling)
1/2 cup water
2 Tbsp caster sugar (add more if like)
1/4 Tbsp gelatine powder (optional)
4 Tbsp water

2. Blend the guava with the 1/2 cup of water into a fine mush. Sieve to remove the seeds. You should get about 500 ml of pulp. Reserve 1/2 cup for the sorbet.
3. Put the gelatine powder into a small metal pot, sprinkle the gelatine powder over and wait 2 minutes. Add the sugar and cook, stirring over a low flame, to dissolve the gelatine and the sugar. Cool.
4. Mix the gelatine mixture with the guava pulp (about 1 1/2 cups), pour into a shallow metal pan and freeze two to three hours until firm and hard at the edges.
5. Scrape the guava pulp into a deep mixer bowl and use a hand blender to turn the pulp into a thickened slush. Divide the guava slush between the moulds, leaving about 1.5 cm for the sorbet. If there's leftover guava slush, add that to the reserved guava.

The Sherbet:
1/2 cup guava pulp
1/4 cup milk
1/4 cup heavy cream
1 Tbsp sugar (or to taste)
1/4 Tbsp gelatine powder (optional)
4 Tbsp water

6. Put the gelatine powder into a small metal pot, sprinkle the gelatine powder over and wait 2 minutes. Add the sugar and cook, stirring over a low flame, to dissolve the gelatine and the sugar. Cool.
7. Mix the gelatine mixture, milk and cream together, pour into a shallow metal plate and freeze for 3 hours.
8. Blend the sorbet until light and creamy and divide into the moulds. Freeze for at least 8 hours before serving. Decorate with cut slices of pink guava.

notes: if you have an ice-cream maker, use that instead of the hand blender. The result will be very ice cream-like sherbets and sorbets. Gelatine powder make softer sherbets & sorbets but I prefer the guava sorbet/sherbet without gelatine.

Related Posts Plugin for WordPress, Blogger...