I've forgotten that baking is therapeutic until I made my best scones yet yesterday. Now I'm ready to go back into the kitchen.
My regular scone recipe makes good scones but the smell of bicarb bothers me although most people don't detect the bicarb like I do. The bicarb also gives my scones a tell-tale yellowish tint. I sniffed very hard at the scone I ate in London, pushing it into my nostrils and really couldn't smell any unpleasant baking agents. So yesterday, when I suddenly wanted to eat scones (I've never met a person who doesn't like scones, never), instead of my regular scone recipe, I used Jessie's (Yi's housemother in her foundation homestay year) recipe which uses self-raising flour and no bicarb. I'd tried Jessie's recipe once without very satisfactory success so for many years I never used the recipe again.
Some people learn the hard way and I'm one of them. I pushed my tray of scones into the oven and saw that the temperature dial was at 150 C, much too low for scones which need a hot oven temp of 220 C. The right thing to do was to take the tray out immediately and wait for the oven to heat to 220 C. But I'm an impatient person and I needed to pick my boy up from school and I didn't trust my helper with my baking so I just let the scones bake. Of course I wasted the whole batch because they turned out like stones, baked hard and golden outside before they can even rise. I baked another batch. This time I not only had the heat right, I also added extra baking powder and butter, just in case.
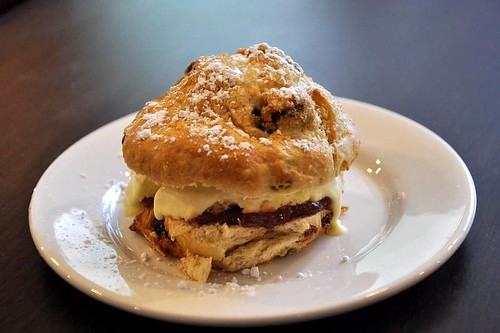
The scones that came out of the oven were a lovely sight, all Louboutins and Blahniks, as high as the sky. I was almost embarassed by their showiness (the scones I mean). Lesson: mistakes can lead to success.
This is THE recipe I'll be using from now on.

My scones rose more than twice as high and were soft, with no hint of baking agents. These were leftovers from yesterday afternoon and still good 24 hours later even without re-heating.
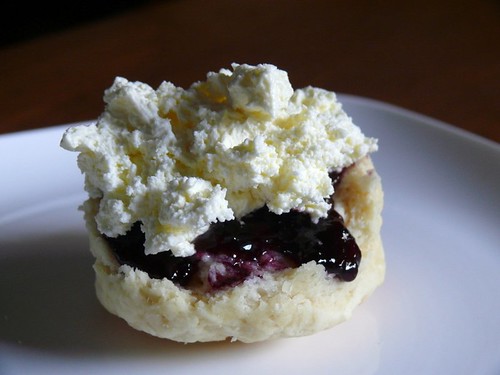
When cutting scones, be careful not to touch the sides because the dough will stick together and the pressed side (right side in the pic) won't rise as high as it should. So even if your recipe is good but your cutting sucks, the scones won't be the killer-heels type. Make sure you use a sharp metal cutter that's higher than the thickness of your dough and cut the scone quickly in one move.
Jessie's Scones, Improved
3 1/2 cups self-raising flour*, sifted with the baking powder
1/2 t double action baking powder
1/4 t bicarb of soda (optional)
1/4 t bicarb of soda (optional)
1 T caster sugar (optional)
50g cold unsalted butter (increased from 20 g), cut into small bits
1 egg, beaten
3/4 cup + 2 T fresh milk
a pinch of salt
1/2 t vanilla (optional)
Serve with: a good jam or preserves and clotted cream or if not available, heavy cream
*For tasty, delicious-smelling scones, the flour must be of good quality and fresh. The flour we get here is usually not very fresh. (sorry, amount was mistakenly first posted as 2 1/2 cups)
1. Oven at 220 C, grease a flat baking tray. If in cold weather, heat the tray up in the oven.
2. Put all the dry ingredients into a large bowl stirring well to mix. You can also put them into a food processor. Using your fingertips only, rub in the butter lightly until the mixture is coarse and loose, breadcrumbs-like.
3. Dig a well in the middle of the ingredients, add the beaten egg, vanilla and milk and use a butter knife to stir and mix well quickly.
4. Gather the dough (should be quite wet) and put it on a lightly-floured work surface and knead lightly, 5 to 6 times until it comes together.
5. Pat the dough out into a flat disc of about 3/4-1"/2-2.5 cm thick and use a cookie cutter (2.5 "/6.5 cm diameter is nice) to cut. You can gather the bits of dough and roll it out to cut more scones.
6. Place scones (be careful you don't touch the sides) on the tray close to each other, brush milk or cream on top and bake10-12 min. Watching scones rise is a joy!
7. Serve warm with clotted cream or whipped heavy cream and home-made jam or a good store-bought preserves.