
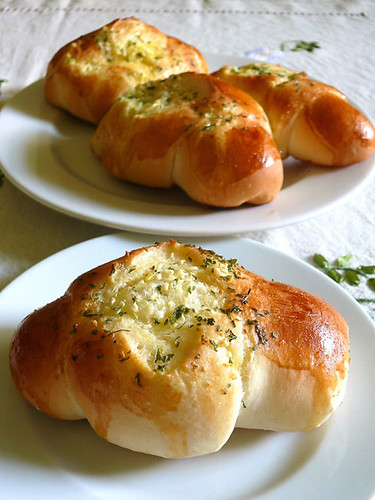
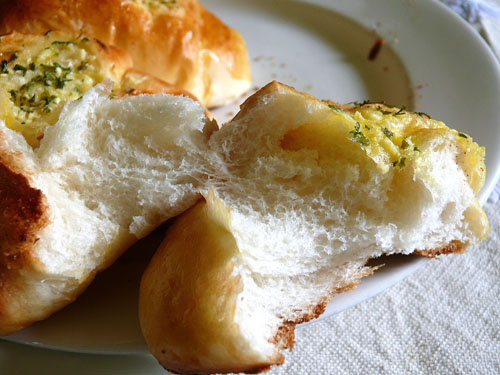
Who can resist a hot, fluffy garlic butter bun? I can't. I eat at least two of these buns each time they come out from the oven and I would have a third if my belly doesn't hurt so much hanging over my jeans.
The dough recipe is the same sweet dough I told you about a few posts ago. You can use this recipe to make all the different buns and rolls you can think of. Garlic butter spread is cheap and easy to make, and you can go further by adding grated cheese or a hot dog in the buns. Someone told me these buns are better than those from the bakeries, and I'm like "Of course they are!" Don't just read about it, try this out today. Don't wait. I may out of exasperation withdraw my recipes if they aren't put to use.
The Dough
500 g bread flour
1 1/2 t dry active yeast
50 g castor sugar*
1 t salt
1 medium-sized egg
50 g cold butter
260 ml cold water (lukewarm water if room temp is low)
*reduce or increase according to the type of bread you are making
1. Put all the ingredients into your mixer bowl and knead at medium speed for 12-15 minutes., or even longer (20 min) but do not let the machine over-heat. The dough will be very wet and sticky at first and gradually becomes less wet but still sticky. Take out the dough hook, cover the bowl with a cloth and leave in unheated oven for 1 hour until all puffed (they always say until dough doubles but really the dough triples).
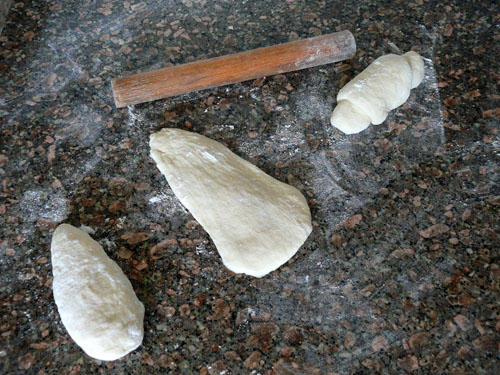
2. Punch dough down, lift out of the bowl and put it on a lightly floured counter. Cut into 50 g pieces. Roll each piece into a smooth ball, then into a cone, then flatten the cone-shaped dough into a longish triangle and roll up from the wider end:
3. Place each rolled piece of dough onto a greased and/or well-floured tray and leave in unheated oven to proof for 1 hour or until more than doubled.
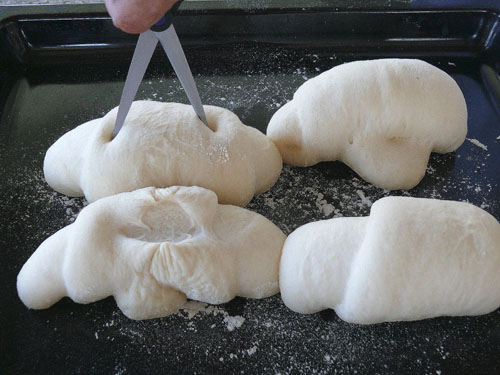
4. Brush the top of the buns with beaten egg yolk, snip down the middle with a sharp pair of scissors (careful or the dough will deflate), spoon some garlic butter onto the slitted area and place in a preheated oven at 200 C, for 8-10 minutes.
Garlic Butter
100 g salted butter
1 bulb garlic, chopped very finely
1 T fresh or 1 t dried parsley
-whisk it all together with a small hand whisk.
-add a pinch of salt if like (I don't; we are on low salt diet)
p.s. I made the buns at night and saved some of the proofed dough in the fridge overnight to make these 4 buns the next day so that I could take better photos in daylight. You can keep the proofed dough (after first proofing) for more than 12 hours in the fridge.
23 comments:
It's late and this looks too good!!!
Kim
kim: me too, hungry, it's late...my girl just called to speak then she said she's sleepy so i'm up n at the comp...
Ah yes, this recipe that you have instructed me to try out. Paiseh, haven't got the time to really try out. But once I do, I will definitely blog about it and notify you. :p
And yes, omigosh, its so late already!!
These look magazine-cover worthy -- very nice. I'm going to try doing that with scissors the next time I make dinner buns, neat idea :).
those garlic butter buns certainly tasted heavenly :) will definitely try them soon once we get the oven installed.
Hi Terri,
My family loves garlic bread, this garlic butter buns look just as yummy. You are full of talent.
Hi Terri, i'm from Spore. Cold water required for the dough, is it the temperature of cold water from the fridge or tap water/room temperature water? Thks
Garlic Butter Buns looks so delicious.
I just want to grab from the picture and eat it at once.
Thank you so much for posting the recipe.
see you next post.
-Green
www.ahacook.com
johnathan: make sure u do it!
sophie: thanx, hope u make them soon :)
b: i can come by n help :0
jo: thanx dear
anon: yes, it's chilled water from the fridge. bc our weather is so hot, the cold water will firm up the dough so tt it won't be such a messy mess. in cold countries, they always recomend warm water so tt the yeast can be activated, but we don't need heat, we have plenty! this is a tip i learnt at a bread bakery years ago.
green: thanx, very nice blog u have!
Hi Terri,
Once again, thanks for sharing a wonderful recipe. I've been on a quest for a "fail-proof" bread recipe or least one that's forgiving to beginners and this looks like it. Would love to try it out, although I don't have a heavy duty mixer. Can I try making it with a food processor (like Magimix)?
Hope you could help give some pointers.
Thanks and grateful as always,
Jackie
jackie: always happy to help :0
magic mixer shd do the job, but make sure u don't overload the machine. can it take half the recipe? tell me how it turned out!
Looks lovely...i could tell how light and tasty it is. AHh....i shall show you my biggest failure in my blog soon....a swissroll tat turned out into thick 'qq' crepe!
Gosh this looks soooo good!! must try..my kids wll love it.
pp: u r back in kl already? hey, airasia today is offering fare to melbourne at RM188! return is RM700 net. crazy. i told my hub not to buy the kids' return fare so soon. now the fares are more than half of what he paid :(
zurin: make for them, make for them!
Aunty I've Tried... Very Soft Indeed!! I made 3 "Faces" Buns for My Little nephew and nieces ... Another Success After Love Shape Pizza for Mother's Day!
Thanks aunty ...
Hi Terri.
I made the buns a few days ago and they were terrific! SO good out of the oven. They dried out a bit the next day so if you have any tips on keeping them soft, I'd be grateful. I just left them out in the open.
Anyway, thanks so much for the recipe! I included it in my blog.
aww, that looks absolutely delicious!! I am so hungry just by looking at it.
Thanks for sharing. Will definitely try it out.
Hi Teri,
Does t means teaspoon and T means tablespoon?
Thanks
myfoodadventure: aunty very happy ur bread making turned out great.
tummywise: hmm, they shouldn't dry out a lot. put them in a plastic bag n seal properly like i do, no prob next day.
iva: tried making yet?
steph: yes babe, t = teaspoon, T = tablespoon. me too lazy to type
Hi Terri,
Can I use instant yeast instead of active dry yeast? I am very skeptical about using the latter, since I have had several failures with recipes that requires them. Instant yeast seems to agree with me more.
Btw, I love your blog.
Rach
Post a Comment