Showing posts with label Pasta N Pizzas. Show all posts

Monday, August 15, 2011

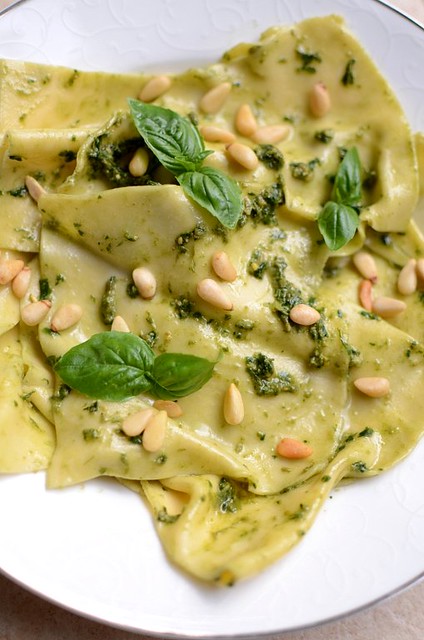
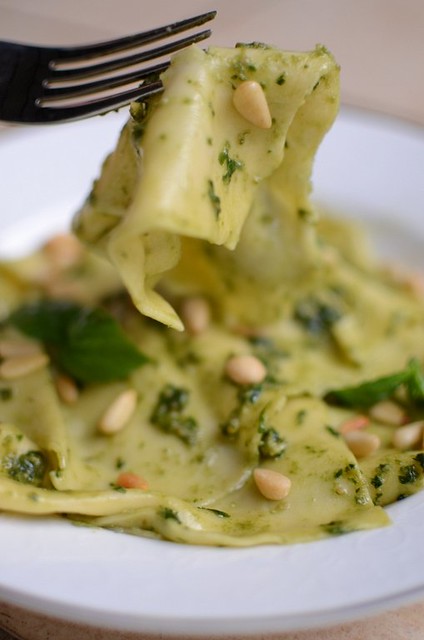
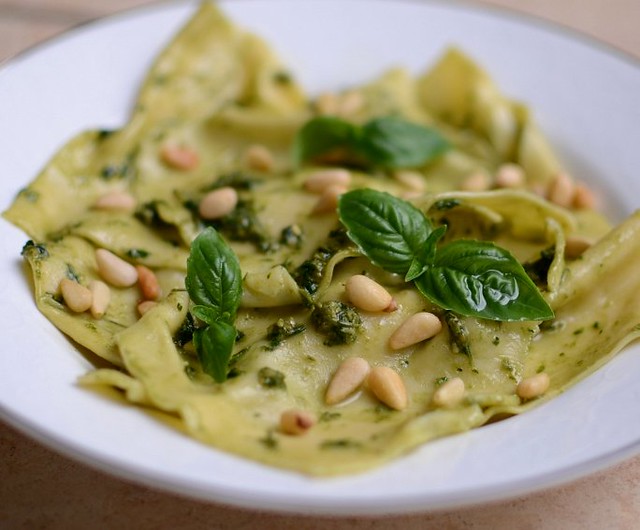
fazzoletti di seta al pesto

DSC_2705_509x768

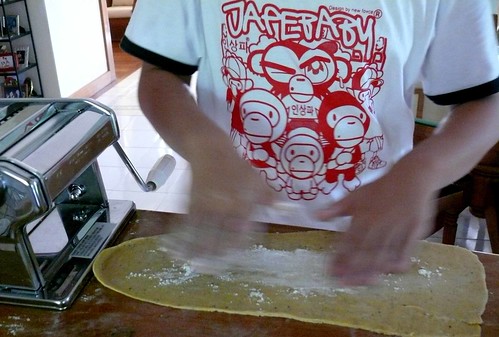
Silk handkerchiefs with pesto, something I've always wanted to make but never did because making my own pasta seems like a lot of work. But it really isn't, once you get past the kneading. Passing the dough through the pasta machine is fun. I enjoy holding the smooth pasta that rolls out of the machine. I feel sort of triumphant now because I've only ever made pasta twice before in all these years. As you know, my son Wey is the pasta guy in the family while son Ming is the risotto guy so I don't bother with these two dishes.

But I have 12 egg yolks in my fridge from my pavlova experiments and I made a jar of pesto last week with my last bit of pecorino cheese (love it!) from Rome (and here). Pasta with pesto is a dish we often eat at home because there's always a jar of home-made pesto (there's always basil in my backyard) and Wey loves pesto. I thought pesto is the same with any pasta but I was wrong. Fazzoletti pesto is very delicious. I'm surprised. One handkerchief is a silky mouthful and I prefer fazzoletti pasta to trofie because trofie is too fine in the mouth. I don't like things that are too fine and give a 'loose' mouthfeel, such as quinoa and couscous. Rice is different. Long grain rice sticks together although not as much as short grain or glutinous rice. Dutch rice is bad, tastes totally 'loose' and impossible to pick up with chopsticks.

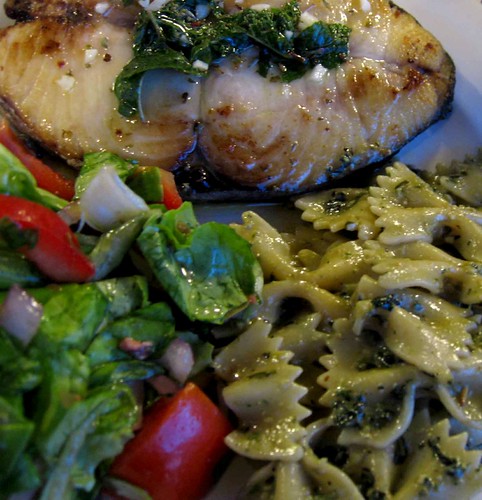
When cooking the fazzoletti pasta, it's best to put them into the boiling water piece by piece, not in a handful like I did. If you grabbed a handful, the hankies'll end up crumpled and looking like used hankies. Also, make sure your pot is big so that the hankies don't get squashed. I served the fazzoletti with thyme-flavored pork schnitzel, a green salad and a beautiful inexpensive Chenin blanc and we were blissfully contented.

This dish is best served immediately because the pasta is so thin it dries and hardens quickly.
DSC_2690_1024x678

DSC_2698_509x768

Fazzoletti Di Seta Al Pesto
300 gm fine ordinary flour, sifted
2 medium eggs + 3 yolks (or 3 large eggs)
pesto
basil leaves & toasted pine nuts for garnish
1. Knead (machine or hand) until smooth. The dough will be very firm. If you find it hard to knead, you can add a spoonful of water or 1 teaspoon of olive oil like I did.
2. Cover and rest the dough for 1/2 to 1 hour.
3. Dust the work surface with some flour, break 1/4 of the dough and pass it throught a pasta machine using the largest setting and gradually proceed to the smaller settings. I ended with No. 5 on my machine but I think No. 6 is better, thinner. The pasta sheets should be thin or they'll not live up to their name. They also should be small or they'll be too much of a mouthful. Coaster size is good.
4. Boil a large pot of water, add salt (quite a bit) and drop the pasta in, making sure they are flat and not crumpled. They need just a couple of minutes; cook them until just el dente.
5. Pour away the water, leaving about 4 tablespoon (or reserve some in a bowl) and add about 5 tablespoons or more pesto, using more pasta water or EVOO to toss if necessary. Toss well, plate up and garnish with fresh basil and pine nuts. Serve hot/warm.

Monday, April 4, 2011

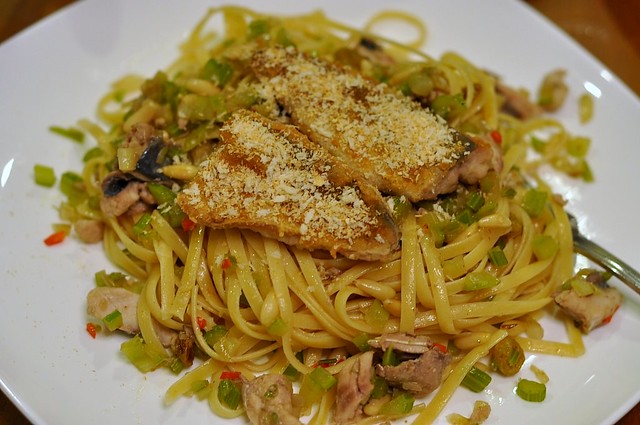
Pasta With Fennel & Sardines

DSC_0504_1024x680

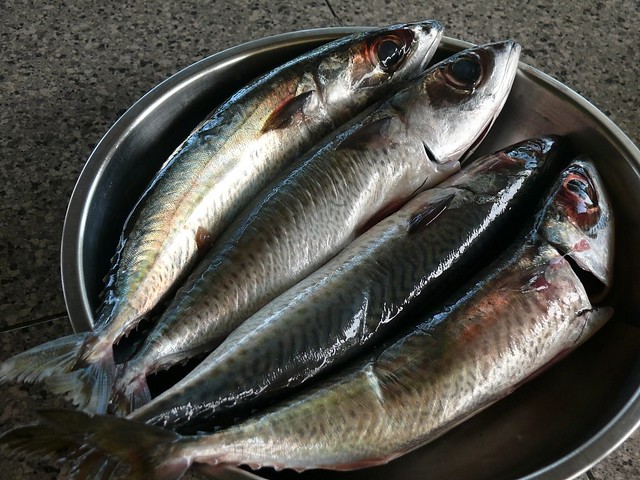
I've only ever eaten canned sardines, never the fresh ones. And I never knew we have fresh sardines in our markets!

The fish monger (seems like such an antiquated word) insisted that sardines taste better than the big-eyed scad (tai ngan chee) and the yellow-tailed scad ( wong mei chee) that I was checking out and that I'd go back for more. He was absolutely right. Sardines are savory-sweet with finer and moister texture than the scads, small fish that we shallow-fry in oil until crisp and dry outside. Small fried fish with rice and a dip of hot chili, lime juice and soy sauce were something I suddenly longed for one day last year when I was on a 2 1/2-month holiday in Europe.

I've been back to the market many times but never found any more sardines because according to the fish mongers, the sardine season is short and most of the sardines are bought by the canneries. I don't give up though, and if I see fresh sardines again, I'm going to buy a ton of them for freezing. Now that I've eaten fried fresh sardines with rice, I can't go back to the scads.

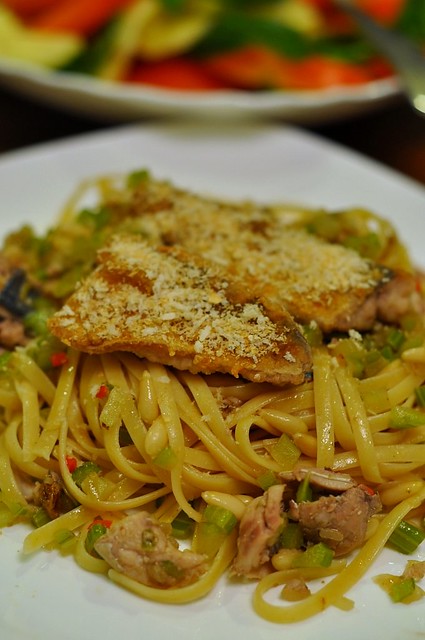
I've been saving my remaining sardines for this classic Sicilian pasta dish but unfortunately, I couldn't get any fennel. Enough of waiting, I thought, so I substituted fennel with celery. One day when I find fresh sardines and fennel, I will cook this again but I will cook the less classic but popular version, the one with tomato paste. That is, if I can save enough sardines for it because I think shallow-fried sardines with rice, soy sauce and lime is still my favorite way to eat small fishes such as sardines and scads.

You can find the recipe for this dish in most Italian cookbooks. I based mine on the recipes from Mediterranean by Jacqueline Clark and Joanna Farrow (which said to use dill, not fennel, and I wonder if it's a lost-in-translation thing) and also Jamie Oliver's Jamie's Italy. However, I later found another recipe that seems to taste better because anchovies and saffron are part of the ingredients. No wonder Yi said something seemed to be missing in my version of pasta con sarde. The kids, I can't fool them anymore.

The following recipe is an adaptation of the recipe I did, plus some improvements that I think will make the dish better.

P1470461_1024x768

DSC_0506_1024x680

Pasta Con Sarde
600 to 700 gm fresh sardines
1 large fennel, bulb finely chopped & feathery tops reserved & chopped
Olive oil
2 onions, finely chopped
5 anchovies fillets
1/2 cup pine nuts
1/2 cup golden raisins, soaked in hot water
1 heaped t fennel seeds, coarsely bashed up
1/3 t saffron in 3 T hot water (optional)
salt & pepper to taste
2 or 3 small fresh red chilies, finely chopped (optional)
500 gm bucatini or spaghetti
1/2 cup breadcrumbs, dry-fried in a pan until golden

1. Clean sardines, remove the heads and fillet them. If big, cut each fillet into 2 lengthwise. Pat them dry with paper towels. Cut 2/3 of the sardines into 1" pieces. Leave remaining whole. Dry-fry the breadcrumbs in a frying pan until golden.

2. Lightly coat the whole sardine fillets with plain flour and fry them in a frying pan with some olive oil until just cooked. Reserve.

3. Add 4 T oil into the pan and fry the onions, fennel, fennel seeds, anchovies and chili, cooking gently in medium heat low until the anchovies are almost melted, about 15 to 20 minutes. Add the cut sardines, the pinenuts, the raisins, the saffron water,  the saffron water and and cook another 15 to 20 minutes. Season to taste. Mix in a drizzle of EVOO.

4. Meantime, cook the pasta in salted water until el dente. Remove, mix in 1/2 the sardine sauce and 2 T fried breadcrumbs.

5. Divide the pasta into 4 or 5 portions onto individual plates, top with the remaining sauce and garnish with the whole sardines, remaining breadcrumbs and the chopped fennel tops.

You can also add 2 T tomato paste and 3 Roma tomatoes that have been peeled, deseeded and chopped at step 3. This sounds tastier and I will do this next time I cook this dish.

Sunday, August 15, 2010

They Can Cook

I hear you, I hear you. You are sick of reading about my Europe trip because that's all I blog about since May. And just when you thought your prayers were answered when you read about the loss of my photos because of some copy error and memory card malfunction, I am telling you now that my prayers were answered instead because the technicians working on the cards said they need the weekend to transfer all my photos into a CD because there are thousands of photos that are recoverable. I am keeping my fingers crossed that the missing photos are among them. So it looks like I can continue to bore readers until September after which I go to Shanghai and have more travel tales.

Earthlings have learnt that everything on the computer is recoverable, thanks to Edison Cheng. But did you know that data on memory cards are recoverable? The photos you took of your private moments/anatomy are recoverable even if you've deleted them so don't be so naive, boys and girls. And be careful too about the photos on FB because prospective employers hire people to check on your raunchy parties/lifestyle photos/nasty comments you make about your present parents/boss/exes.

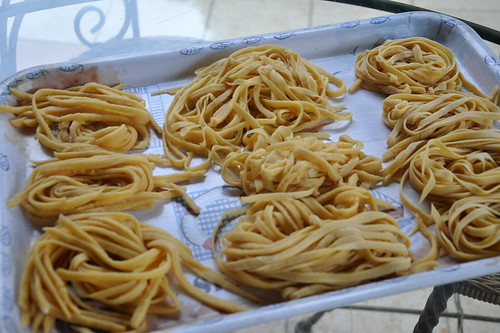
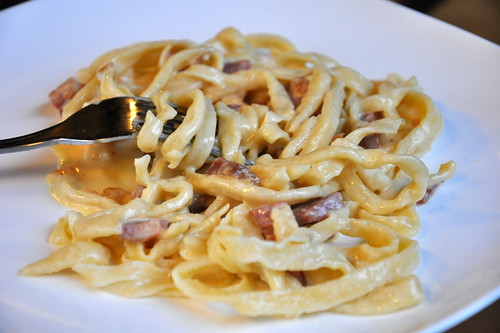
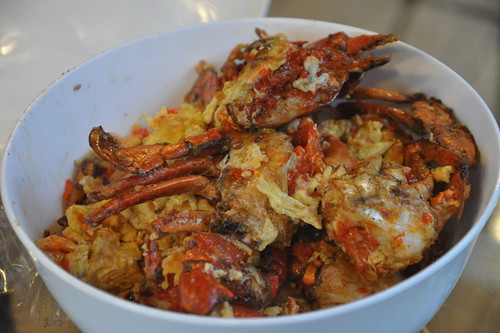
Before his sister left for Melbourne to finish up the last 4 months of her master's degree (she seems to have been in uni forever! Time to get out and earn $, Yi!), Wey and sis had a cook out. Wey made his own fettucine carbonara with the pancetta I bought in Pisa while Yi cooked up some crabs with eggs and ginger, a dish her aunty in Shanghai impressed her with.

DSC_0732
He made these pasta effortlessly and quickly too.

DSC_0733
Wey likes his carbonara with cream. I prefer mine without (less calories) but this was perfect.

DSC_0738
Yi's crabs with eggs and ginger was very delicious. I need this recipe, Yi.

P1450377
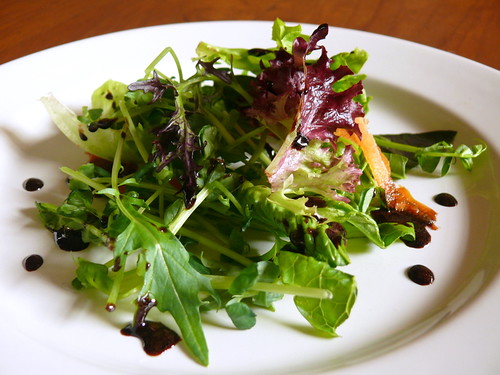
I now prefer my salad with balsamic glace which is  slightly thicker and sweeter  than balsamic vinegar.  I've tried making balsamic glace a couple of times and sometimes the result is good sometimes not. Basically just boil balsamic vinegar with a bit of sugar or even honey until it's slightly thicker. You can add olive oil or serve it separately. I much prefer it to plain balsamic vinegar which can be too sour.

Not to be left out on the culinary scene, my son Ming won Monash University's first Masterchef Student Competition last Friday. From a pool of about 20 participants, 5 made the finals. Ming called me the day before his semi finals to tell me about the competition and asked for advice on burgers. Two days later was the finals and he didn't call to discuss his menu or recipe. I'm glad he didn't consult me because he was good enough on his own and came up with lamb cutlets seasoned with rosemary and marinaded in--prepare for this--coca cola! He said the coke tenderized the lamb and gave it some sweetness. Way to go, Ming! Now you still have to finish your degree in Engineering. And please get some dancing lessons.

I hope Hub now feels pressured to cook more than his egg and garlic fried rice, which the kids love. Growing up, the kids violently rejected his tuna and peanut butter sandwiches and he found the only thing he cooked that they would eat was his fried rice.

Wednesday, May 5, 2010

Pizza Fritta (Yes!) & A Monte Cristo Sandwich (No!)

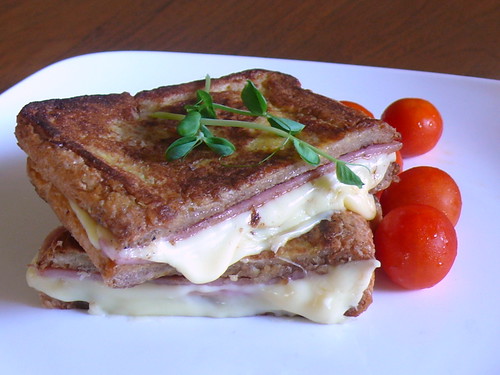
P1400039-1
A version of the Monte Cristo sandwich not dipped in batter and fried.

Don't believe anyone who tells you a Monte Cristo sandwich is like a croque monsieur because it's not. A Monte Cristo sandwich is a ham/turkey and cheese sandwich dipped in an egg, flour and milk batter and deep fried. That sounds like typical greasy American diner fried food which can be very tempting to some but gross to me. I searched for a healthier version and found it in Saveur. The bread is French-toasted, then sandwiched with slices of ham, turkey and cheese and then pan-fried. Because the recipe said to press the sandwich while frying, the resulting sandwich tasted like the heavy compressed piece of French toast that it was. Disappointing so I won't give you the link to the recipe. Next is a totally thumbs up recipe.

I had leftover dough from the breakfast pizza yesterday and when he came home from school today, Wey wanted to make his own pizza. He said he would fry it and then grill it, according to page 59 of Jamie Oliver's 'Jamie's Italy'. The boy reads cookbooks at bedtime and has stored up many recipes to try.  I was doubtful but didn't want to interfere with his culinary creativity/curiosity so I left him alone in the kitchen. A while later, he came to me with this:

P1000088
Pizza fritta knocked my socks off (sorry, that's how I felt too Jamie except I wasn't even wearing socks)

This is pizza fritta, fried pizza. I thought it tasted better than baked pizza although it was oilier. The golden fried pizza bases looked like naan and yu ja gui but were pillowy soft. Absolutely delicious! According to Jamie, this is how the first pizzas were made: fried in a pan and then grilled to melt the cheese.

Just roll your dough on a lightly floured surface into a small piece (say hand-size) about 1/4"/0.5 cm thick,  it doesn't have to be regular circle, let it rest 10-15 minutes and fry in 1/2 cup of oil in a small pan. Turn over afer 30 seconds and fry another 30 seconds, remove and place on a kitchen paper to catch the oil, then put on a baking tray. Smear each base with a spoonful of tomato sauce, top with (buffalo) mozzarella and dried oregano or basil leaves and put  under a hot grill (Wey used the toaster oven grill) until the cheese is melted. Wey was resourceful and used whatever ingredients he found in the fridge. Thanks to Wey, I've discovered pizza fritta!

Thursday, February 25, 2010

Ming's Pasta

P1320195
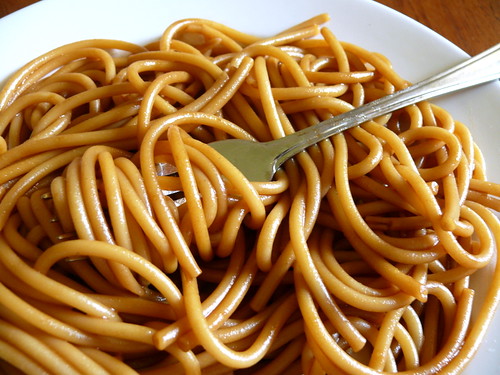
Plain can be tasty: pasta tossed with Bovril and butter, a dish not for the faint of weight.

I realise that I don't have any food recipes to blog since it's still CNY and I'm still eating out, at restaurants, friends' and my MIL's. So before all my readers run away, here's the world's simplest way to serve pasta according to my son Ming who cooked it up, literally. All you need is pasta, preferably the ones with a hollow center like macaroni and bucatini, Bovril and the best butter. That would be Lurpak or President butter here but if you can get Kerrygold, which we used to get, that's good too. A cheaper but still good butter is Anchor block butter.

This is a pasta dish for hungry teenagers whose moms are lazy/too busy/ran out of money/all the previous excuses/reasons.

Ming's Pasta

1. Boil your pasta in salted water as usual (and never add oil, it's unecessary and makes the pasta too slippery for the sauce to cling) and to the texture you like. Drain well.

2. When still hot, add lots of butter and Bovril. That's it. A minestrone or tangy seafood tomato soup goes well with it.

Thursday, December 3, 2009

Re-post: Rocket Parma Ham Pizza

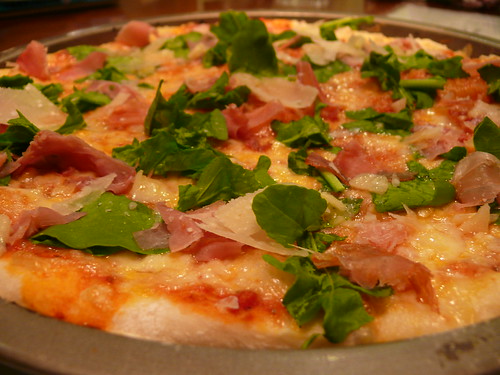
P1060441 
This is my favorite pizza, for its simplicity and taste. If you don't try it, you loose out because I'm so reluctant to give the recipe away that I might delete this post after a week!! Have made pizzas a long time and never quite got the crust right. Then Wey had his 12th birthday at this popular pizzaria and I picked up a few tips from watching the cook because the party was a 'make-your-own-pizza' theme and everybody got to make their own pizzas. Two things I learnt: 1) the dough is made the night before 2) the oven is hot as hell, something home ovens can never achieve, which is why our crust can never crisp perfectly. One of my problems in making pizza is I haven't mastered the art of rolling and pushing the dough against the edge of the counter so I use a rolling pin but the dough would always spring back. To overcome that, I used plain flour which has little gluten so it's less elastic but that doesn't give a strong crisp crust. The trick as I've discovered at Little Italy is to use bread flour but make the dough the night before and let it rest in the fridge. I now can roll my dough into little discs and twirl them into the air using my knuckles...sometimes they still land on my head. The next thing I've learnt is, put your pizza pan directly on the floor of the hot oven which has been heated to the highest level it can go (usually 240 C). There's no point getting a pizza stone if you use a home oven because it'll take hours to heat through and it'll still not get hotter than the heat limit of your oven. Now to the task. Update 23/4/08: NO! Do not put your pizza pans on the floor of your home oven as I had advised because that caused my oven to wear out a hole. The instructions in my new oven manual clearly states that to bake anything on the floor of the oven would spoil the oven because doing that would affect the heat distribution. 

Pizza Dough 2 cups bread flour 1 1/2 t dry yeast 2 t sugar 2/3 t salt 2 T olive oil 3/4 cup cold water (in the tropics; use warm water in frigid places) 1. If you know your yeast is good, just put everything together in your KitchenAid or Kenwood mixer bowl with the dough hook and knead at medium for 8 min, till dough is soft and smooth and springs back when you poke it. You may have to add a little bit more water or more flour. Cover dough with a cloth and let it rise for 1 hour (longer if you live in Antartica or Canada). 2. Take dough out and divide into 4. On a lightly floured surface, roll each piece of dough into a ball, using a little bit of flour if necessary, and put them on a floured tray. Cover with clingfilm only if the film (has plasticizers, a chemical that is harmful and bleeds into food!) doesn't touch the dough (remember it'll still rise in the fridge). Otherwise, do as I do and dust the tops of the dough balls with flour and cover with a cloth. Leave in fridge 24 hours before using. Remember to take out 1/2 hour to 1 hour (longer in frozen countries) before using. The Tomato Base Ha, you'll really thank me for this. I used to make my own, which means cooking it. Now I just put tomato puree into a bottle together with chopped garlic, olive oil, salt and pepper and dried basil and shake it. Baking the Pizza 1. Heat oven to as hot as it can go, say 250 C, using only the bottom element. Roll the dough out as thin as you can without tearing it and press it out to the edge, or use your knuckles under the dough to stretch it into a round big enough to fit the pizza pan and put it onto a lightly greased 31 cm (12") pizza pan. Spread about 2 large T of tomato base all over the crust (leave clear a 2 cm rim), then scatter grated mozzarella (you'll notice I used very little mozz; too many fat-conscious people at home) and bake on the lowest rack for 8 to 10 min, checking the bottom of the crust by using a cake server, say, in the 6th minute. When the bottom is brown and burnt in random spots, take it out. Overcooking will cause the mozz to harden. 2. Scatter rocket, shredded parma ham (not too much; very salty) and shaved parmigiano reggianno (that's high-grade parmesan) all over. Mmmm... Don't forget the wine! P10603692 P1060421 
Grow your own rocket! This type of rocket is not as fancy as the baby wild rocket, but according to a pizza chef from Milan, this is the stronger-scented and preferred kind of rocket. I usually get my rocket and basil seeds at Signature.

Wednesday, January 30, 2008

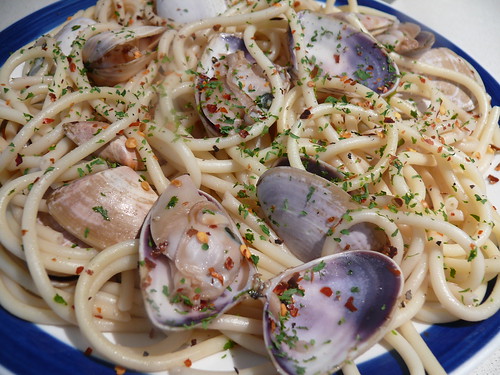
Bucatini With Clams

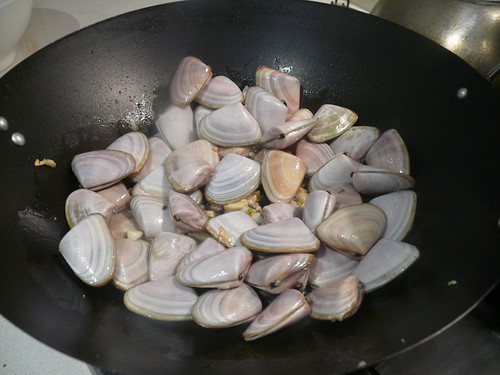
Remember the pipis (clams) my kids dug up in the Mornington Peninsula? Truth is, I didn't quite know how to get the pipis to spit out the sand (my aunt used nails, some say to use oatmeal, some say milk. We used steel spoons. Stupid idea; it didn't work. Any advice?) and I was concerned about the hygiene in that area although I was told later that if the water's not clean, there'll be signs up saying so. Anyway, the clams went down the rubbish chute. These ones in the pic were from Vic Mart. No sand.

P1180215

This is my favorite pasta dish, if it is cooked right. The best olio pasta (with prawns) I've had was - surprise - in Perth, in this place somewhere off Hay street near the city 'park'. I'll have to find out the name of the restaurant and tell you Perth people because I hear good restaurants are hard to find in Perth.

Do you, like me, sometimes find creamy white sauce pasta too rich and tomato sauce ones too everyday? That's when I want a simple pasta with no cream or tomato sauce. Although this is an easy dish to cook, it is not easy to get it right because the ingredients must be very fresh and of the best quality. So this is where I'd compromise by adding a can of chicken stock or freshly-made stock (Howfor can thou have home-made stock on standby all the time??).

P1180214

Bucatini With Clams

1 1/2 to 2 kg small clams
500g bucatini/linguine or pasta of your choice
2 T chopped garlic
1 brown onion, chopped
2 T chopped fresh parsley
1 t dried oregano or basil
1 to 2 cups chicken stock/broth
1 cup white wine
salt and pepper to taste
dried chili flakes (optional)
4 T extra-virgin olive oil
3 to 4 T butter

1. Bring to boil a large pot of salted water and boil the pasta. When the centre of the linguine still has a small white spot when you break it off, switch off the fire and let it sit in the water for 2 minutes,covered, then check again. There should be no more white uncooked dough. This is the way I cook my pasta but you can do it your way.Drain and put pasta back into the pot and add the butter (omit if health conscious). Mix well and keep warm in the pot.

2. Put 2T extra virgin olive oil into a large skillet, add 1 T garlic and fry till soft, then add the clams. Now add the wine and cover. When it starts to boil, remove the cover and cook at high heat for 10 minutes to reduce the water. When all the shells have opened (discard those that aren't), dish out (including the juice) into a bowl.

3. In a clean skillet, add 2 T x-virgin oil and fry the 1 T garlic and the onions till soft, then add the clams and chicken stock, the basil/oregano, bring it to a boil and let simmer a minute. Season with salt and pepper. Add the pasta and season with salt and pepper. Finally add the parsley and toss well. Sprinkle with dried chili flakes if like. Serve hot with shaved parmesan on the side.

Tuesday, October 23, 2007

Making Our Own Pasta

I was typing some notes yesterday when Wey came to me and said, "Mom, let's make pasta!" What a horrible suggestion. Images of messy flour and dough and taking out the machines and so on, plus the fact that I've never made pasta before, just drained me, so I said, "Oh, you go have fun." And he did. Now and then he'd ask,"Is 300g of flour a lot?", "Do we have ricotta cheese?" and I just shouted back my answers until I heard my Kenwood mixer running. I rushed into the kitchen and saw that he had the dough going and the kitchen wasn't even messy.

If you don't know the trouble, you won't be deterred, and I think Wey taught me that yesterday. It turned out making pasta is very easy. And I shouldn't complain because we have Vero to clean up the mess!

P1160019a
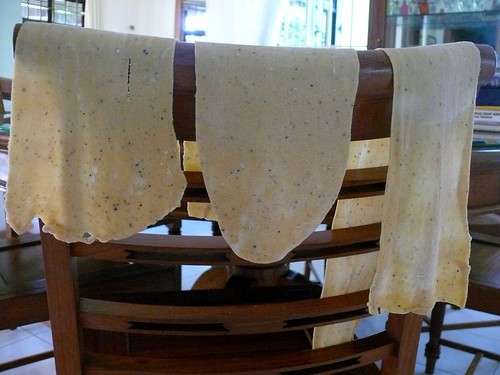
Our new pasta machine - how did I live without one all these years?

P1160021
Hanging out the black pepper pasta sheets to dry

P1160023
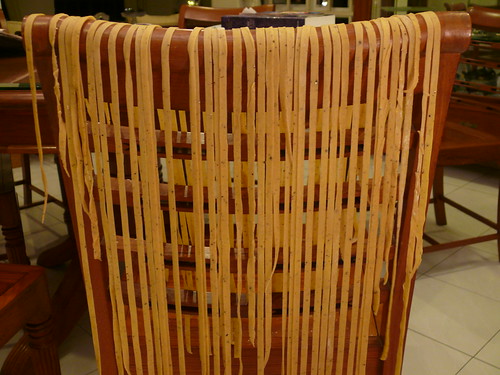
Drying the fettucine on a chair

While the pasta was drying, we went to get some cheese because Wey wanted to cook 'Black Pepper Fettucine With 3 Cheese Sauce' from Ann Wilan's Look & Cook book. We couldn't find any Gorgonzola cheese so he decided to chill his pasta for the next day while we check out Tong Hing for the cheese. On the way home, he said to me happily, "Mom, anybody can cook!" and I realised what an inspiration that Remy was in Ratatouille!

Ming was a little jealous, I think, when he got home and saw the pasta hanging on the chair. His little bro had upped him in his area (Ming is quite the cook in the fam). He said he is going read up on pasta making too. I was so happy. Maybe after a while they can cook all our dinners. Heck, maybe they can do all the shopping too.

By 9 pm, Ming had cooked all the pasta (asked Wey's permission, for once) and tossed them with olive oil, capers, black olives, sun-dried tomatoes, garlic and fresh parsley for a very light and tasty supper. We all agreed that fresh pasta gives a different el dente bite, and is so good that the best way is to dress it light and not overwhelm it with heavy cream and sauces. Looks like my weight will never go down. Wey said "Let's make more tomorrow!"
P1150880a
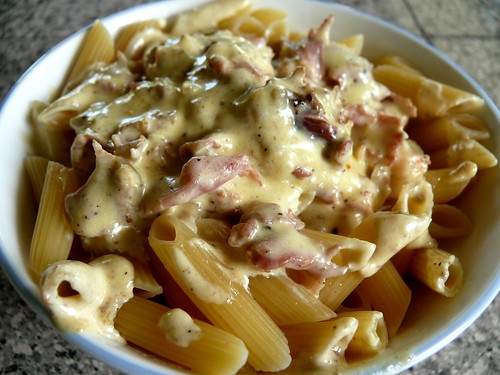
Wey cooked penne with parma-ham and cream a few days ago. I was astounded; he had been watching.

Thursday, August 30, 2007

Pesto Pasta

IMG_1119a

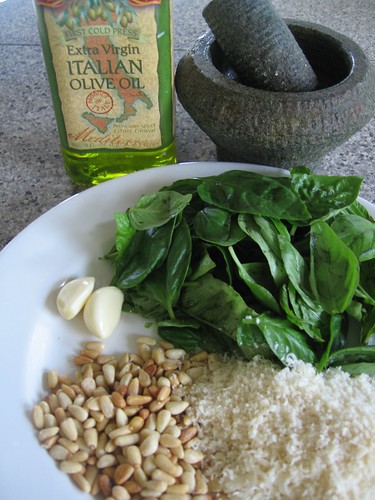
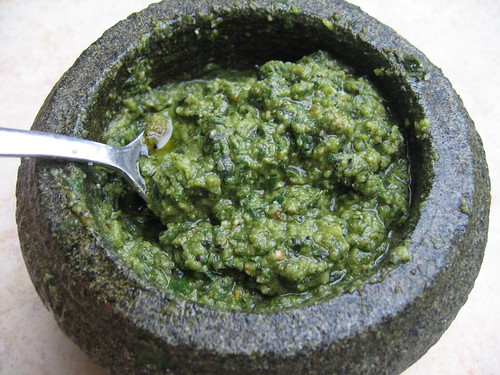
The net service was out today and I was so restless I contemplated making fresh pasta. Opted to make pesto sauce instead. My basil plants have grown so old that all I could salvage from them was about 1 1/2 cups of leaves. I used to whizz everything in a blender to make a few bottles to store in the fridge but they don't really keep well so now I make a fresh batch whenever I need it. For small amounts I usually use the pestle and mortar, which smashes and releases the flavor of all the ingredients rather than cut them up like the blender does.

You can make your pesto according to your liking, adding more pine nuts or basil or EVOO. I don't bother to measure anymore and I think that's how pesto should be: adjust the ingredients until you get the sauce you want.

IMG_1113

IMG_1116

Pesto Sauce
2 cups (packed) fresh sweet basil leaves
2 T pine nuts, toasted lightly
2 to 3 garlic cloves
1/2 cup freshly grated parmesan reggiano
1/2 cup extra virgin olive oil
1/2 t salt + 1/16 t freshly grounded black pepper (to taste)

1.If using blender, whizz everything together. Adjust taste with salt, pepper, oil and cheese.

2. If using mortar, just pound the garlic, nuts and leaves and add the salt, pepper, oil and parmesan to taste.

Use sauce with pasta (boil pasta in salted water, drain & toss with pesto sauce & top with grated pecorino cheese). Or use for bruschetta.

Note: Do not cook the sauce. Somebody did that (you know who you are! :))

Wednesday, July 4, 2007

Cheat's Fusion Ravioli

P1060446

I came up with this dish because Wey loves ravioli in white sauce and being a growing boy, one serving is never enough. It costs at least RM18 (US$5) per plate in restaurants so one day I decided to cook up an easy and quick ravioli dish using ready-made wonton wrappers, and instead of cheese and other fancy Italian filling I just used minced meat. That's why I call this recipe fusion even though I'm more of a purist and I dislike fusion food. Wey's happy and I'm happy.

Cheat's Fusion Ravioli

300 g ground/minced pork or beef or chicken
salt and pepper
round wonton or potstickers wrappers
2 cups heavy cream
2 heaped T parmesan cheese, grated

1. Season meat with salt and pepper. Put a small teaspoon of meat onto a wrapper, fold into half-moon shape and seal edges with water.

2. Boil a pot of water and drop ravioli in, say 15 at a time. When water boils again, add 1 cup cold water to stop the boiling. When it comes to a boil again, let it boil a minute or so. You can take one ravioli out, cut it in half and see if the meat is cooked. Remove with a slotted spoon and put on serving plate.

3. Meantime, put the cream in a pot and add the cheese, stirring under medium heat till cream thickens slightly. If like, salt and pepper the sauce. Pour cream over the ravioli. Sprinkle with fresh or dried parsley.

Friday, June 29, 2007

Rocket-Parma Ham Pizza

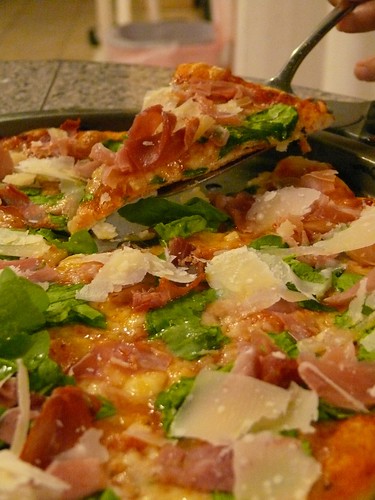
P1060441

This is my favorite pizza, for its simplicity and taste. If you don't try it, you loose out because I'm so reluctant to give the recipe away that I might delete this post after a week!!

Have made pizzas a long time and never quite got the crust right. Then Wey had his 12th birthday at this popular pizzaria and I picked up a few tips from watching the cook because the party was a 'make-your-own-pizza' theme and everybody got to make their own pizzas. Two things I learnt: 1) the dough is made the night before 2) the oven is hot as hell, something home ovens can never achieve, which is why our crust can never crisp perfectly.

One of my problems in making pizza is I haven't mastered the art of rolling and pushing the dough against the edge of the counter so I use a rolling pin but the dough would always spring back. To overcome that, I used plain flour which has little gluten so it's less elastic but that doesn't give a strong crisp crust. The trick as I've discovered at Little Italy is to use bread flour but make the dough the night before and let it rest in the fridge. I now can roll my dough into little discs and twirl them into the air using my knuckles...sometimes they still land on my head.

The next thing I've learnt is, put your pizza pan directly on the floor of the hot oven which has been heated to the highest level it can go (usually 240 C). There's no point getting a pizza stone if you use a home oven because it'll take hours to heat through and it'll still not get hotter than the heat limit of your oven. Now to the task.

Update 23/4/08: NO! Do not put your pizza pans on the floor of your home oven as I had advised because that caused my oven to wear out a hole. The instructions in my new oven manual clearly states that to bake anything on the floor of the oven would spoil the oven because doing that would affect the heat distribution.

Pizza Dough
2 cups bread flour
1 1/2 t dry yeast
2 t sugar
2/3 t salt
2 T olive oil
3/4 cup cold water (in the tropics; use warm water in frigid places)

1. If you know your yeast is good, just put everything together in your KitchenAid or Kenwood mixer bowl with the dough hook and knead at medium for 8 min, till dough is soft and smooth and springs back when you poke it. You may have to add a little bit more water or more flour. Cover dough with a cloth and let it rise for 1 hour (longer if you live in Antartica or Canada).

2. Take dough out and divide into 4. On a lightly floured surface, roll each piece of dough into a ball, using a little bit of flour if necessary, and put them on a floured tray. Cover with clingfilm only if the film (has plasticizers, a chemical that is harmful and bleeds into food!) doesn't touch the dough (remember it'll still rise in the fridge). Otherwise, do as I do and dust the tops of the dough balls with flour and cover with a cloth. Leave in fridge 24 hours before using. Remember to take out 1/2 hour to 1 hour (longer in frozen countries) before using.

The Tomato Base

Ha, you'll really thank me for this. I used to make my own, which means cooking it. Now I just put tomato puree into a bottle together with chopped garlic, olive oil, salt and pepper and dried basil and shake it.

Baking the Pizza

1. Heat oven to as hot as it can go, say 250 C, using only the bottom element. Roll the dough out as thin as you can without tearing it and press it out to the edge, or use your knuckles under the dough to stretch it into a round big enough to fit the pizza pan and put it onto a lightly greased 31 cm (12") pizza pan. Spread about 2 large T of tomato base all over the crust (leave clear a 2 cm rim), then scatter grated mozzarella (you'll notice I used very little mozz; too many fat-conscious people at home) and bake on the lowest rack for 8 to 10 min, checking the bottom of the crust by using a cake server, say, in the 6th minute. When the bottom is brown and burnt in random spots, take it out. Overcooking will cause the mozz to harden.

2. Scatter rocket, shredded parma ham (not too much; very salty) and shaved parmigiano reggianno (that's high-grade parmesan) all over. Mmmm... Don't forget the wine!


P1060421

Grow your own rocket! This type of rocket is not as fancy as the baby wild rocket, but according to a pizza chef from Milan, this is the stronger-scented and preferred kind of rocket. I usually get my rocket and basil seeds at Signature.

Thursday, June 14, 2007

Skinny Lasagne?

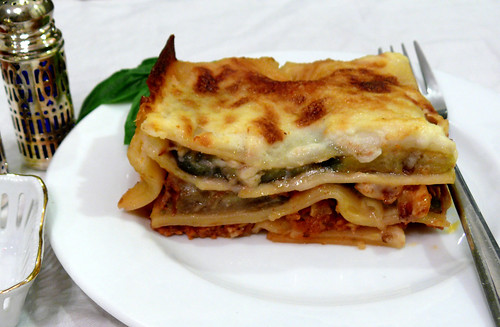
Whenever I make lasagne, I feel guilty as I turn the bechamel sauce (white sauce) into a sinful mornay sauce of melted mozzarella, cheddar and parmesan. So the other day I came up with a less sinful version by using only one layer of white sauce on top and substituting the sauce with eggplant/brinjals/aubergine (you can also add tomato slices). But beware, a sin is still a sin, big or small...

bP1030638

Skinny Lasagne

Bolognaise sauce
250g ready lasagne sheets
3 large eggplants
white sauce
grated mixture of cheddar and mozzarella

1. Cut the eggplant into large 3/4 cm slices and fry in a little oil till half done.

2. Grease a glass dish. Arrange a sheet of lasagne sheet in it (I prefer to boil mine but its more work. If you use the instant sheets, make sure you dash some low-fat milk over the veg layers). Cover the pasta sheet with a thin layer of bolognaise sauce. Place another layer of lasagne sheet over that, then arrange the fried eggplant over it, sprinkle with the cheese mixture and douse a tablespoon or two of skim milk over.

3. Continue till you run out of lasagne sheets. You end with a layer of lasagne sheets, then cover that with the white sauce and sprinkle grated parmesan all over.

4. Bake in oven at 200 c for 30 to 40 min. Instant lasagne sheets tend to expand, so tuck in the sides and corners when it comes out of the oven so the upper layer won't dry and curl up.

The bolognaise sauce below is 'healthier' and less 'grainy' by replacing half of the beef with pork/chicken and adding lots of veg. You can use skimmed or lowfat milk or omit milk altogether.

Bolognaise Sauce

1 large onion, chopped
2 large carrots, cut into small cubes
2 stalks celery, cut into small cubes
3 cloves garlic, minced
250g canned or fresh diced plum tomatoes
2 T tomato paste (optional)
250g lean pork, minced
250g lean ground beef
1 cup milk
1/2 cup white wine
1/4 t dry nutmeg
1/2 t dried basil or oregano (optional)
1 cups water + 1/2 beef stock cube or 1 cup chicken or beef stock
freshly ground black pepper
salt to taste

1. Fry the onions, carrots, celery and garlic in a little oil for 3 to 4 min.

2. Add the meat and stir to mix well. Add the tomatoes, then the remaining ingredients except the wine and simmer 20 min. Add the wine and simmer 10 to 15 min.

White Cheese Sauce

2 T ordinary flour
2 cups milk
1 T butter or olive oil
1/4 cup freshly grated parmesan
salt & pepper
1. Heat a small pot, melt the butter or add the oil. Throw in the flour, stir well under low heat till it clumps, stir another 1/2 min. Remove from heat and add 2 T milk, then 2 more, stirring well with a small whisk.

2. Put pot back to stove and stir in all the milk under low heat. Whisk well till sauce thickens. Add the cheese and season to taste.

Overall taste? Well, of course it'll taste better if you make it the traditional way with alternating layers of white cheese sauce. Frankly I don't know if this version is any less fattening because I still added the cheese with the eggplant...

Thursday, April 26, 2007

Creamy White Sauce Pasta

As requested by Nee of Kuching (ha, trying to sound international), here are two simple classic white-sauce pasta you can cook up in a jiffy. They are basically the same except carbonara has eggs in it and because I cannot resist not heating the pasta again after tossing it with the egg mixture, I always end up with curdled sauce so personally I prefer the alfredo.

Two things to note:

1. Never use the grated parmesan in those green canisters. The smell always makes me look around the room for babies regurgitating their milk. Freshly ground parmesan is not smelly at all and if you use parmesan reggiano (Parmigiano-Reggiano) this'll be your best pasta alfredo/carbonara ever. I sometimes throw in leftover/remaining cheddar to enhance the tastiness.

2. You can add some crispy-fried bacon or fried parma ham strips, and fried mushrooms or peas etc to make it more lavish.


Fettucine alla Alfredo

250g fettucine (serves 2 big eaters)
150ml heavy cream
50g freshly grated parmesan plus extra to serve
1/8 teaspoon ground nutmeg
salt & freshly ground pepper
1 tablespoon butter

1. Boil the pasta in salted water until 'el dente'. Drain well.
2. Meanwhile, melt the butter in a pot at medium heat. Add half the cream, stir well for a minute or so till cream thickens a little, then add the parmesan and nutmeg, salt and pepper, stirring well. When it begins to bubble, add the pasta, tossing well.
3. Now add the remaining cream and when it just begins to steam, remove from the fire. Adjust taste with salt and pepper if necessary.
4. Serve immediately with extra grated or shaved parmesan on the side.

Spaghetti Alla Carbonara

250g spaghetti (or other shapes)
2 eggs
50g freshly grated parmesan plus extra to serve
150ml heavy cream
salt and pepper to taste

1. Whisk together eggs, parmesan and cream, season with salt and pepper.
2. Cook pasta in salted water till el dente.
3. Drain pasta well and quickly add in the egg mixture when the pasta is still hot. Toss well and season to taste.
Related Posts Plugin for WordPress, Blogger...