Tuesday, August 9, 2011

Spicy Red Lentils And Barley Soup

DSC_2488_1024x678

I wanted a bowl of congee for lunch but my friend E suggested lentils soup at her house. Er. The only lentils I eat is dhall gravy served with roti canai. How good can lentil soups be.

So good. So very good that I wanted to shout it from a mountain top. Delicious, nutritious and complete, this soup will from now on be a staple in my house, especially on cool days (some snow would be nice). The cumin, tumeric and curry powder gave this soup an exotic North African (or is it Middle-Eastern) flavor and I was reminded of a soup I ate in Melbourne last year although E's soup was wayyyy tastier.

Lentils, dried beans and whole grains are not big with the Chinese, or at least the Cantonese Chinese. I didn't grow up eating them. The only dried beans I ate growing up was red beans (azuki beans), black eyed peas/beans, green beans (mung beans) and black beans. I like to cook a mixed dried beans soup which my family loves and sometimes, when the weather is hot, a sweet mung bean lily bulb soup to cool the body. When I feel that my body lacks energy, I cook red bean soup because my mom said that red beans fortify the blood, likely because of their high iron content.

If your family is carnivorous like E's, you can add some chicken drumsticks or pork chops to the soup although without the meat the soup is just as good. Served with slices of crusty bread, this soup would make a very hearty, nutritionally balanced meal. The basic recipe is awesome but feel free to add veggies such as celery, potatoes and carrots. As with all long-simmered soups, this soup tastes better if allowed to sit for at least an hour and reheated just before eating. Perfect soup for those on a liquid fast.


DSC_2314_1024x678

DSC_2493_1024x678

Red Lentils & Barley Soup (serves 6 to 8)
1 T veg oil
1 large onion, chopped
2 cloves garlic, crushed
1/2 t tumeric powder
2 t curry powder
1/2 t ground cumin
1/2 to 1 t chili flakes or paprika
6 cups water
1 1/2 cups veg or chicken stock
1 cup red lentils
1/2 cup pearl barley
400 g can diced tomatoes
salt & pepper to taste fresh parsley or coriander, chopped
optional but recommended : 1 kg meaty pork bones or chicken

note: 1) if you are adding bones, you can add another 2 cups of water and additional 1/4 cup lentils.
2) you can sub the can of chicken stock with a can of tomato soup, and use 3 to 4 large ripe tomatoes instead of canned tomatoes.


1. Heat oil in a pot, add onions and cook gently 5 to 10 min or until soft and beginning to brown.

2. Add garlic, tumeric, curry, cumin & chili flakes and cook, stirring 1 min.

3. Stir in water, stock, lentils, barley, tomatoes, salt and pepper to taste. Cook about 30 minutes. If adding bones, add the bones now and the lentils about 20 minutes later (because they break up faster) and simmer another 30 minutes. That means altogether about 50 minutes with bones. Switch off the heat and let the soup sit and develop the flavors. Reheat just before serving.

4. Garnish with chopped parsley or coriander.

Sunday, August 7, 2011

Four Seasons Restaurant

Four Seasons (not affiliated to the hotel) serves a limited menu but there's an item to cater to every member of the family because the food served is western and Japanese. I can bring my mom here and order an udon for her while I tuck in an Aussie-style beef pie. Terence the chef and owner was trained in French cooking and apprenticed under a top Japanese chef in Perth for many years before relocating to his hometown. I've had good meals here and the restaurant is cosy and pleasant, one of those homey places where you can eat without worrying what to wear or who you'll run into because it is open only at night, Mon to Sat and tucked away in a small lot next to CoffeeBean Damai which means it is rather low-key in terms of exposure.

The subdued atmosphere is fine to me but may not appeal to the younger crowd who might prefer a happening place kind of atmosphere like Party Play or the place for good atmosphere, cheap beers but bad food, Upperstar, a few doors away. Maybe that's how Terence wants it, small and manageable. Also, the food can sometimes be not quite how you like it. Maybe that's when Terence isn't around.

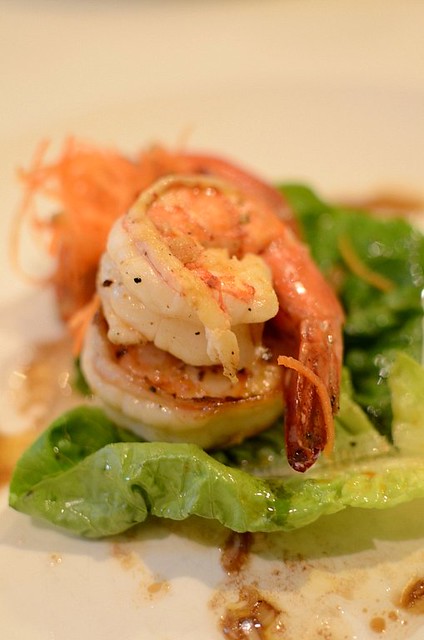
DSC_1008_509x768
Grilled prawns done very well--succulent and fresh.

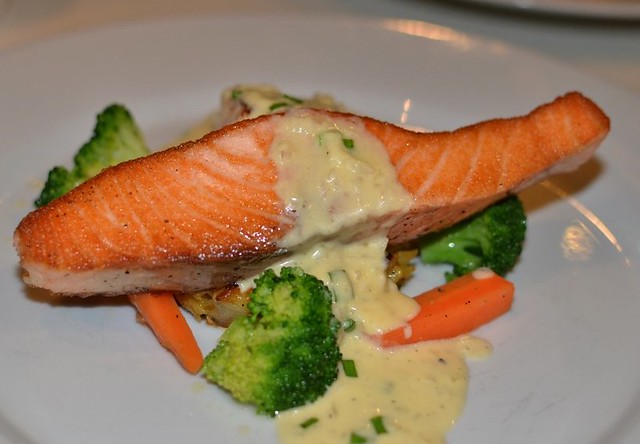
DSC_1021_1024x678
This would've been better if slightly underdone.

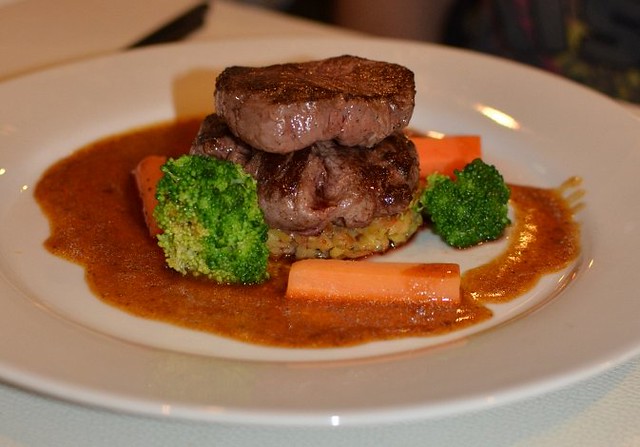
DSC_1020_695x1050
The tenderloin (chilled, not frozen, Terence told me) was tender and flavorful at first bite but with subsequent bites, the flavor wasn't deep enough, not unusual for tenderloin. Like the salmon, this would have been better if medium rather than well done. Still, this was better than the steaks in most other places.

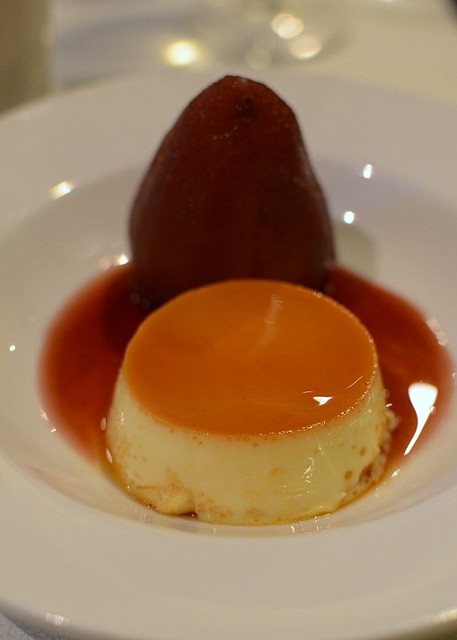
DSC_1027_509x768
Caramel custard with pear poached in red wine was simple but delicious, thumbs up.

This is a nice little restaurant for a good meal that won't empty your wallet. I love the lacy and light tempura here and the Singapore laksa they used to serve. Good place for eating a quick quiet meal with the family. Don't expect to linger. They close early. And make sure it's Terence who cooks.

Four Seasons, next door to CoffeeBean Damai. Open Mon to Sat, dinner only. Open on Sat for lunch too.

Thursday, August 4, 2011

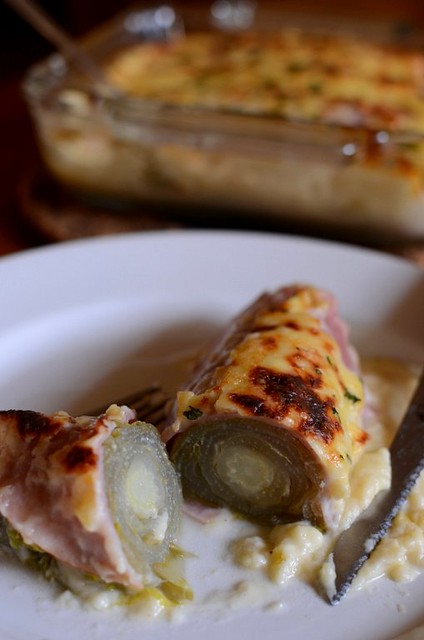
Belgian Endives And Ham Au Gratin

DSC_2179_509x768

Last year when I was living with my daughter in  Delft, the Netherlands ( the Netherlands was rated by OECD in May 2011 as the 'happiest country' among the top 34 richest countries in the world), I enjoyed cooking and eating many kinds of European veggies which I've never even known existed before. Belgian endive, known as witlof in the Netherlands, is not a veggie I grew up eating. Once in a while the salads on hotel buffet tables have some endive leaves tossed in them but I've never eaten them as a dish.

With the limited ingredients in my daughter's little 1 meter kitchen, I caramelised endives in butter and sugar and we both found a new veggie to love. European veggies are undoubtedly more flavorful and tasty than Australian ones (American veggies aren't any better, I'm told by a friend back from California), and much cheaper too.

Two Saturdays ago, I visited Lim Lee Seng Wholesaler in Penampang, near Supertanker Restaurant. I was allowed into their storage rooms, which was fun, because they were stacked to the ceiling with boxes of imported veggies, most of them from Australia. The 4-degree C temperature was a respite from the 35 C heat we are recently having. I came away with lush portebello mushrooms, asparagus, potatoes, a couple of cheeses and of course, endives. Prices at Lim's are about 30 to 40% cheaper than in supermarkets.

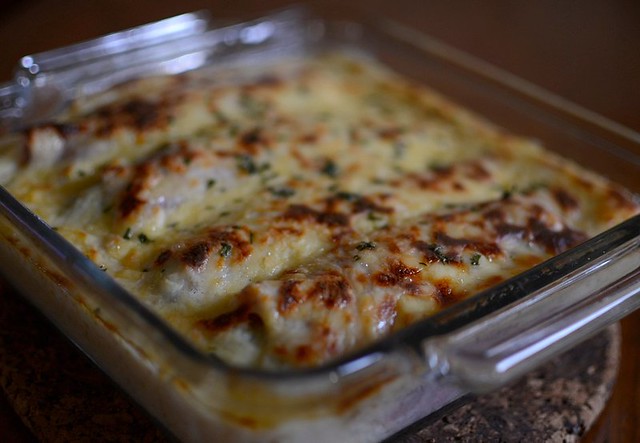
I think it was reader and blogger Lianne who told me about endive and ham au gratin, a very French way of cooking endives. The endives are sauteed or boiled until soft, then wrapped with a slice of ham each and topped with a white sauce of Gruyere cheese and baked. I bungled of course by typically cutting corners. Instead of sauteing the endives with sugar, I boiled them sans (as stated in the recipe in allrecipes.com) and I think that probably resulted in the endives tasting more bitter than expected. I didn't taste any bitterness in the endives I cooked in the Netherlands. The next time I cook this dish, I would simmer the endives in some butter and sugar before baking them. I'd also look for the whitest and smaller endives. Still, the dish turned out lovely and would've been even better, if not for the bitterness. In honesty, endives being so expensive here (RM35/USD11.70 per kg wholesale price) and lacking any particular flavor, I think this recipe would be just as good with other suitable veggies such as (of course) cauliflowers, potatoes, asparagus and yes, even Chinese cabbage.

DSC_2107_1024x678
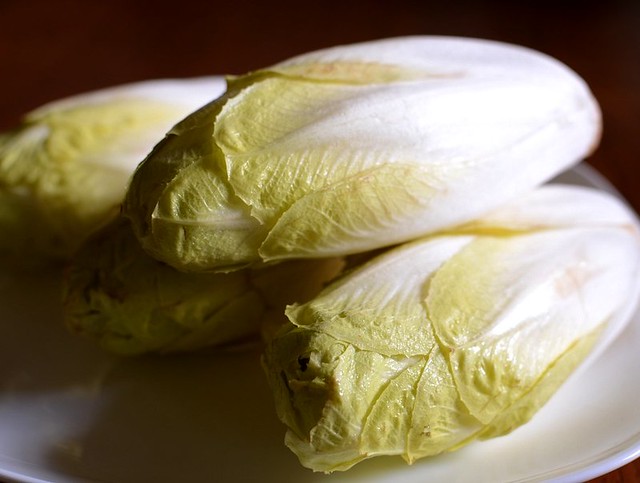
Belgian endives look like little Napa/Chinese cabbages with tapered tops but they are really a very different species because endives have a tuber root as big as the plant. The whiter the leaves of the endive, the less bitter it will be. Endives are grown in the dark and below soil level to prevent them from turning green and bitter. The ones I bought were too big and the leaves had too much color, probably because they weren't wrapped in paper to block out light.

DSC_2116_1024x678

Belgian Endives And Ham Au Gratin (for 4 persons)
4 Belgian endives
4 thin pieces of leg ham
3/4 cup chicken stock e.g. Swanson's
1 T unsalted butter
1/2 T caster sugar
1/4 t salt

The cheese sauce*:
2 T butter (or 1/2 butter 1/2 veg oil, if limiting use of butter)
2 T plain flour
200 ml fresh milk
pinch of nutmeg
pinch of cayenne pepper (optional)
1 t Dijon mustard (optional)
100 gm Gruyere, grated coarsely
1/2 T finely chopped parlsey
1/4 t (or to taste) salt and a pinch of freshly ground white or black pepper
*I made too much sauce so this recipe is half of what I made.

1. If the endives are big, cut them each into half lengthwise. Put the endives cut sides down into a frying pan and add the stock, butter, sugar and 1/4 teaspoon of salt. Cover and simmer about 10 minutes for cut endives, 15 min for uncut. Let cool.

2.  While the endives are being cooked, make the white sauce: Melt the butter (and oil if using) in a medium sized pot. Add the flour and stir well, about 3 minutes in low heat. Slowly drizzle milk into the flour-butter paste, stirring with a small whisk and adding more milk each time after the milk is absorbed. If you add the milk too quickly, the sauce will be lumpy (like mine) so be patient. Continue stirring until the sauce thickens. Remove from heat. Add 3/4 of the cheese and season with salt and pepper to taste.

3. Lightly press some of the liquid out from the endives. Wrap each endive with a slice of ham and place on a gratin dish.

4. Pour the white sauce over the wrapped endives, sprinkle with the remaining cheese and the parsley and bake for 25 minutes in a preheated oven at 220 C until golden brown. Serve hot.

Tuesday, August 2, 2011

Sticky Date Cake

DSC_2060_397x600

DSC_2093_800x530

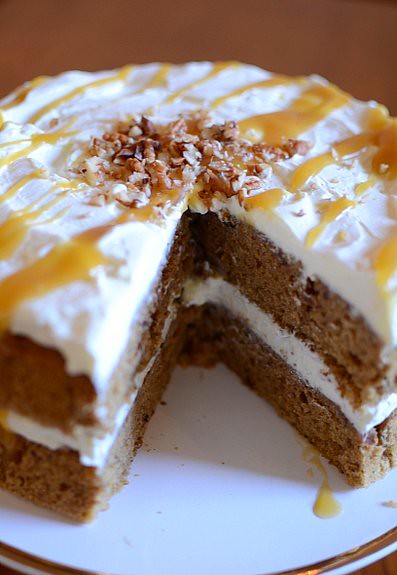
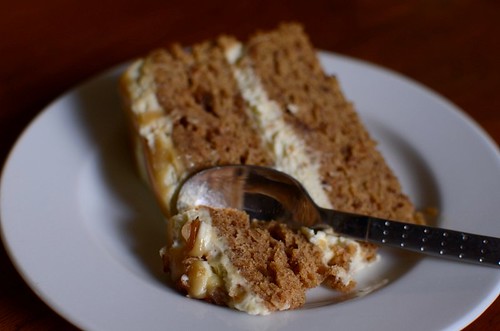
I've had so many good comments each time I serve sticky date pudding that recently when I wanted to make a surprise birthday cake for two of my best pals, I thought "Why not make it a big cake instead of little cakes?" And why not just take the recipe apart and make it like a sponge cake, beating the butter with the sugar and separating the eggs? A little more work, yes, but the cake might be lighter. Also, the dates will not be as mushed up and fine as in the original recipe which is, em, a piece of cake because it's a one-step recipe: everything goes into the food processor.  This was not an expensive cake to make so I could afford to experiment taking apart and reconstructing the recipe, using the exact amount of ingredients because the original recipe is a fantastic cake. Other than the great taste, what I like about the original recipe is that the quantity of butter is very little (for one recipe: 2 oz/60 gm!) yet the cake is moist. Even cardiologists would eat it.

The outcome: a surprisingly pretty cake that is more moist and slightly sticky (maybe it was slightly underbaked) even without soaking the cake with the butterscotch sauce. The texture was not lighter or fluffier but softer. A total success, according to my friends and family. I was so happy with the feedback that I thought I'd share the recipe straightaway. What are good friends for I say.

The following recipe is the same as the original recipe in my earlier post except I've increased the amount to 1 1/2 times for a round 8"/20 cm cake. Like I said, I've also changed how the cake is made although you can still dump everything in the food processor like in the original recipe.

DSC_2033_397x600
Two mistakes I  made making this cake: the lining paper was cut too big and the folds of the paper caused the sides of the cake to be holey. Putting the sauce into a plastic bag would give better control when drizzling it. Told you I'm a lazy cook.

Sticky Date Cake
3 oz/90 gm/6 T cold and firm (but not hard) unsalted butter
2 1/4 cups pitted dates (korma) 
3/4 cup caster sugar
3 large eggs
 2 1/4 cups self-raising flour 
1 1/2 t bicarb of soda
1 1/2 t vanilla
2 cups water


note: prepare the dates earlier because they need to be heated up and then cooled.


1. Oven @ 180 C. Line the bottoms of two 8"/20 cm  round cake pans with baking paper and grease the sides. Sift the flour with the bicarb of soda. 
 2. Put the dates into a saucepan with the water and when it boils, take the pot off the fire and add the baking soda (it will fizzle). Stir, leave to cool. When cool,  use a hand blender to blend the dates but do not over-blend so that the cake'll have some bits and strands of dates here and there.
3. Beat the butter and 1/2 cup sugar until light and fluffy. Add the yolks one by one, beating until incorporated each time, then add the vanilla, mixing well with a spatula. In a separate bowl, beat the egg whites with 1/2 t cream of tartar and the remaining 1/4 cup sugar until stiff peaks stage.
5. Alternately fold the flour and the dates into the butter batter in 2 or 3 batches until well-combined. Fold in 1/3 of the egg whites into the flour-dates mixture, then fold in the remaining whites and mix quickly. Do not over mix but make sure the batter is well-mixed.
6. Pour batter into prepared pans and bake about 40 to 50 minutes (ovens vary). Check with a wooden skewer plunged into the center of the cake. If it comes out totally clean, the cake is done. Cool (I like to chill them too because the weather is hot) and remove the paper lining when frosting.
7. For a sticky, pudding-like cake, pierce holes in the cake with a skewer and pour 1/2 the butterscotch sauce into the holes. I prefer to spread a layer of whipped dairy cream and drizzle with 2 to 3 spoonfuls of butterscotch sauce and repeat with the next layer. If you put the sauce into a plastic bag, the sauce'll drizzle better and nicer. Chill well before serving.


Butterscotch Sauce 
2 T unsalted butter
1/2 cup less 2 T (or use 1/2 cup if you love sugar) brown sugar
1/2 cup heavy whipping cream
1/2 T vanilla extract
large pinch of salt

This recipe is IT. It's absolutely delicious!

1. Melt the butter in a saucepan over medium heat. Add the sugar and stir with a wooden spoon. Stir frequently over low heat, 3 to 5 minutes. When the sugar caramelises, it will bubble, turn more liquid and look like thick sand.

2. Add all the cream and use a whisk to stir once in  a while over medium heat, 7 to 10 minutes, until very smooth. Remove from stove and let cool.

3. Whisk in the vanilla extract and salt, taste and add more vanilla or salt to taste.


Monday, August 1, 2011

Pears Poached In Red Wine


DSC_2005_509x768

The Chinese believe that pears double boiled (ceramic pot inside a pot) with rock sugar and served cold will balance the body's heat and soothe the throat. All I remember about my mom's double-boiled pears was that they were a special treat and they took hours to cook.

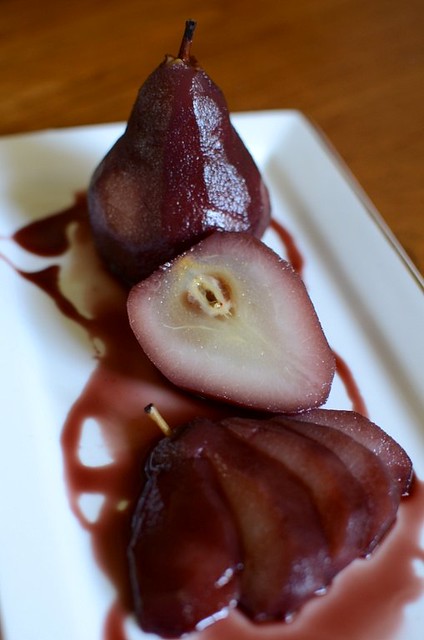
I was at Four Seasons Restaurant recently and dessert that evening was pears poached in red wine with caramel custard, very delicious. That led me to poaching pears at home last Friday and I am just so happy I did that because now I know that poaching pears (or any other bland-tasting fruit) is so easy to do. Even Wey loved the poached pears and told me I must blog about them.

What I'll do differently next time is not use a stainless steel pot. I detected a faint metallic
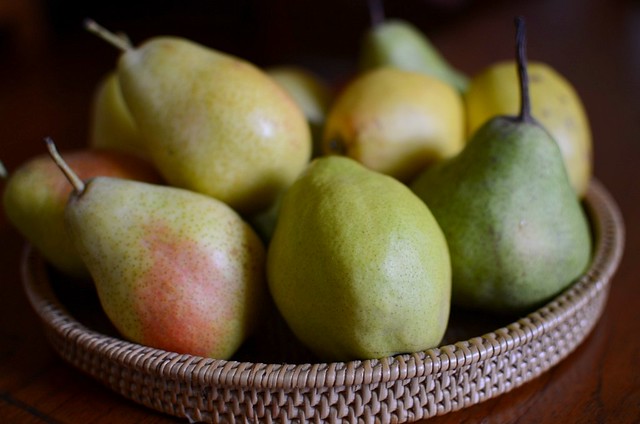
taste in the poaching syrup but am not sure if it was the wine or my suspicious mind. Because wine is acidic and the pears are poached for about 50 minutes, it would be better to poach the pears in a glass pot. You can add either cinnamon or star anise or both spices (I used cinnamon only and my kitchen smelt like Christmas) and orange or lemon peel, or both peels. I used three types of pears.  Chinese sweet pears, one of my favorites, forelle pears from South Africa and the common Barlett pears. I found that after poaching, all pears tasted alike: soft. So it really doesn't matter much what pears you use. I think. But when it comes to pears, Chinese ones beat the western ones hands down, to a pulp. Chinese pears are very sweet, crisp-crunchy and less dense than western pears. So eat Chinese pears au naturel and poach the bland-tasting western pears.

DSC_1931_1024x678

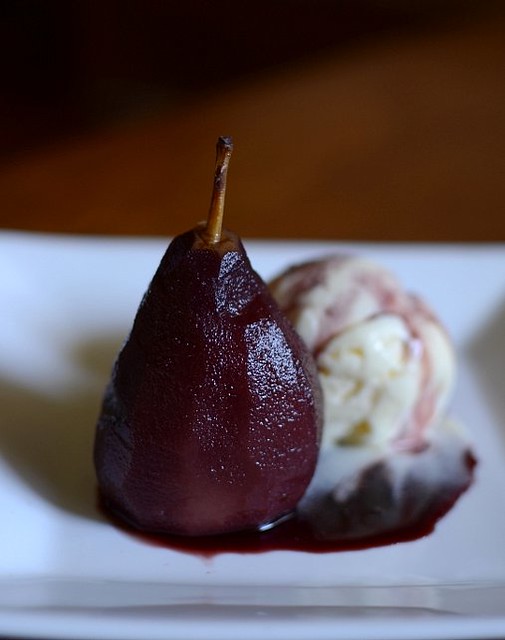
Poached pears can keep for up to a week in the fridge so this is a dessert that you can prepare well ahead. And if you really don't have time to make anything else to go with the pears, just serve them with a good vanilla ice cream (or gelato--they are less sweet than ice cream, which is why I'll take gelato over ice cream anytime). Your guests'll be impressed but the truth is, poached pears are probably the easiest dessert to make.

Our favorite way to eat poached pears? Plain, with plenty of the delicious poaching syrup. And chilled, very chilled.

DSC_1964_1024x678
Learn from my mistake: use a smaller pot so that the pears are completely immersed in wine. And use a glass pot because it's non-reactive with the wine.

DSC_1991_509x768

Pears Poached In Red Wine
12 (or enough to fit the pot) pears of your choice
2 cups red wine (Shiraz/Merlot/whatever)
3/4 cups caster sugar (more or less, up to you)
peel from one lemon or orange or mixture
1 piece cinnamon bark, about 6 cm long
2 to 3 star anise (optional)
3 cups water

1. Peel the pears, making sure the cut surfaces are nice and smooth. Do not cut off the stems. Cut the bottom of the pears so that they can sit upright.
2. Put the rest of the ingredients except the pears into a glass pot and boil for about 5 to 10 minutes.
3. Add the pears to the poaching liquid, standing them upright. When the liquid comes to a boil, lower the heat to a simmer and cover. If pears are not fully immersed in the poaching liquid, turn them over once in a while to make sure they get evenly colored. Simmer for about 50 minutes or until pears are soft. Remove into another bowl, immersing them in the wine. Let cool. Cover and chill.

To thicken the syrup, put about 1/2 cup or more of the poaching liquid into a small pot and boil under high heat until the liquid is syrupy. Cool. Use that to drizzle over the pears and ice cream or cake you are serving the pears with. You can also serve the pears in the poaching syrup. Wey and I love them that way, no ice cream or cake to mess with the flavors. Just make sure the pears and syrup are very chilled. The alcohol content of the wine will not be strong after boiling and the sweetened liquid takes on the scent of the cinnamon and orange peel. Truly heavenly.

Related Posts Plugin for WordPress, Blogger...